Host & Table Management
Seating Parties
Use this workflow when guests arrive and are ready to be seated at a table.
Open Seat Party Form
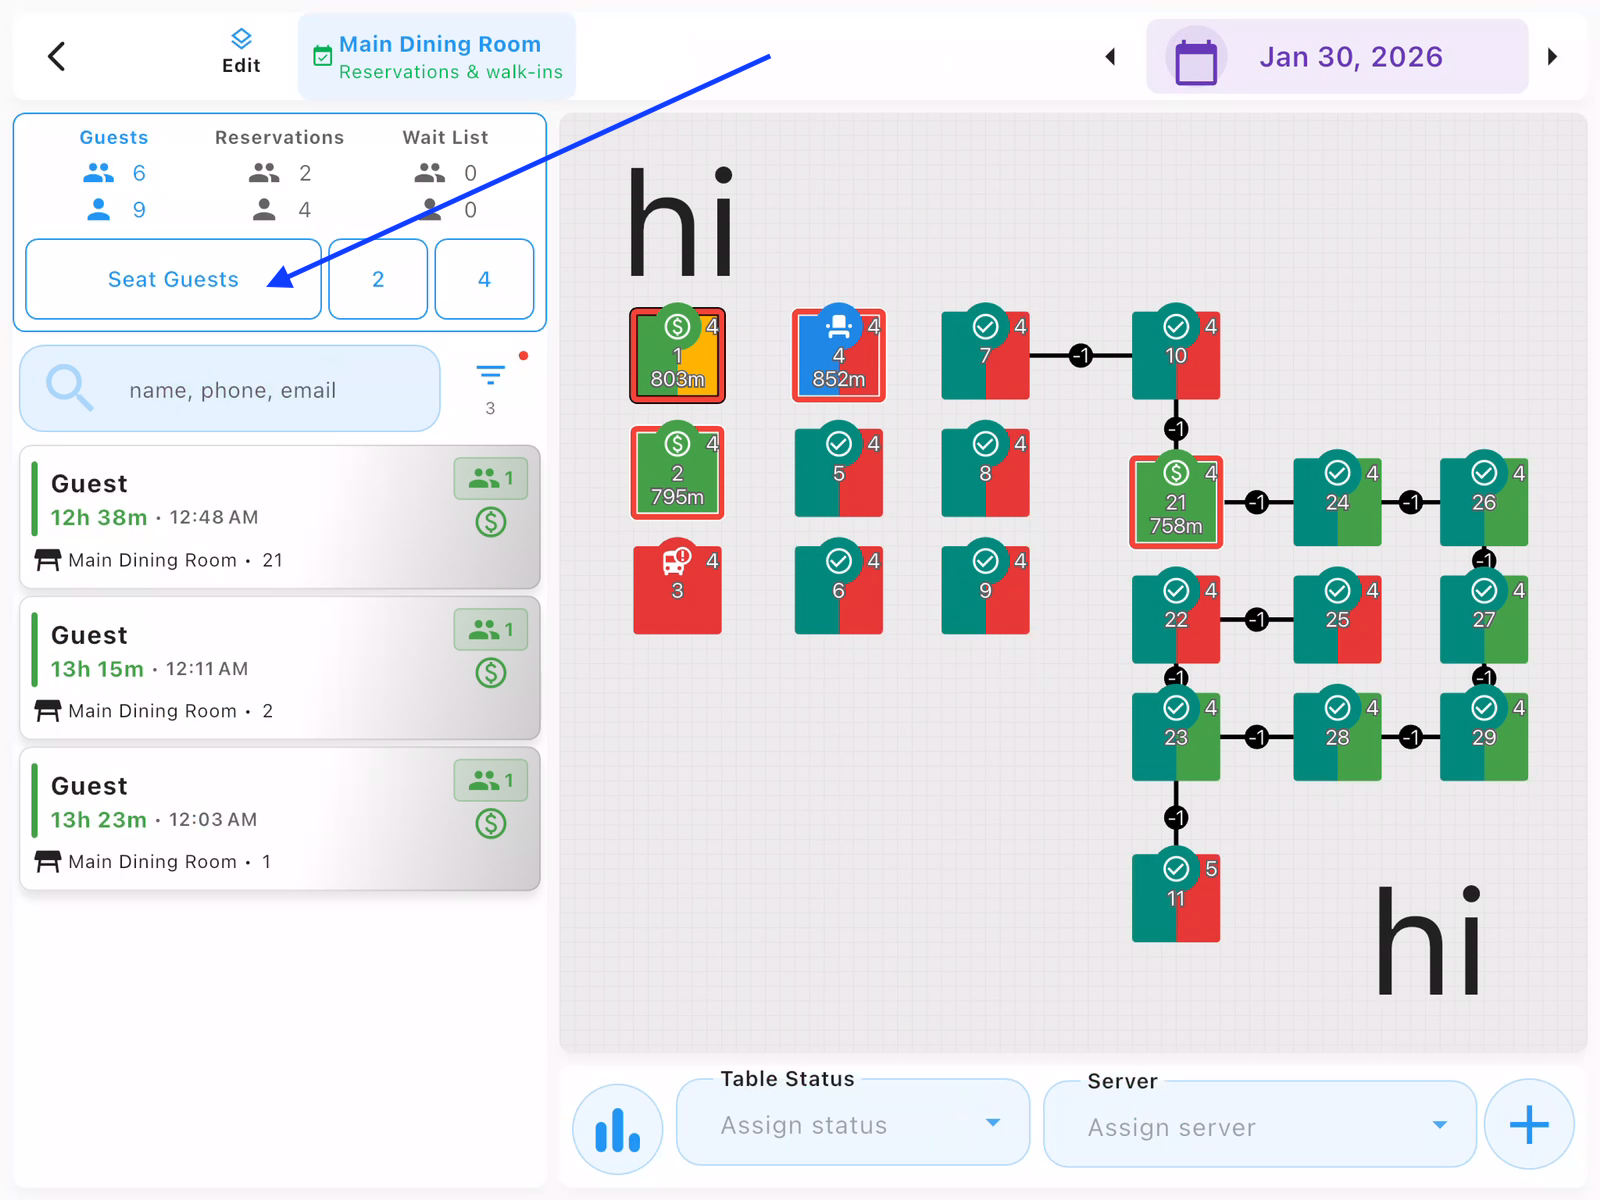
From the Host view, tap Seat Guests in the left panel. You can also enter the party size using the number inputs (2, 4, etc.) before opening the full form.
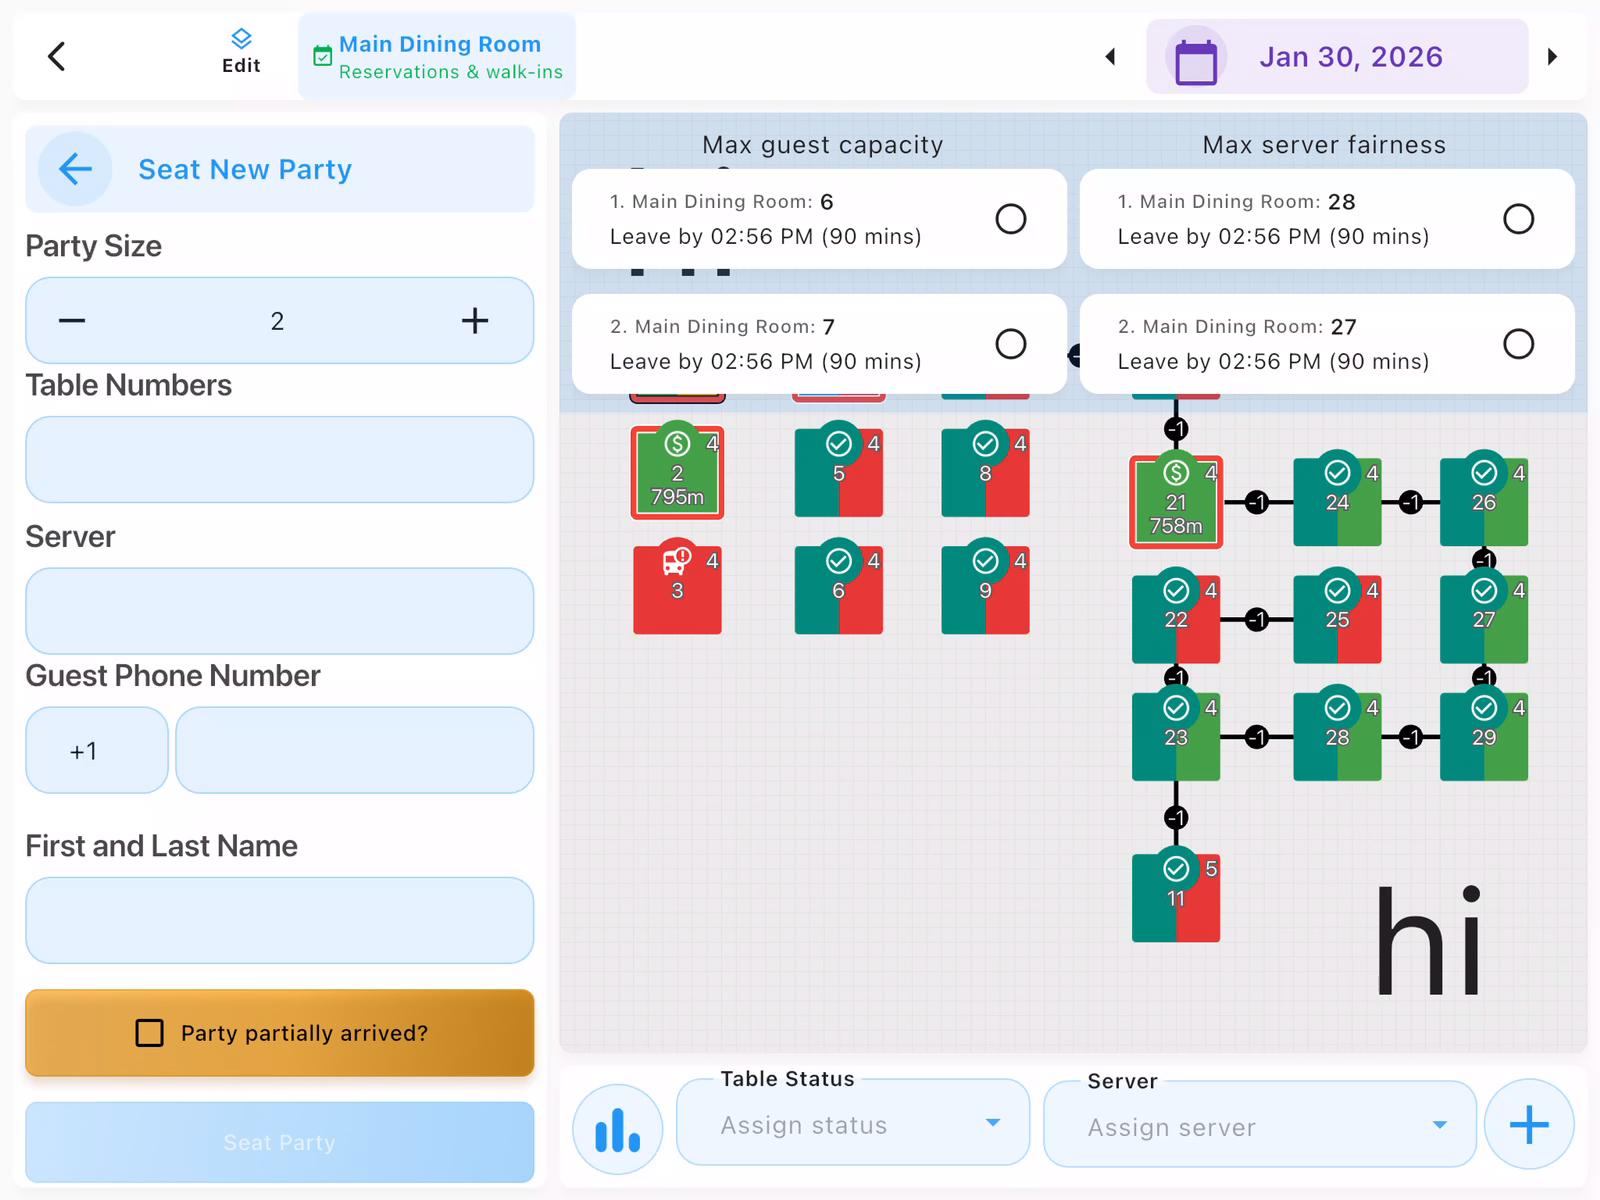
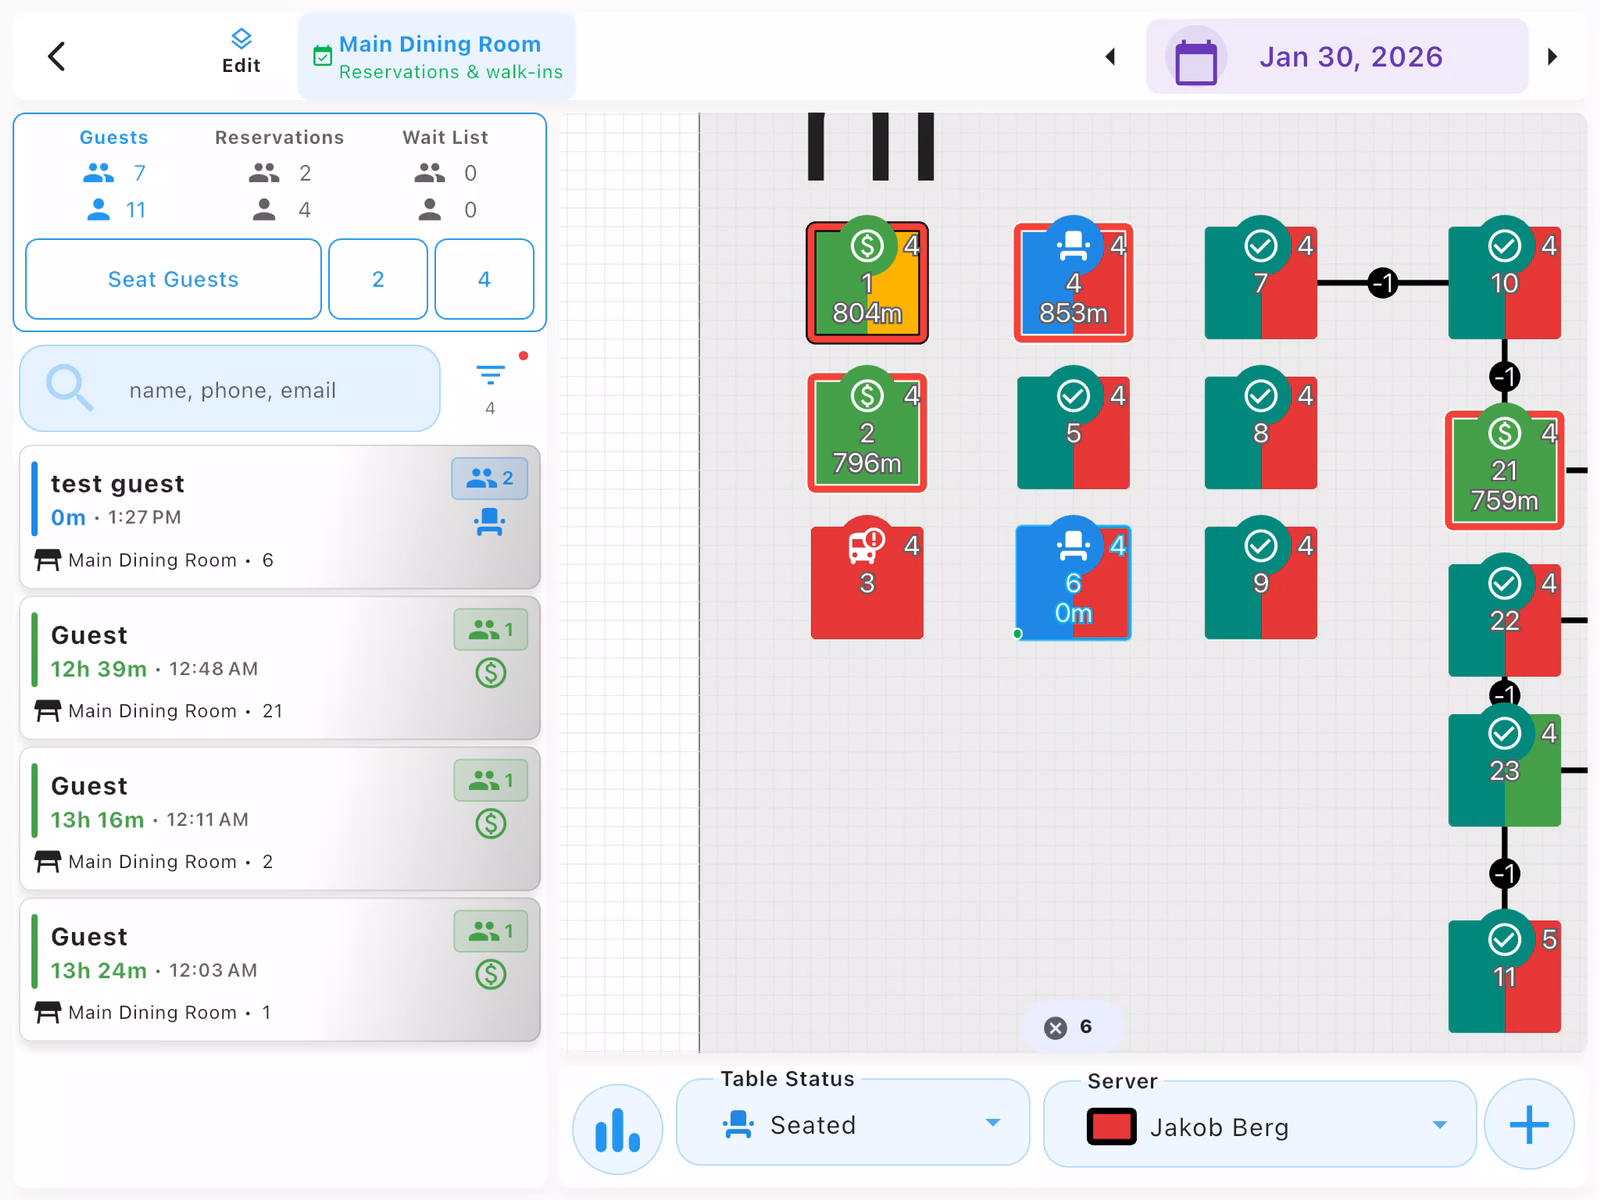
Select a Table
The system suggests optimal tables based on:
- Max guest capacity: Tables that best fit the party size
- Max server fairness: Tables that balance workload across servers
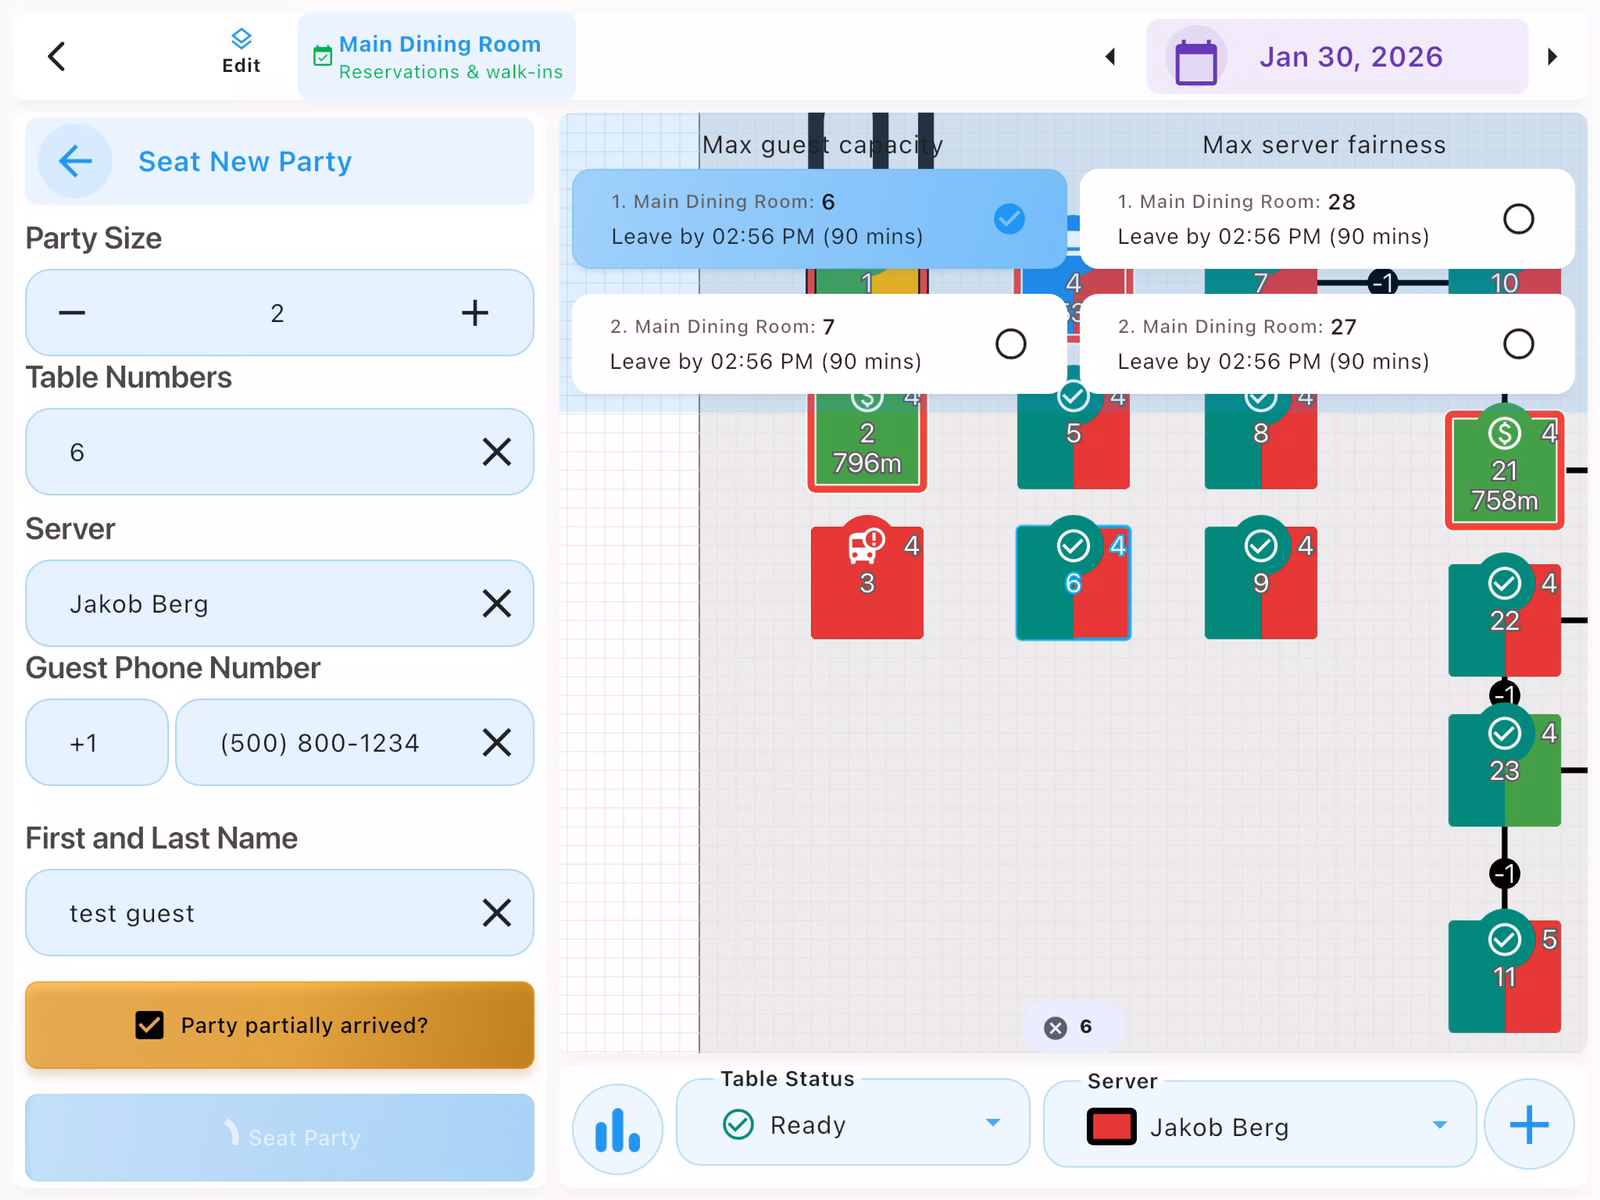
Tap a suggested table row or tap directly on the floor plan. The selected table highlights and the Table Numbers field updates automatically.
Enter Guest Information
Fill in the guest details and tap Seat Party to complete the seating:
- Server: Assigned server for the table
- Guest Phone Number: Optional contact info
- First and Last Name: Guest name
- Party partially arrived?: Check this if not all guests have arrived yet (helps hosts direct latecomers to the right table)
- Use table suggestions to maximize available tables during rushes like pre-concert dining
- Enter phone numbers to build your Guest Book and track visit history
- You can seat parties at multiple tables for large groups
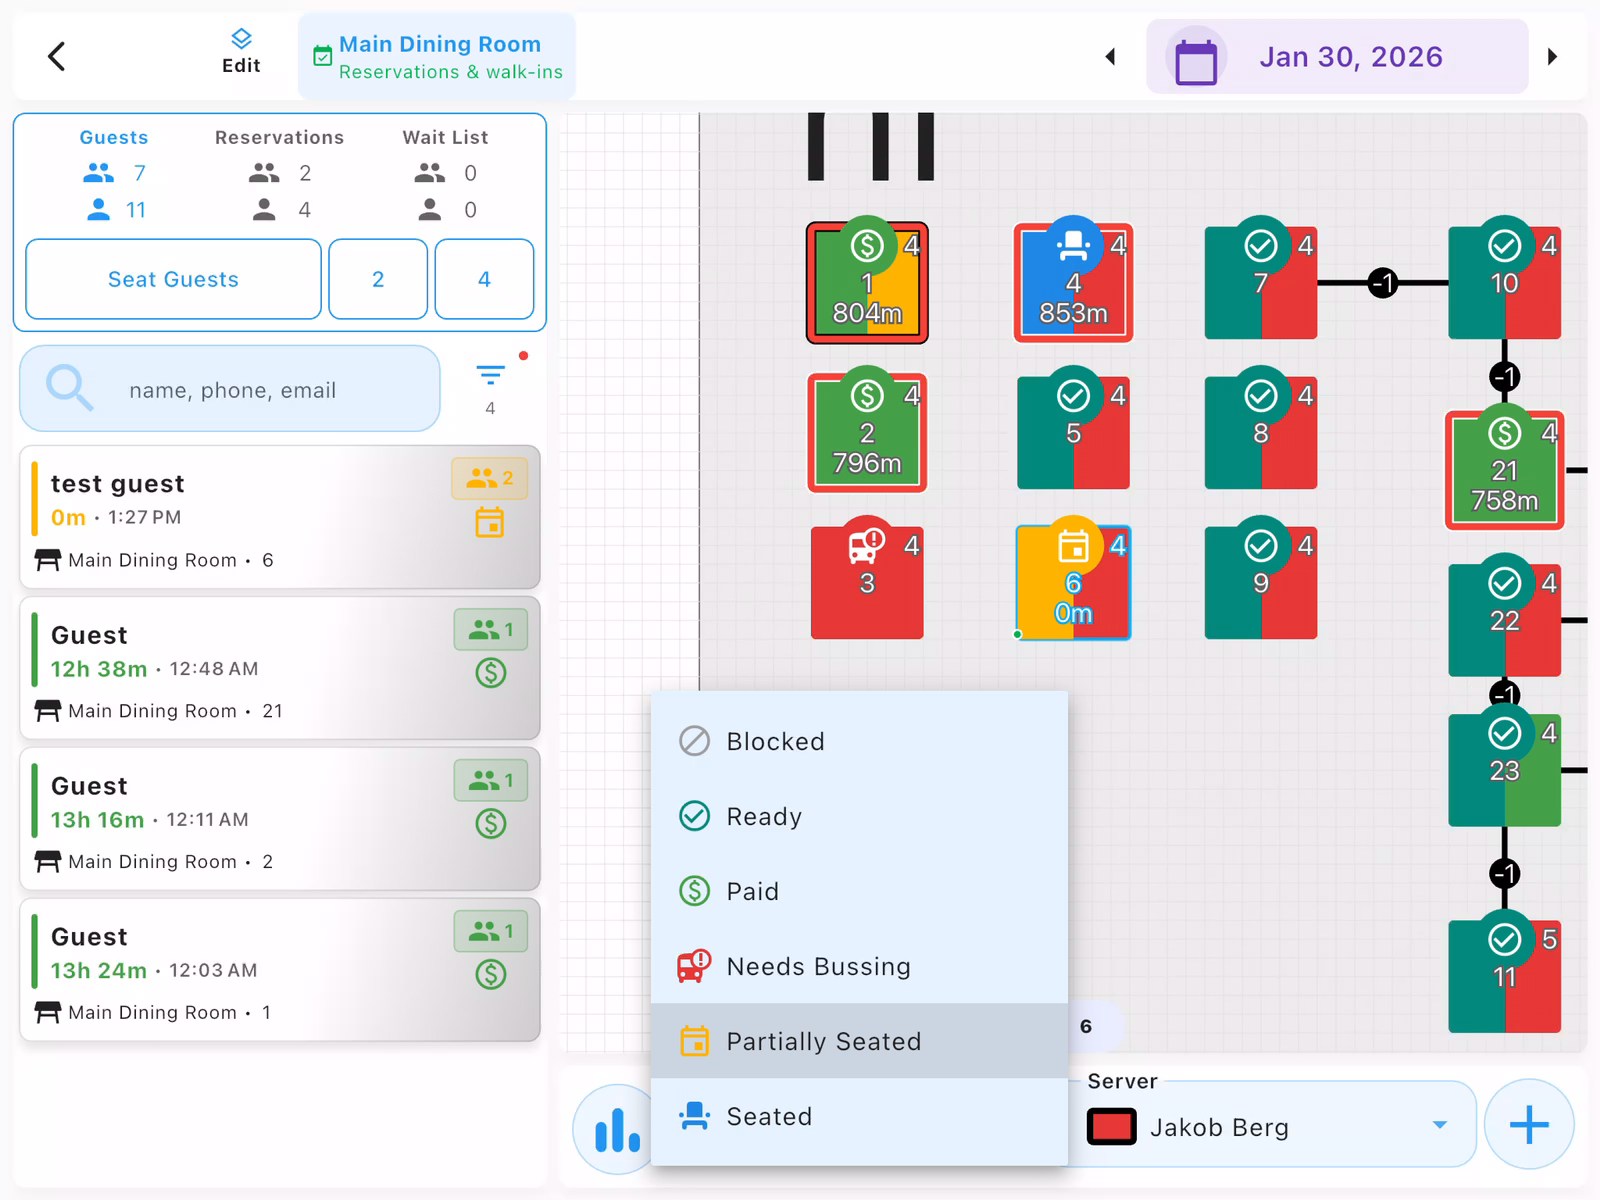
Updating Table Status
Change a table's status to communicate with your team - for example, marking a "Partially Seated" table as "Seated" when the rest of the party arrives.
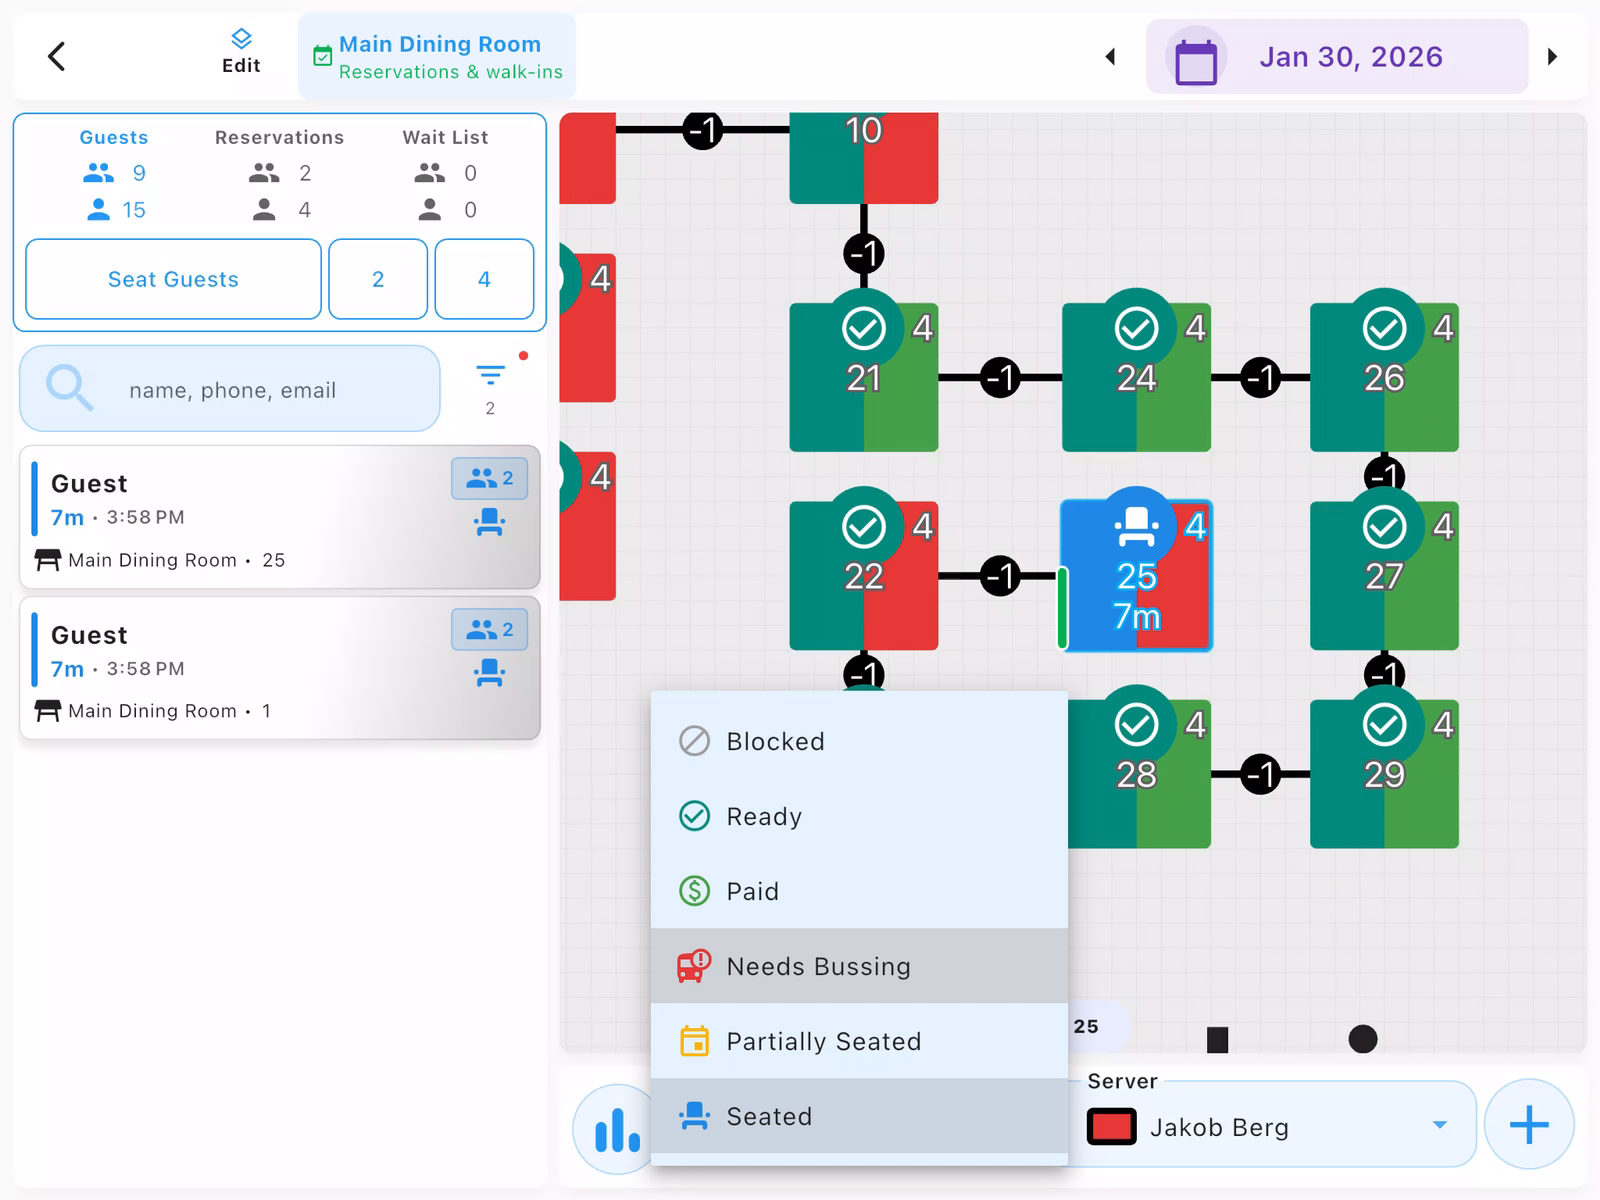
View Status Options
Select a table on the floor plan, then tap the Table Status dropdown at the bottom to see all available statuses:
- Blocked: Table unavailable
- Ready: Table available for seating
- Paid: Guests have paid
- Needs Bussing: Table needs cleaning
- Partially Seated: Some guests seated, expecting more
- Seated: All guests have arrived
Change Table Status
Select the new status from the dropdown. The status updates immediately.
Common status changes:
- Partially Seated → Seated: When the rest of the party arrives
- Seated → Paid: Happens automatically when check is closed
- Paid → Needs Bussing: When guests leave and table needs cleaning
- Use "Partially Seated" so hosts can quickly find tables expecting more guests
- When a guest arrives and says "I'm joining a group," check for partially seated tables
- On the Host page, you can change table status directly without entering any special mode
- On the Server page, tap "Enable Status Mode" first to change table statuses
Marking Parties as Leaving
When guests finish paying, the table automatically shows as "Paid." To clear the party and free the table for new guests, mark it as "Needs Bussing" or "Ready."
Select the Table
From the Host view, tap on the table on the floor plan that needs to be cleared. Tables with "Paid" status indicate guests have finished paying and are ready to leave.
At the bottom of the screen, you'll see the Table Status dropdown which allows you to quickly update the table's status.
Assign Table Status
With the table selected, use the Table Status dropdown at the bottom of the screen:
- Tap Assign status to see available options
- Select Needs Bussing if the table needs to be cleaned
- Select Ready if the table is already clean and available
Either option will clear the party from the table. The status options help coordinate between hosts, servers, and bussers.
Confirm Party Finished
A confirmation dialog appears showing:
- Guest name being marked as finished
- Number of guests in the party
- Server who handled the table
- Table number
- Duration of the visit
Tap Confirm to mark the party as finished and clear the table.

- Tables automatically show "Paid" status when the check is closed
- Use "Needs Bussing" to alert bussers that the table needs cleaning
- Visit history is automatically saved to the Guest Book if phone number was entered
- On the Host page, you can change table status directly without entering any special mode
- On the Server page, tap "Enable Status Mode" first to change table statuses
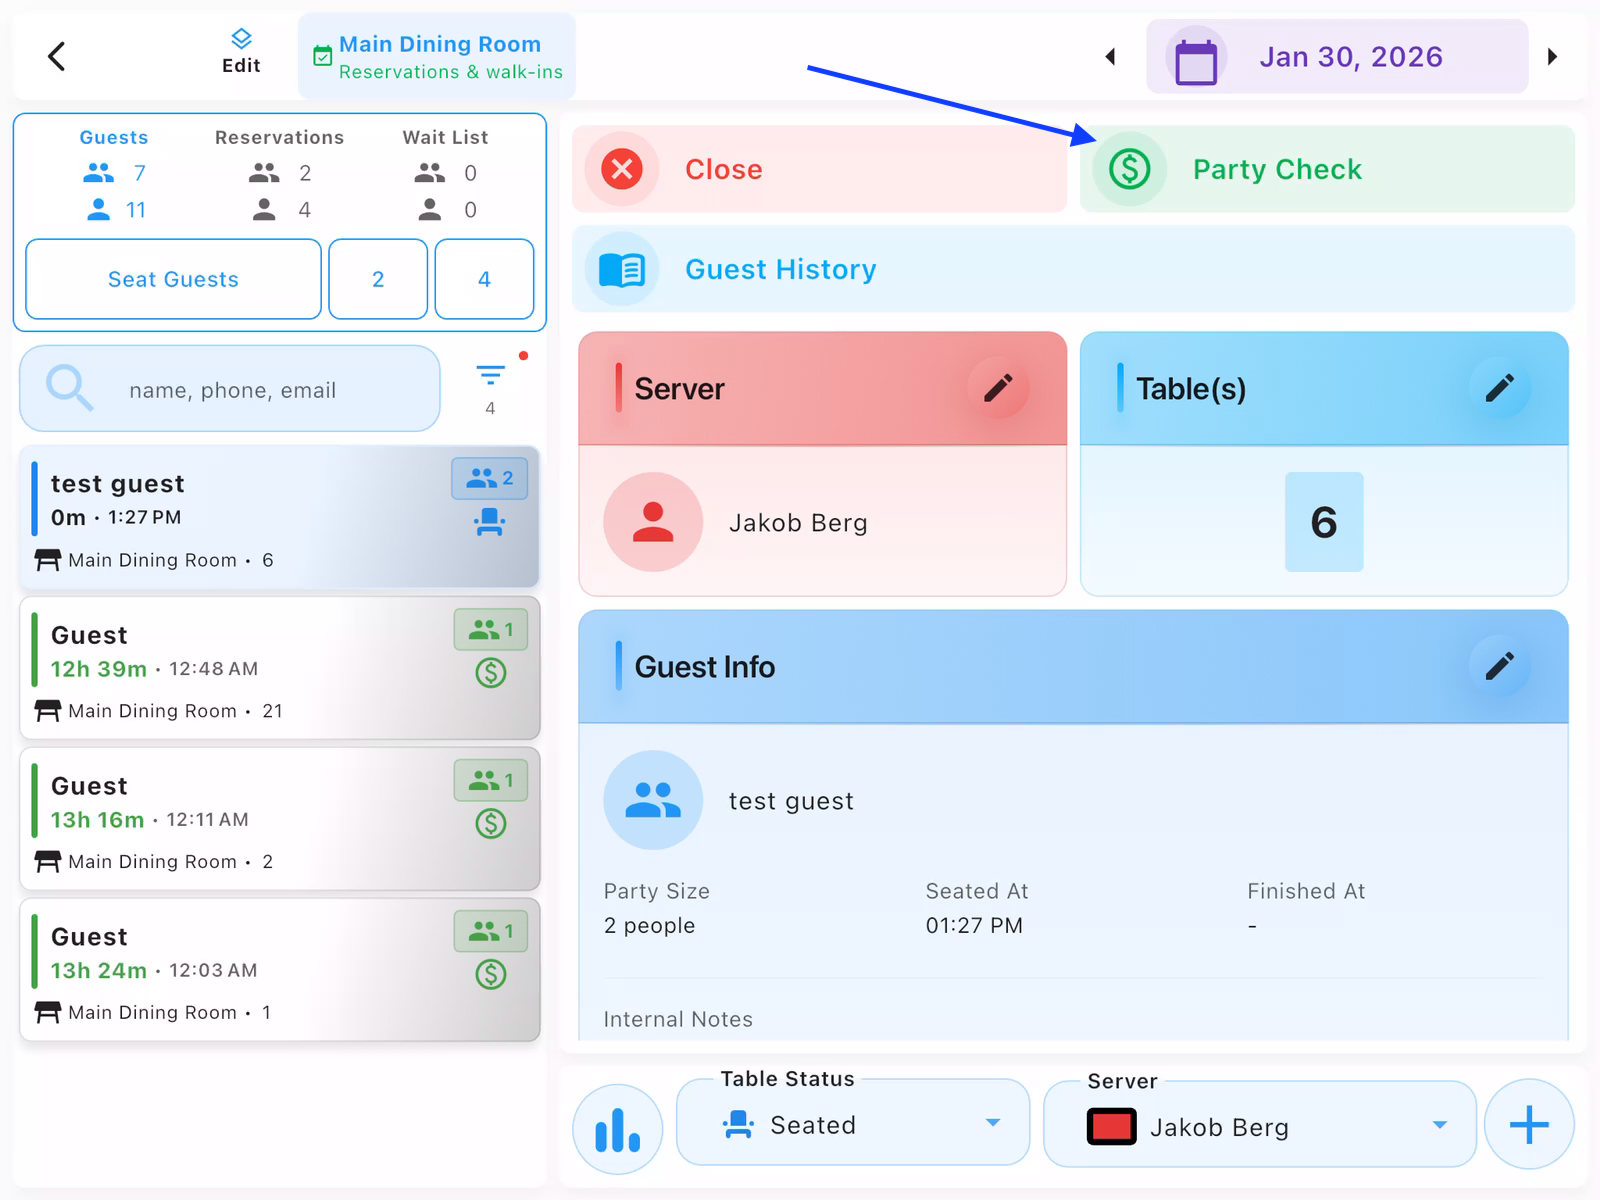
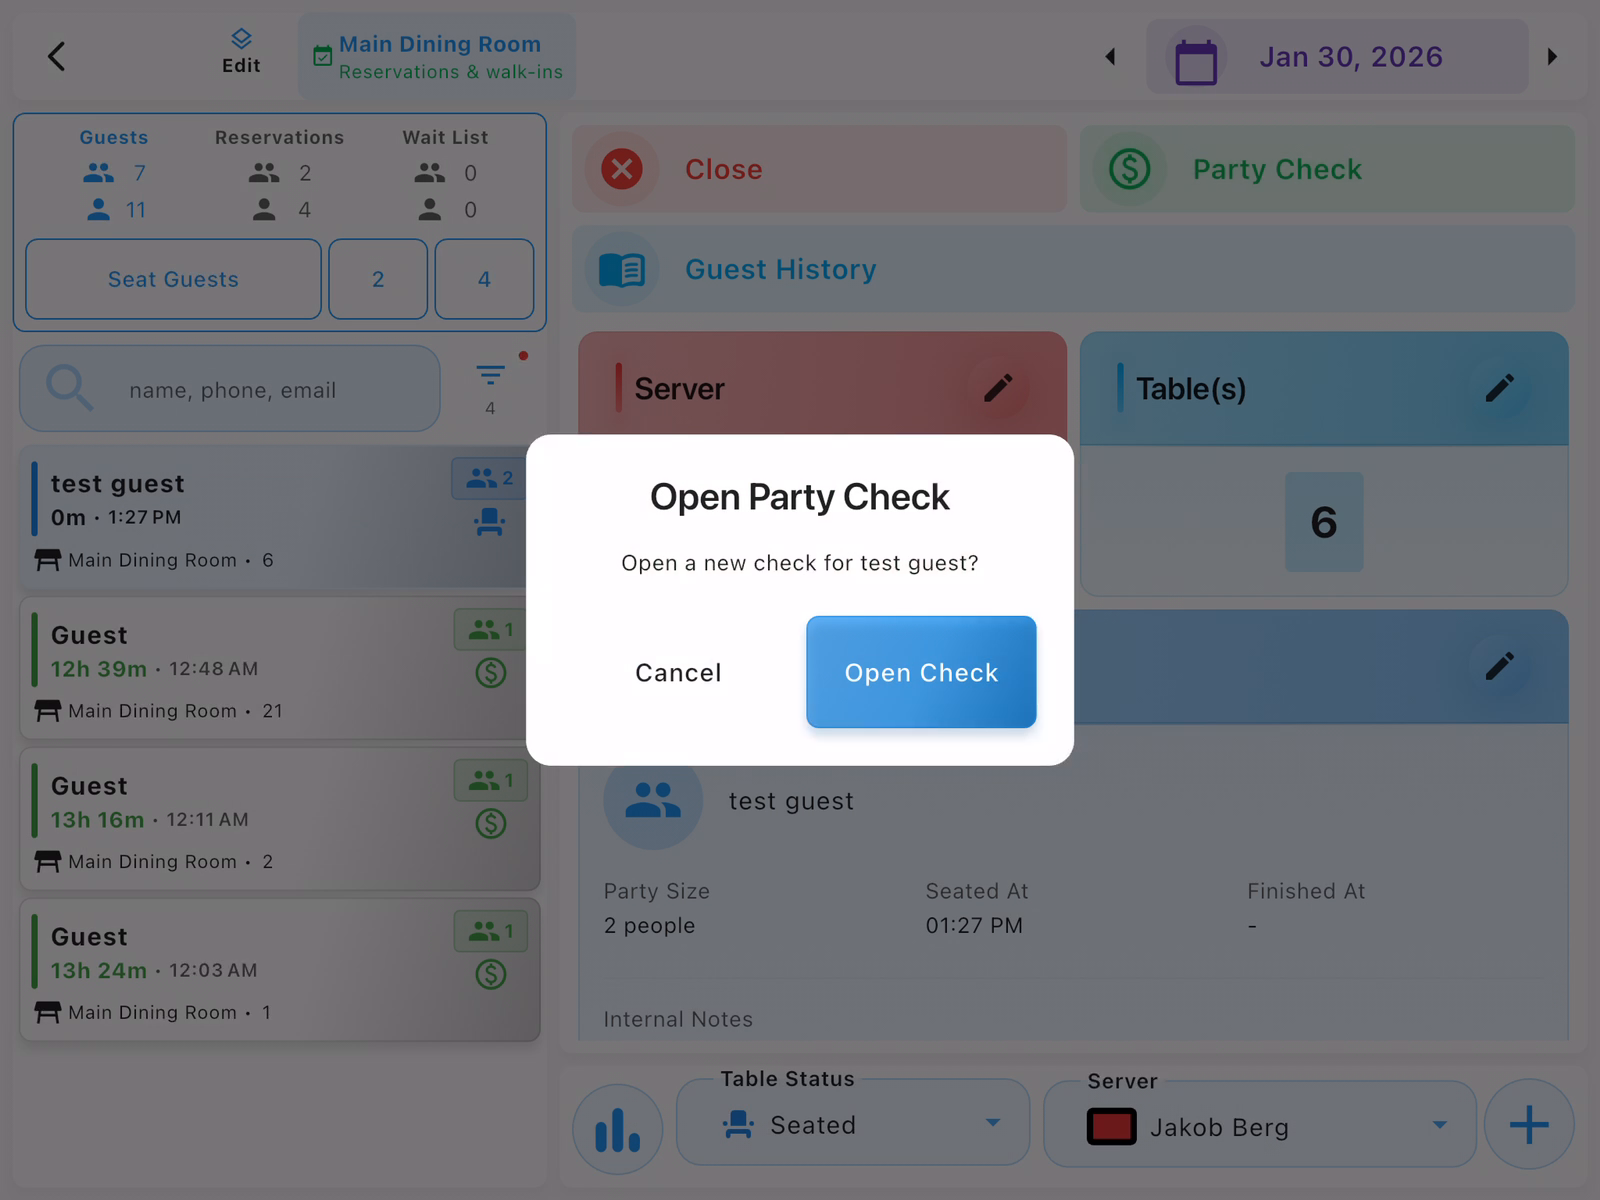
Opening a Party Check from Host
Hosts can open a new check for a seated party directly from the Host view, without switching to the Server view.
Select Party and Tap Party Check
From the Host view, tap on the seated party in the Guests list. The party detail panel opens showing:
- Server: Assigned server
- Table(s): Assigned table number
- Guest Info: Guest name and party size
- Seated At: Time the party was seated
Tap the Party Check button (blue, top right of the panel) to create a new check for this party.
Confirm Opening Check
A dialog appears asking "Open a new check for [guest name]?". Tap Open Check to create the check, or Cancel to go back.
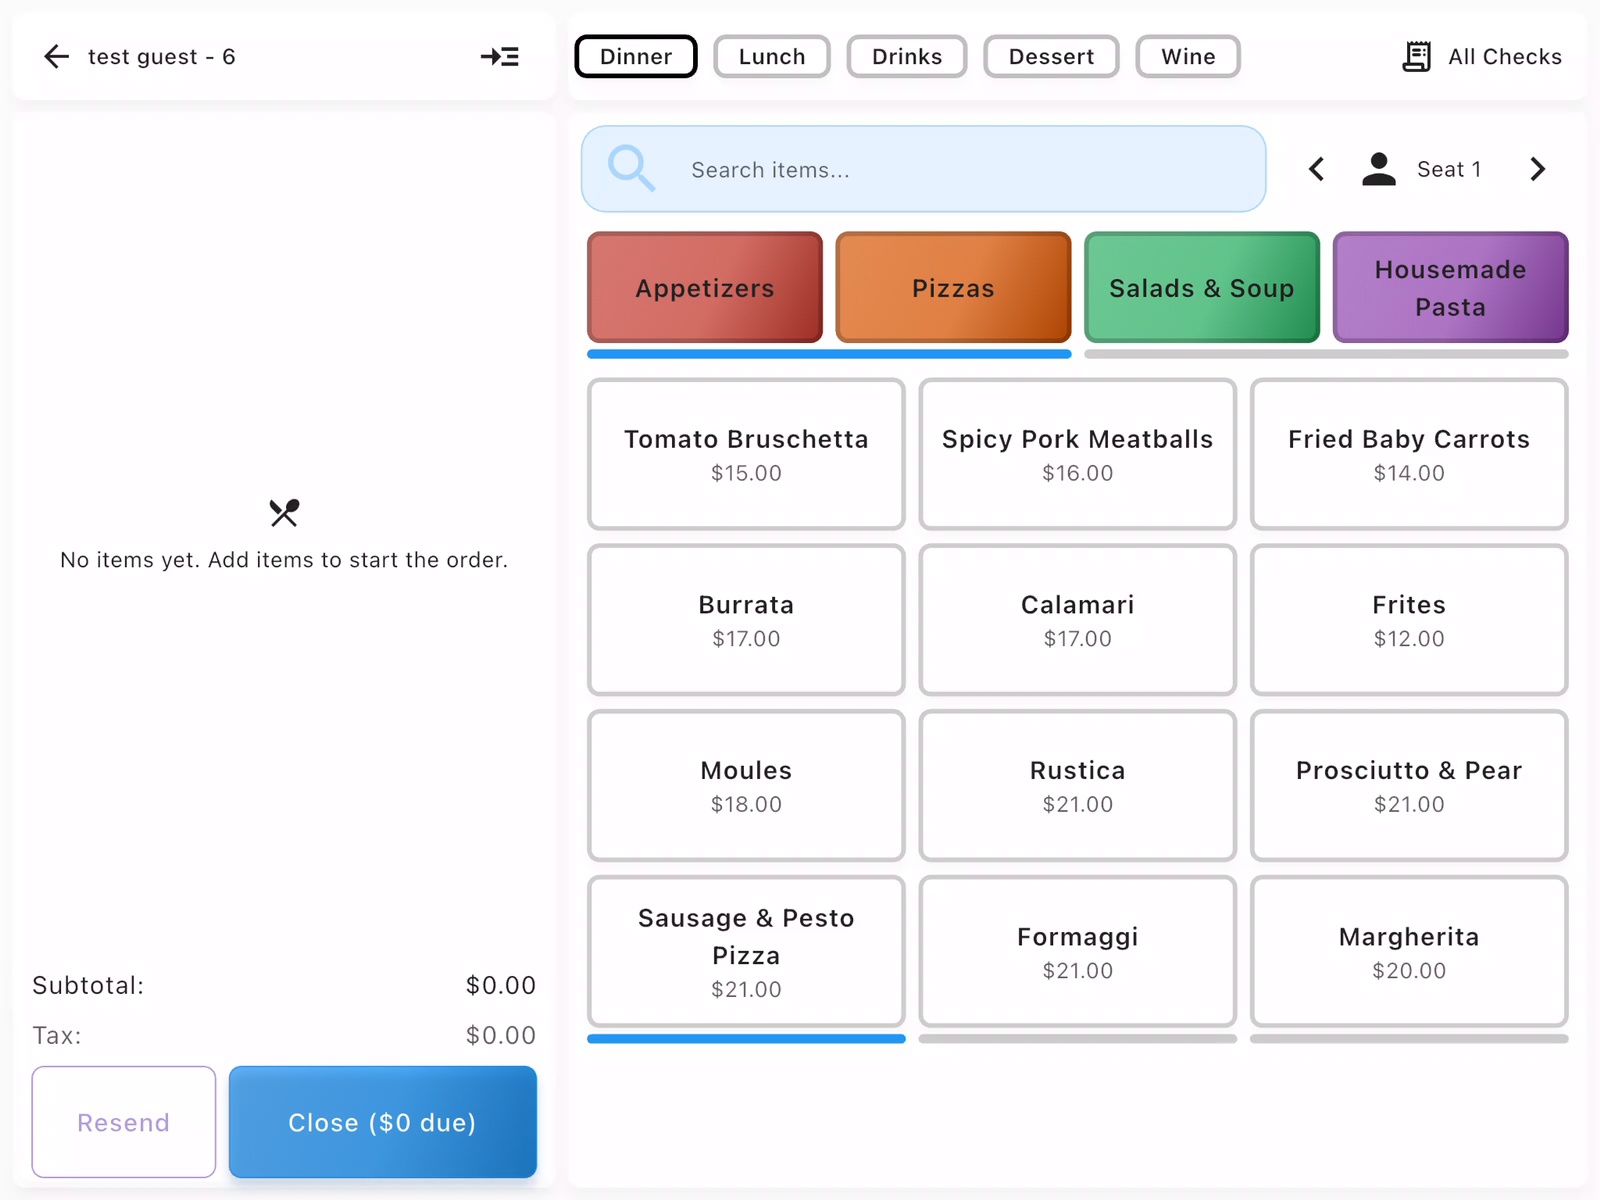
View the New Check
The check view opens, ready for the server to add items. The check shows:
- Guest name and table number in the header
- Menu categories and items on the right
- Empty order panel on the left
The server can now browse the menu and add items to the order.
- This is useful when hosts help servers during busy periods
- The check is automatically assigned to the table's server
- If a check already exists for the party, this button won't appear
- After opening the check, you can navigate back to Host view or continue taking orders
Contact us at support@chompypos.com.