Check Management
Adding Items to a Check
Use this workflow when guests are ready to order.
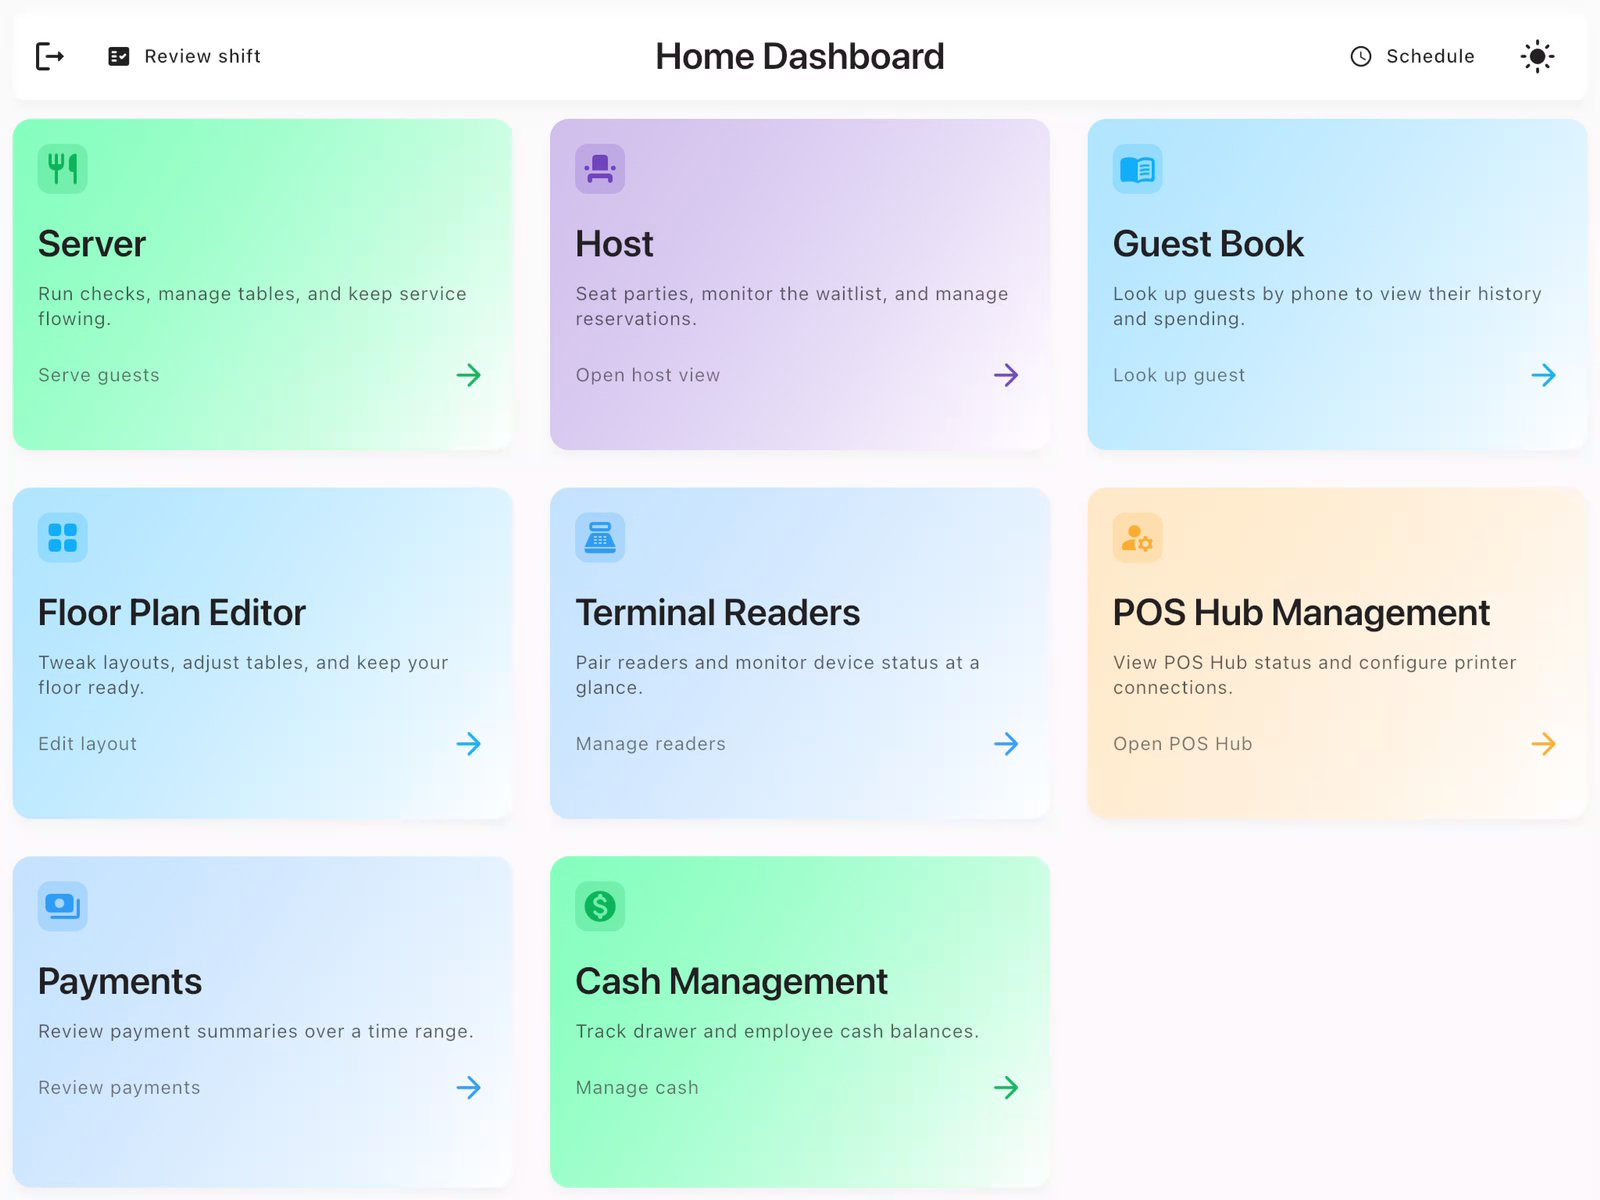
Navigate to Server View
From the Home Dashboard, tap Server to access your tables and checks. The dashboard provides quick access to all major functions: Server (for managing checks), Host (for seating), Guest Book, Floor Plan Editor, and more.
Open or Create a Check
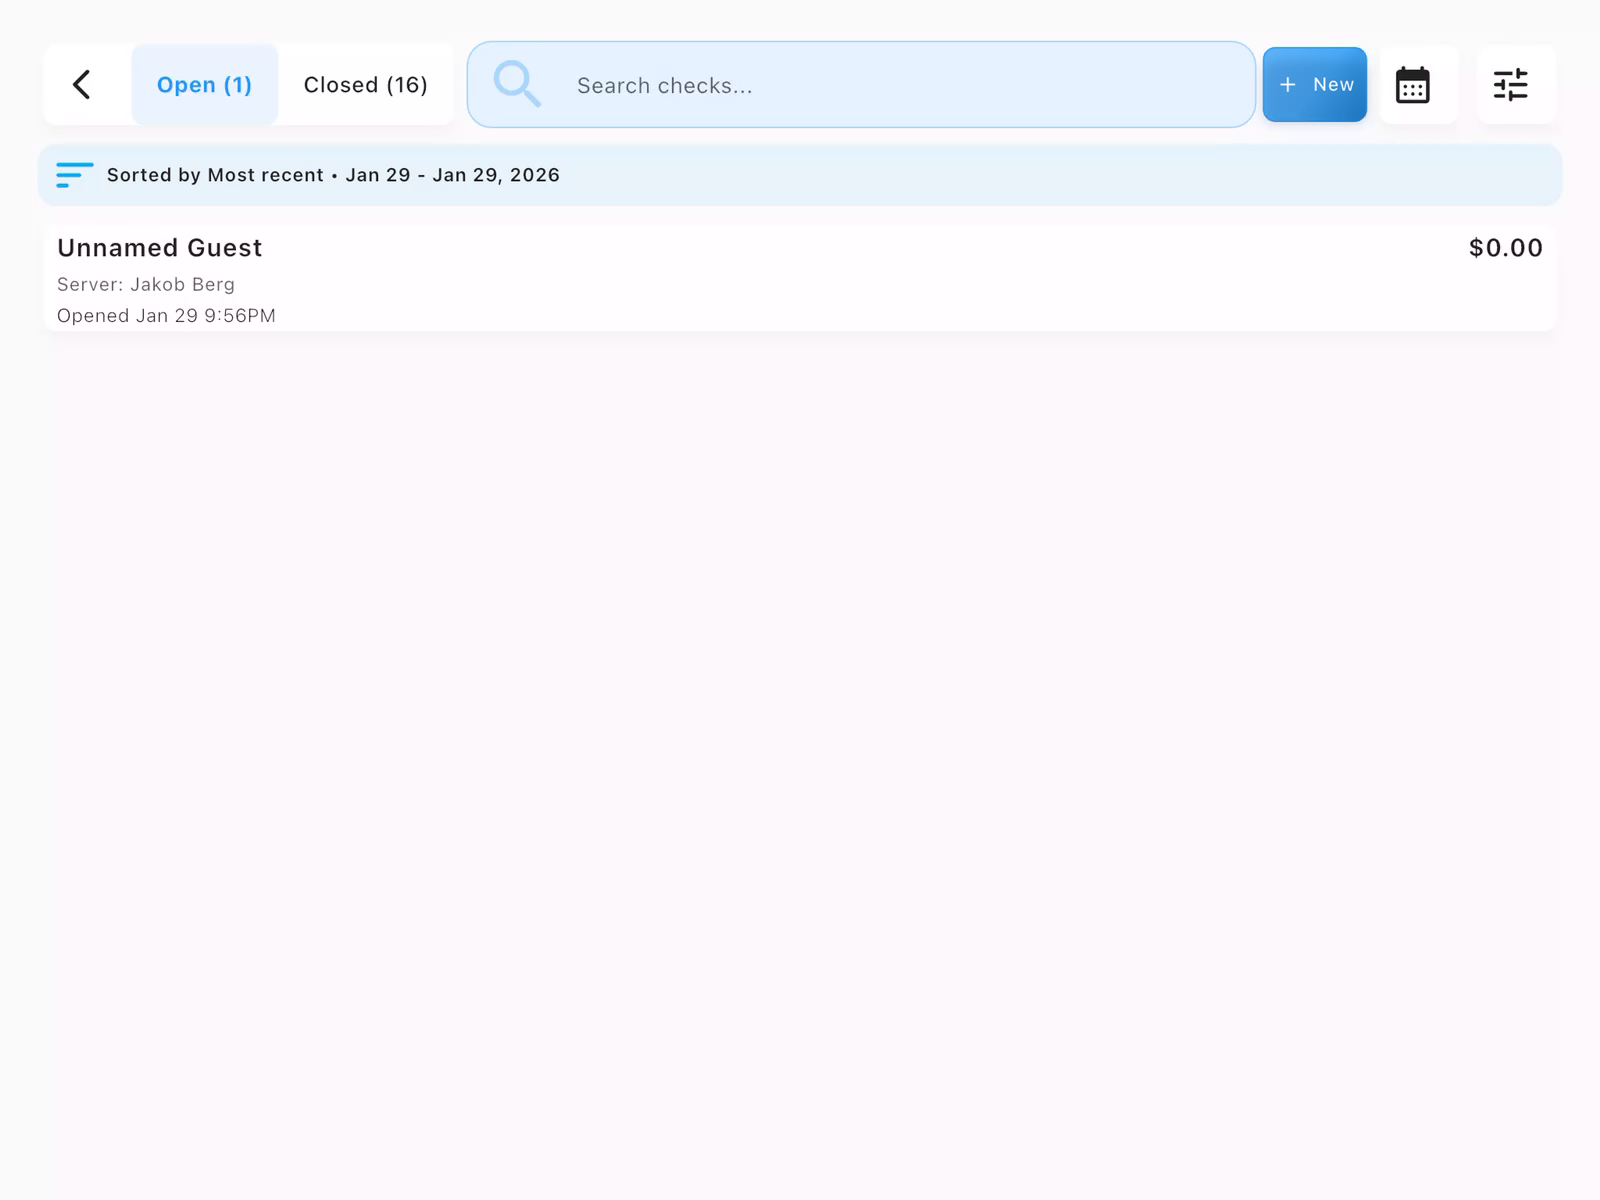
From the Server view, tap All Checks in the top-right corner to see your open and closed checks. A new check appears in the list showing:
- Guest name (or "Unnamed Guest")
- Assigned server
- Opening time
- Current balance
View Check Details
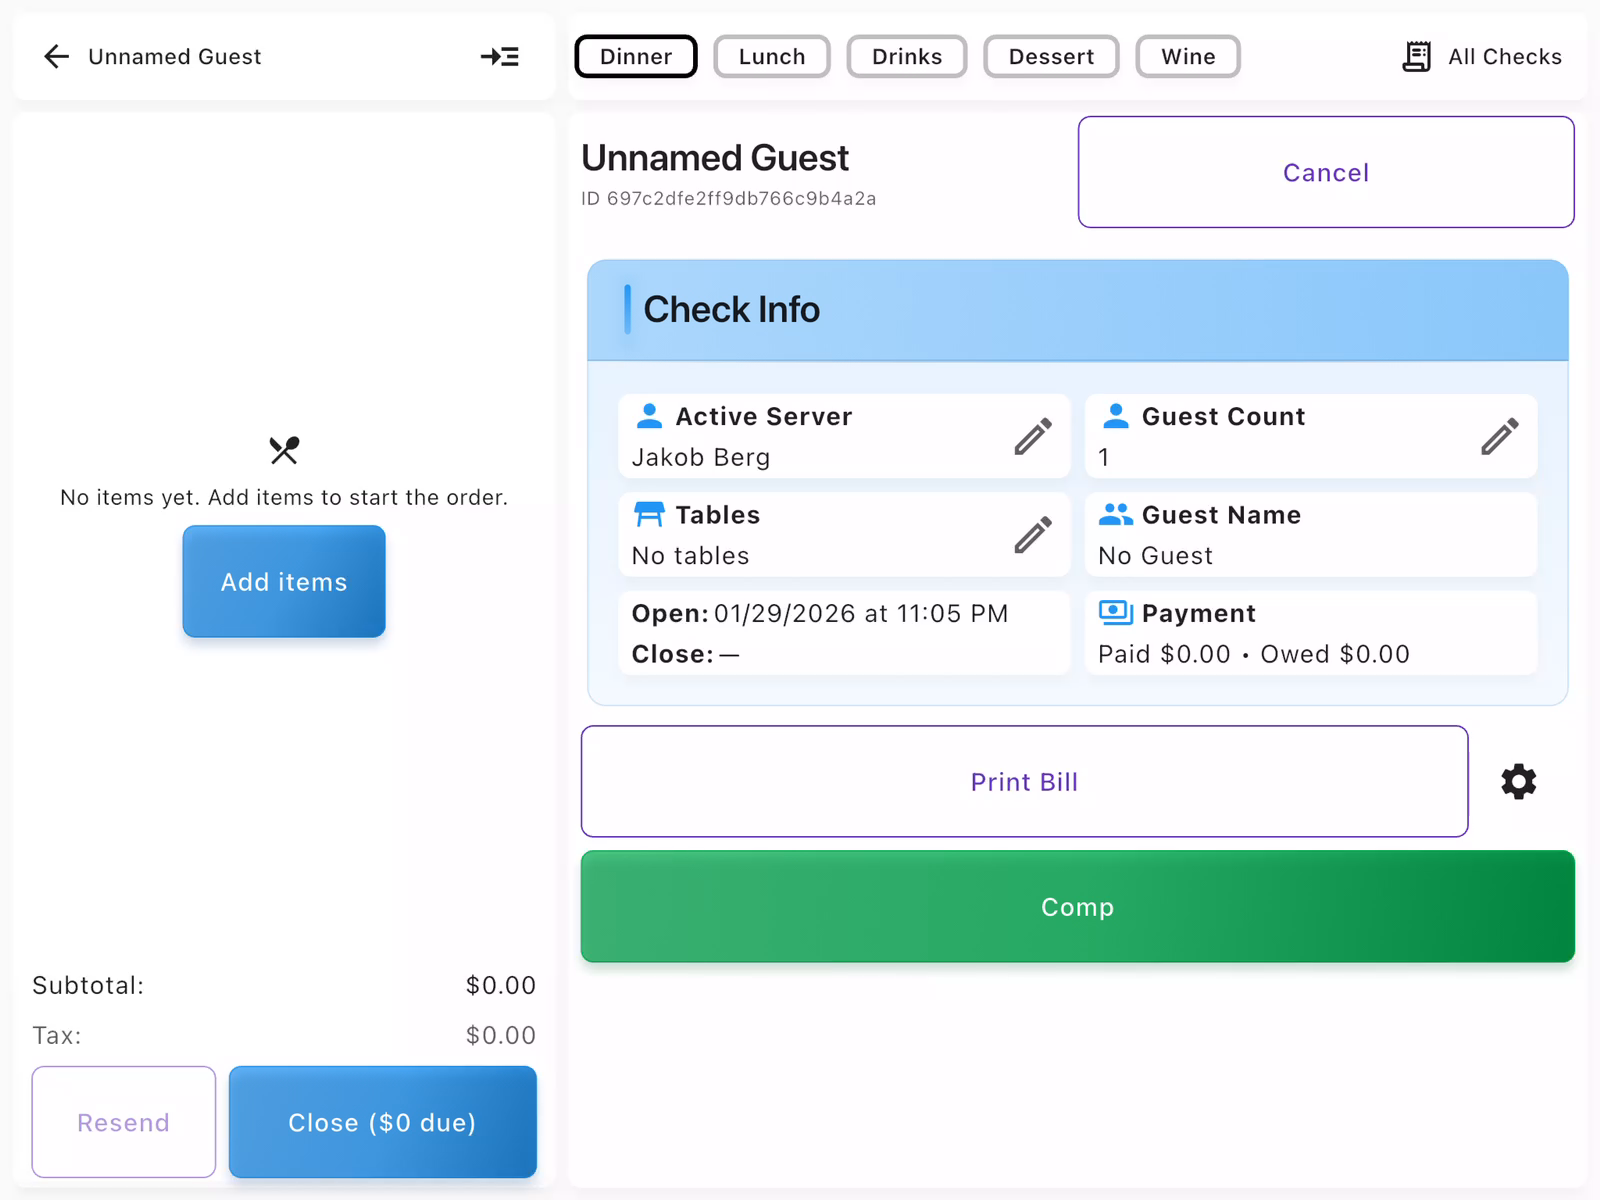
Tap the check to open it. An empty check displays:
- Left panel: Order items (empty at first)
- Right panel: Check Info showing server, guest count, tables, and payment status
- Add items button to start ordering
Key actions available: Add items, Print Bill, Comp, and Close.
Browse the Menu
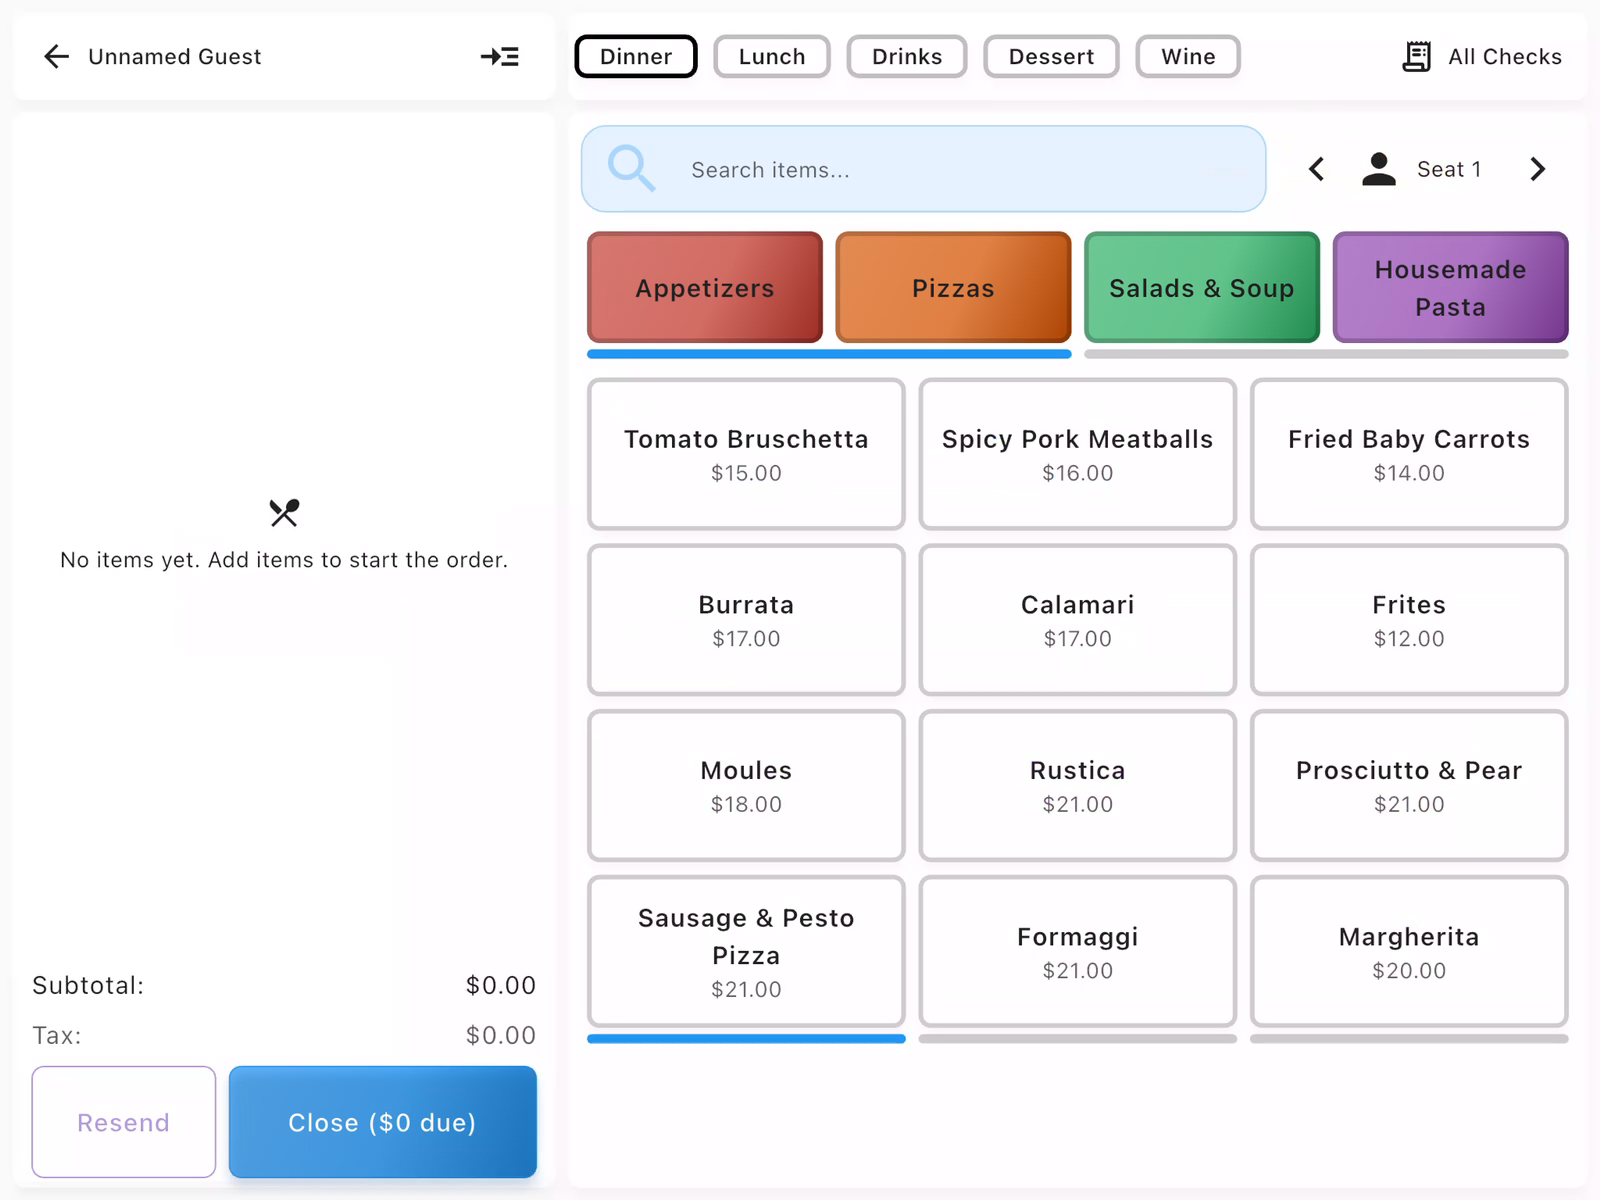
Tap Add items to open the menu. Items are organized by:
- Categories (top tabs): Dinner, Lunch, Drinks, Dessert, Wine
- Subcategories (colored buttons): Appetizers, Pizzas, Salads & Soup, etc.
- Seat selector (top-right): Assign items to specific guests
Each menu item shows its name and price. Tap an item to add it to the check.
Add an Item
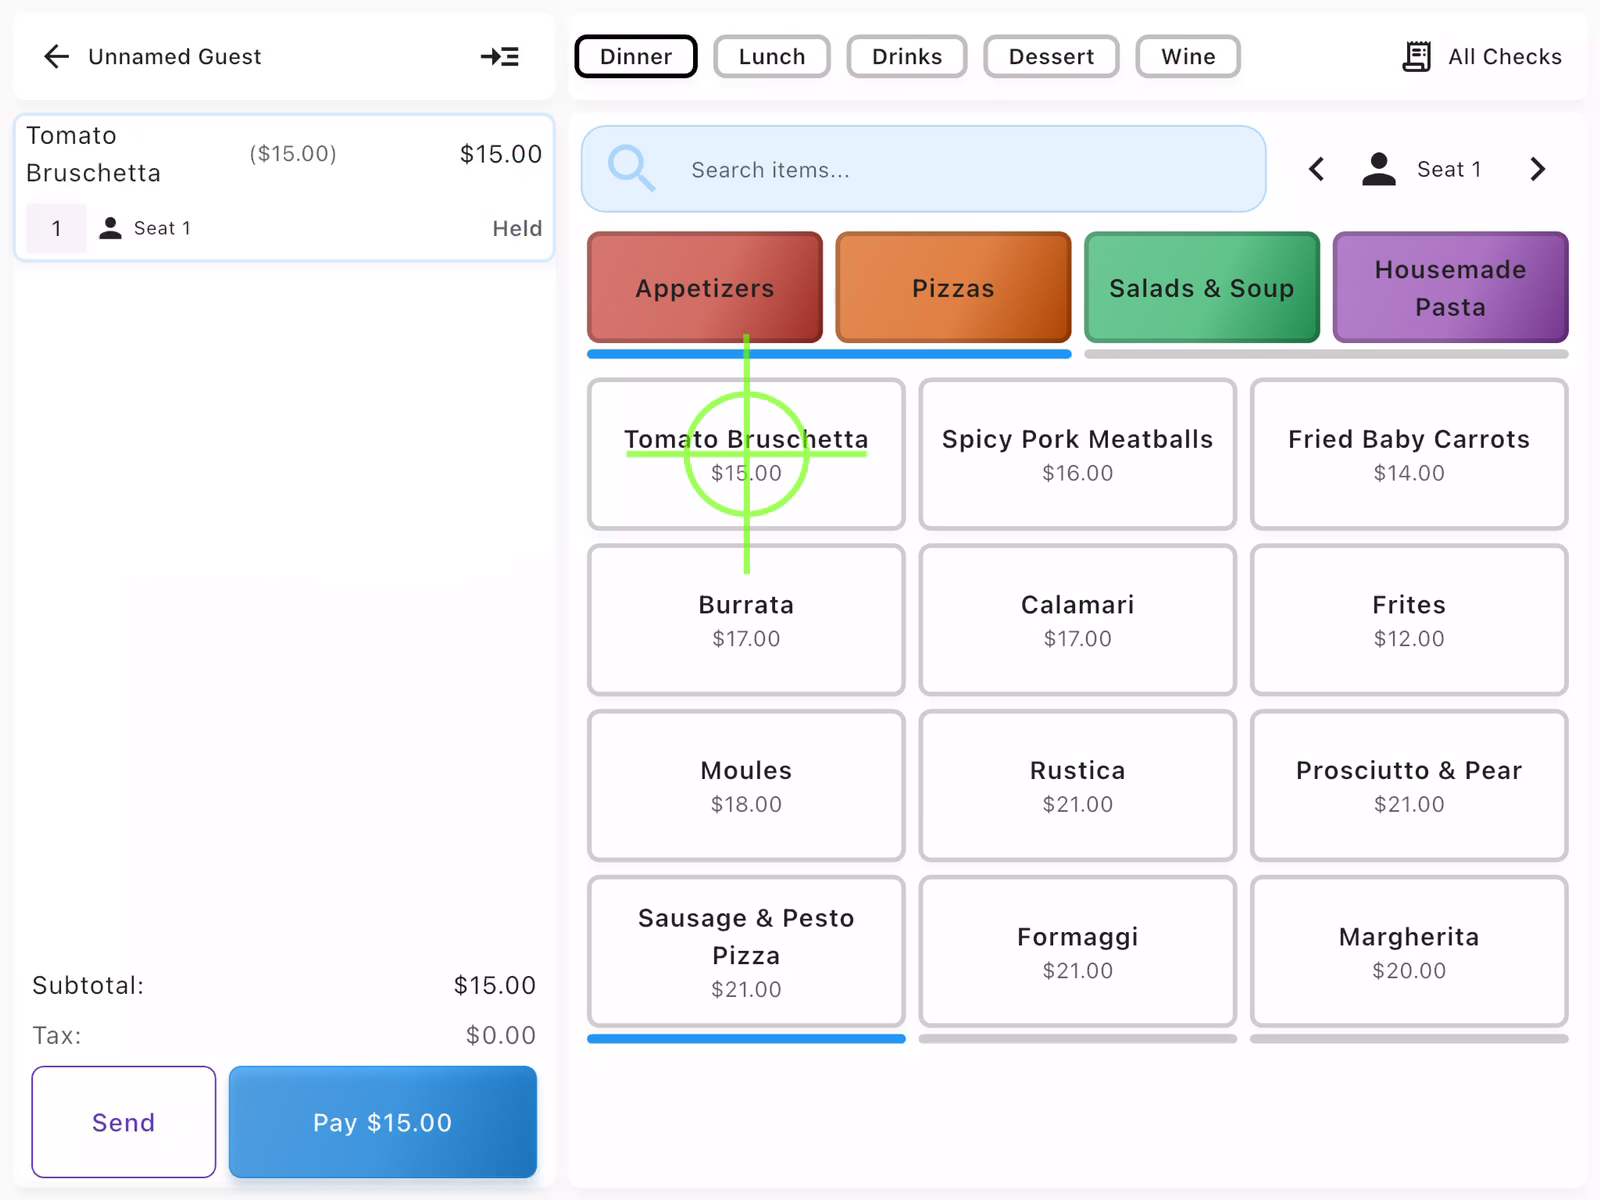
When you tap a menu item (e.g., Tomato Bruschetta - $15.00), it immediately appears in the check on the left panel. The item shows:
- Item name and price
- Seat assignment (e.g., "Seat 1")
- Status: Held (not yet sent to kitchen)
The subtotal updates automatically. Continue adding items or proceed to send to kitchen.
- Use the search bar for faster item lookup
- Items with a dot indicator have required modifiers
- Tap an item in the check to modify quantity or remove it
Paying with Card
Process credit or debit card payments using your payment terminal.
Review the Check
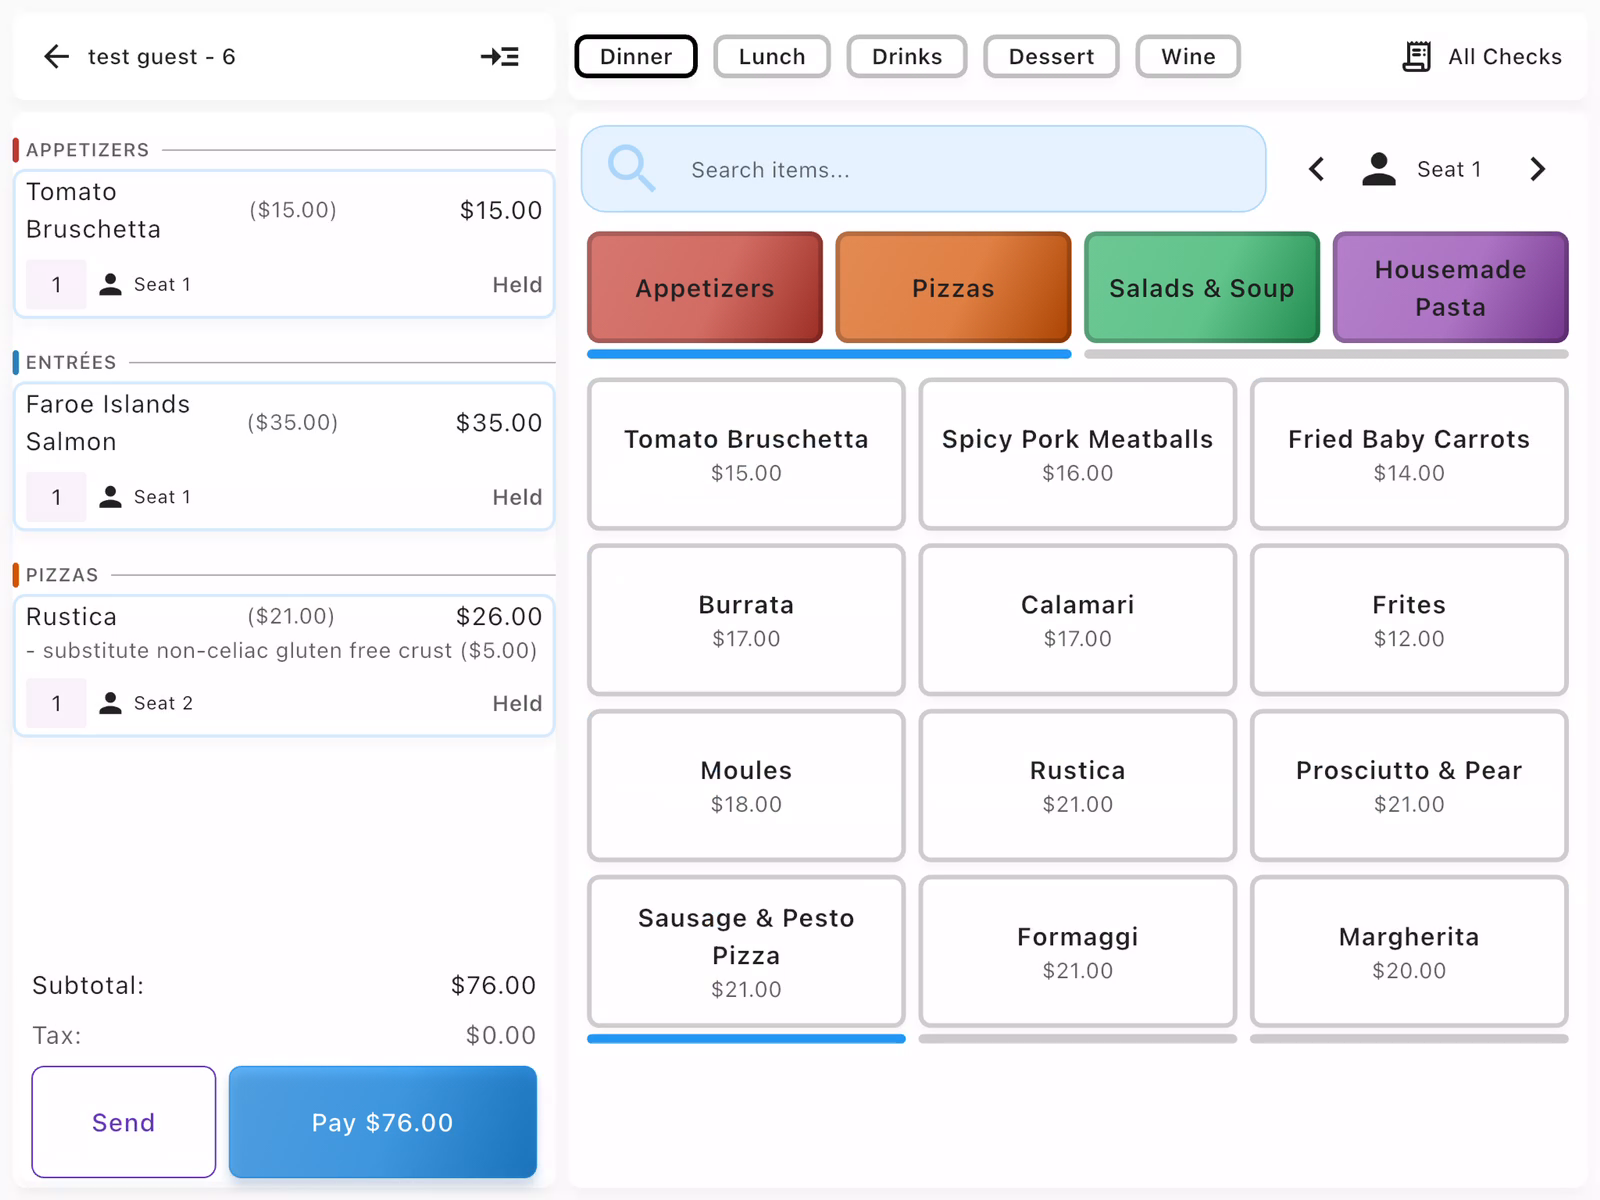
Before collecting payment, review the check to ensure all items are correct. The check shows:
- All ordered items with prices
- Seat assignments for each item
- Subtotal at the bottom
- Pay $XX.XX button when ready
In this example, the check includes Tomato Bruschetta ($15.00), Faroe Islands Salmon ($35.00), and Rustica pizza ($26.00) for a total of $76.00.
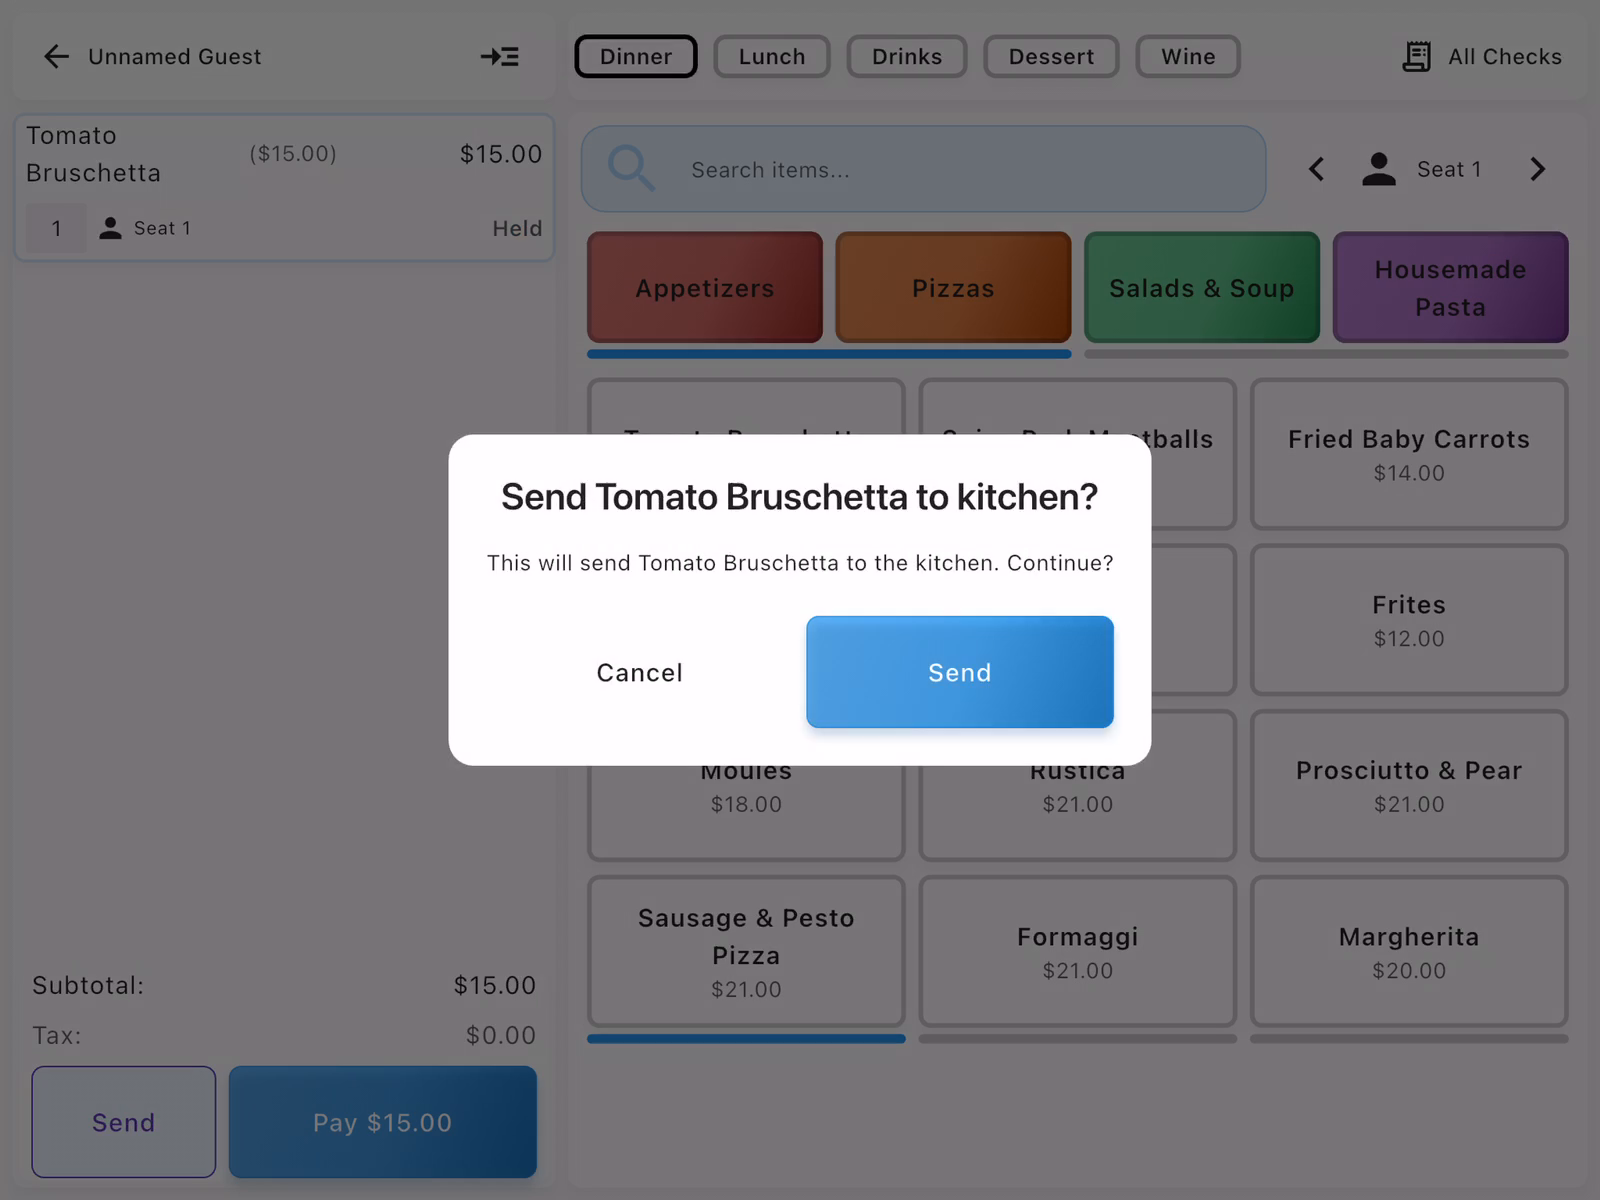
Send Items to Kitchen
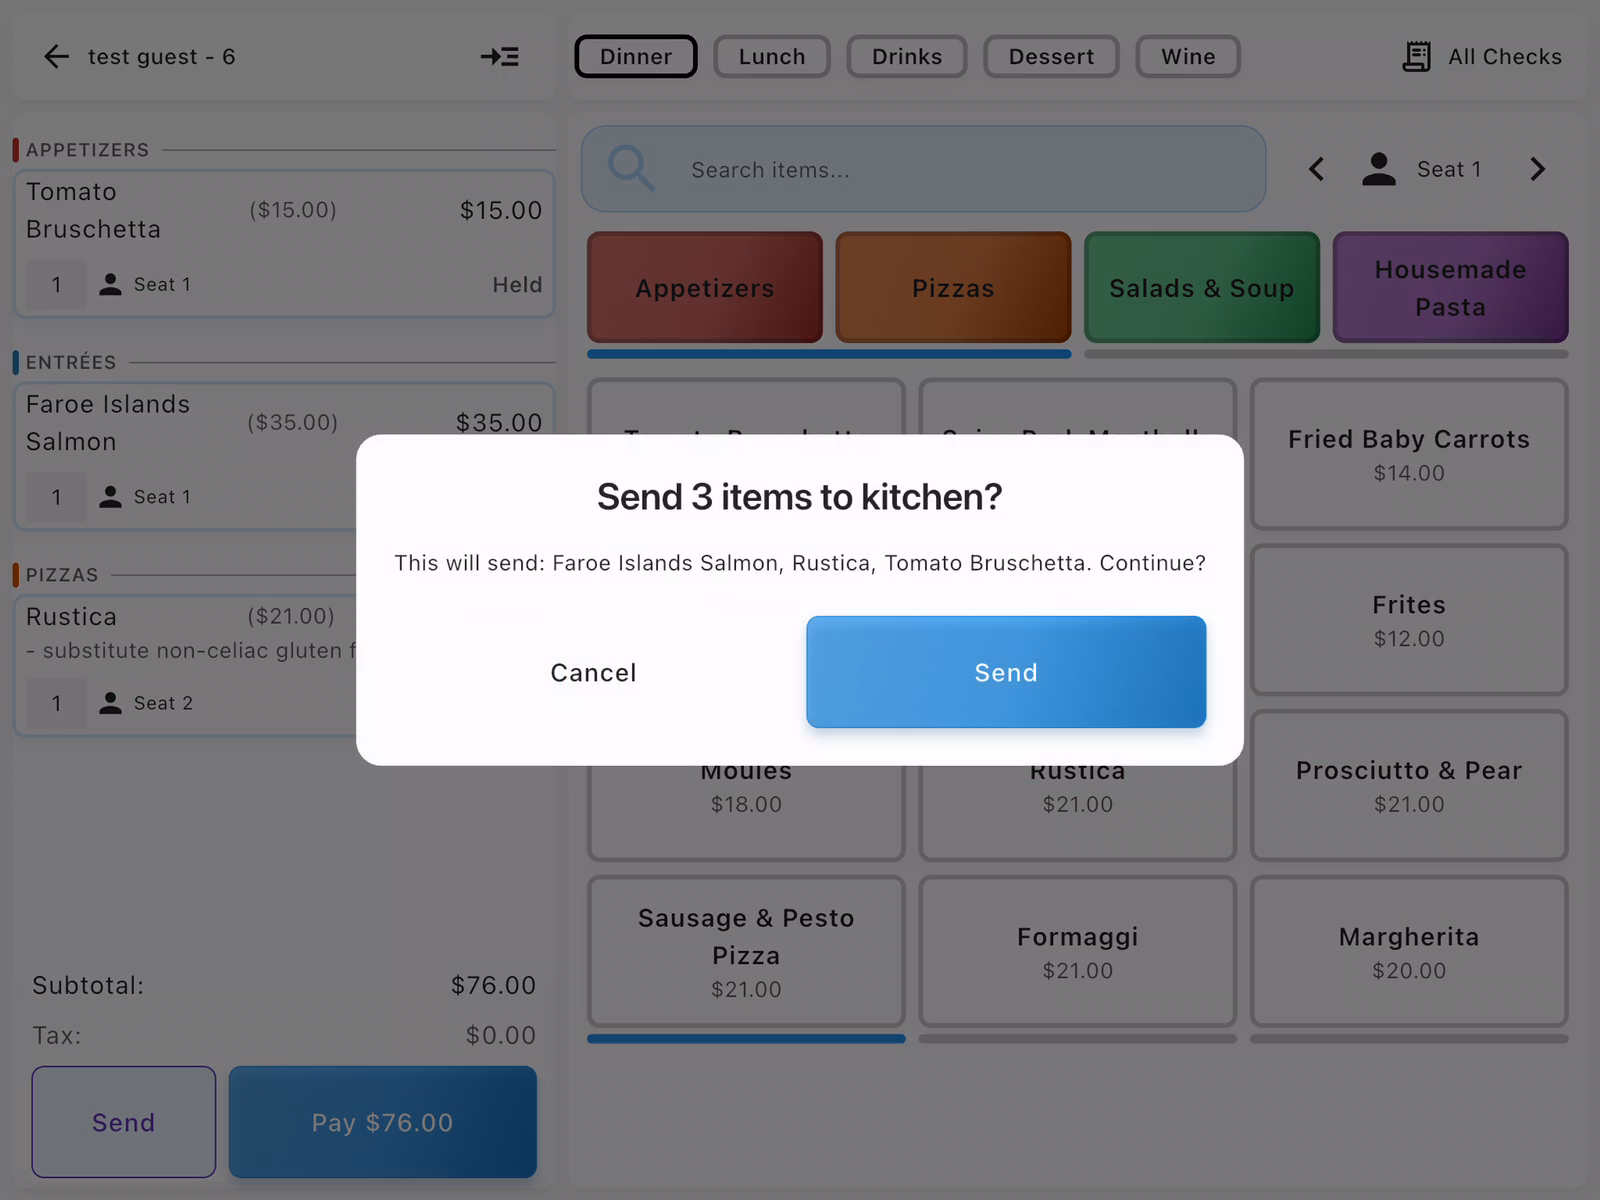
Before collecting payment, items should be sent to the kitchen. Tap Send to transmit the order. A confirmation dialog appears listing all items to be sent.
Tap Send to confirm. The items will show "Sent" status when complete.
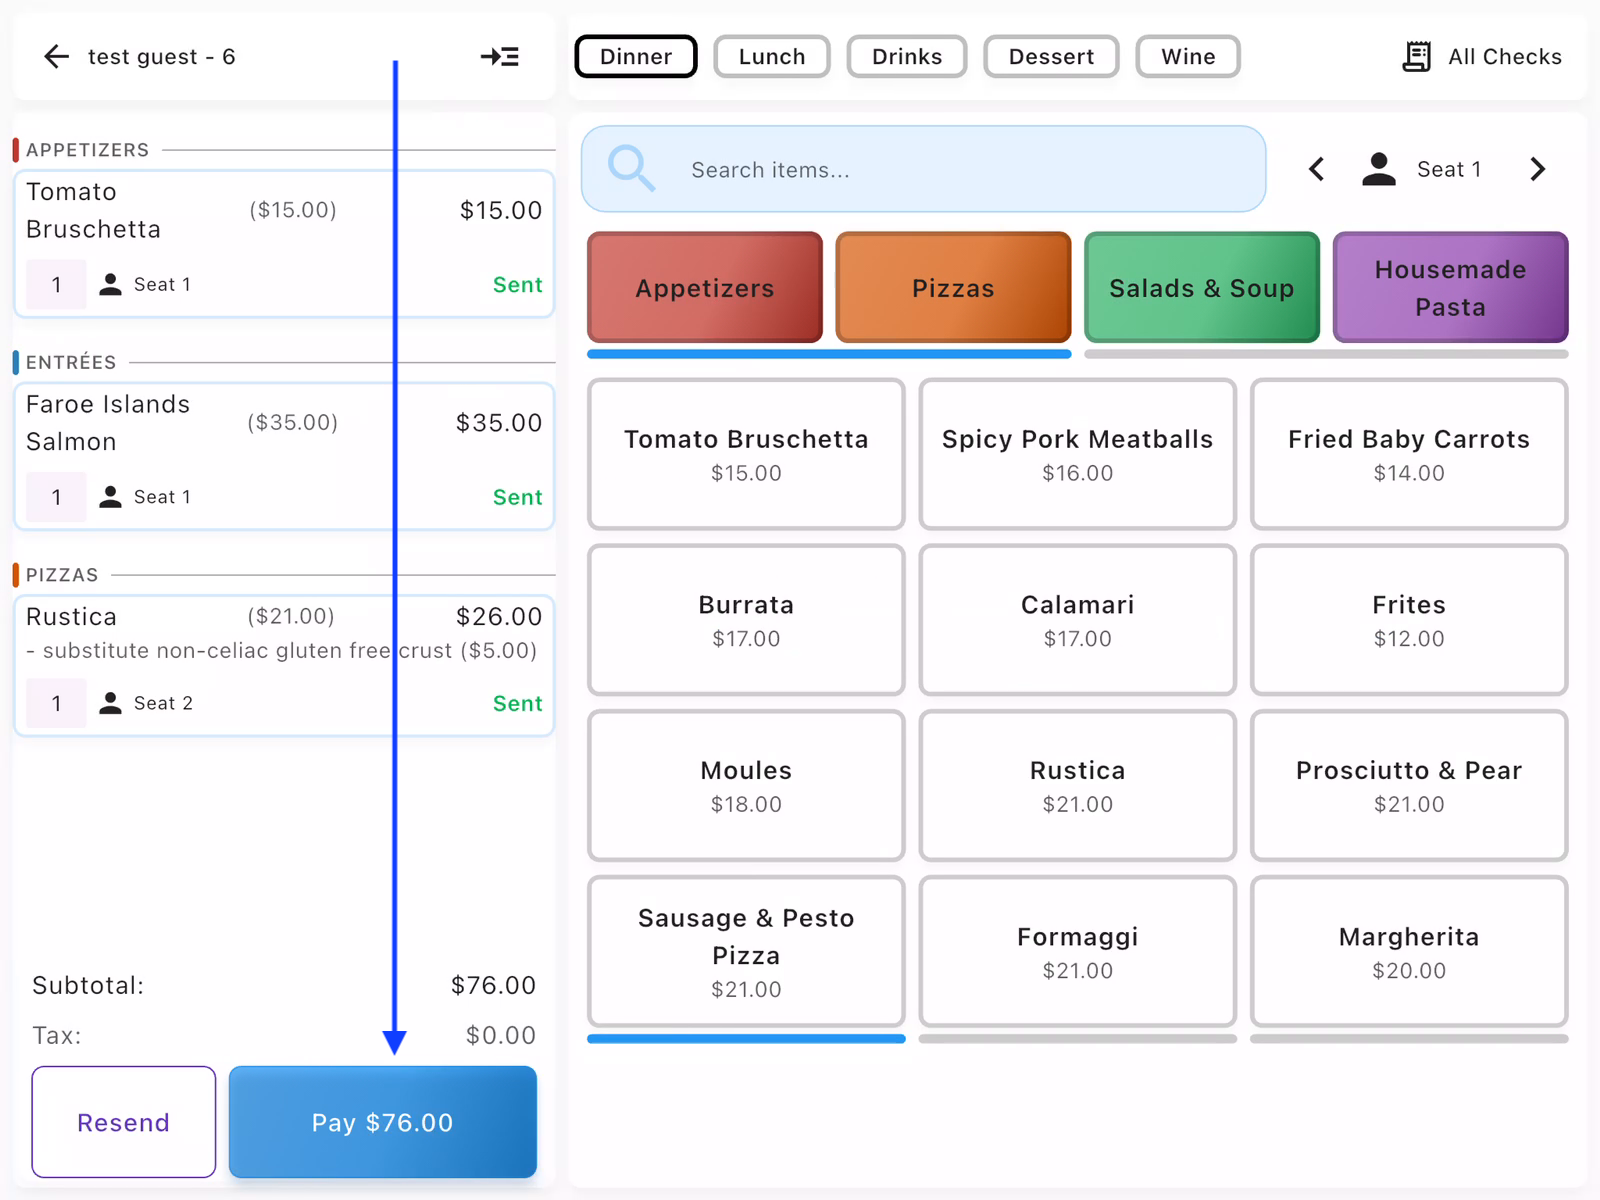
Tap Pay
After items are sent (shown with green Sent badges), tap the Pay $76.00 button at the bottom of the check. This opens the payment method selection screen.
Items must be sent before payment can be collected.
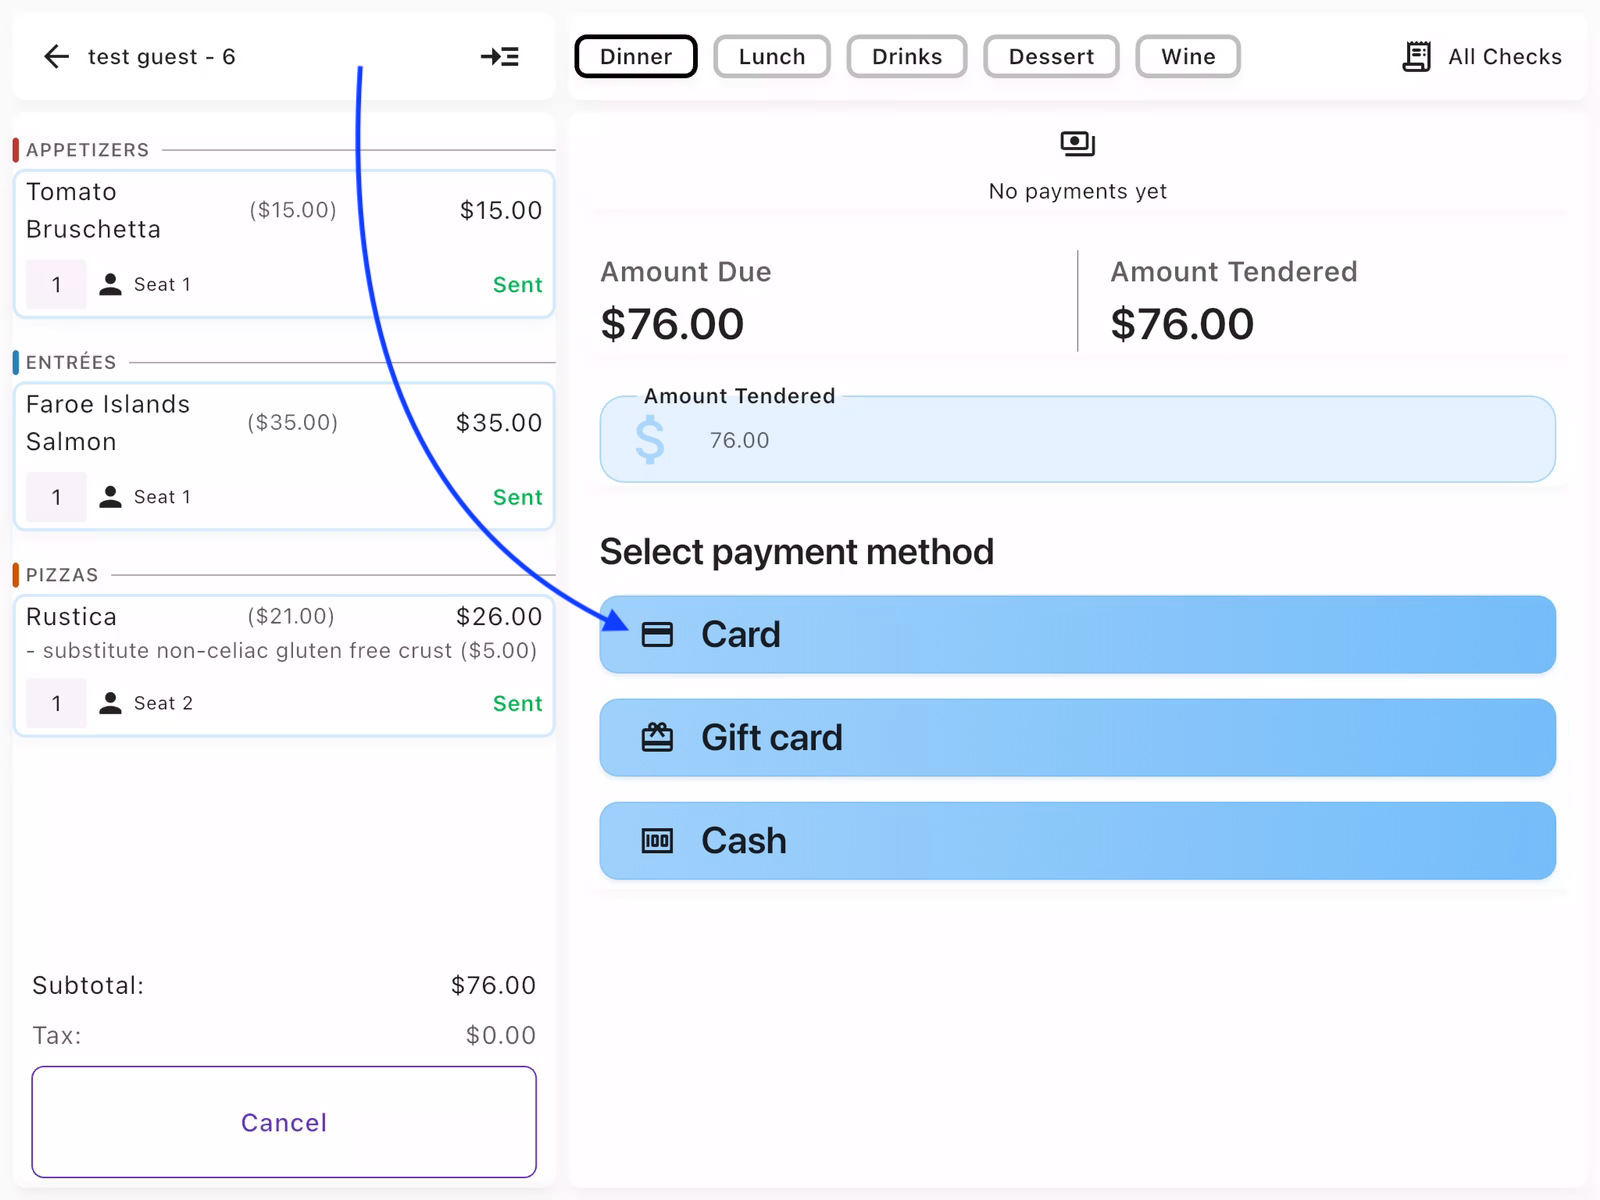
Select Card Payment
The payment screen shows:
- Amount Due: The total amount ($76.00)
- Amount Tendered: Amount to charge (defaults to full amount)
- Payment methods: Card, Gift card, Cash
Tap Card to process a credit or debit card payment.
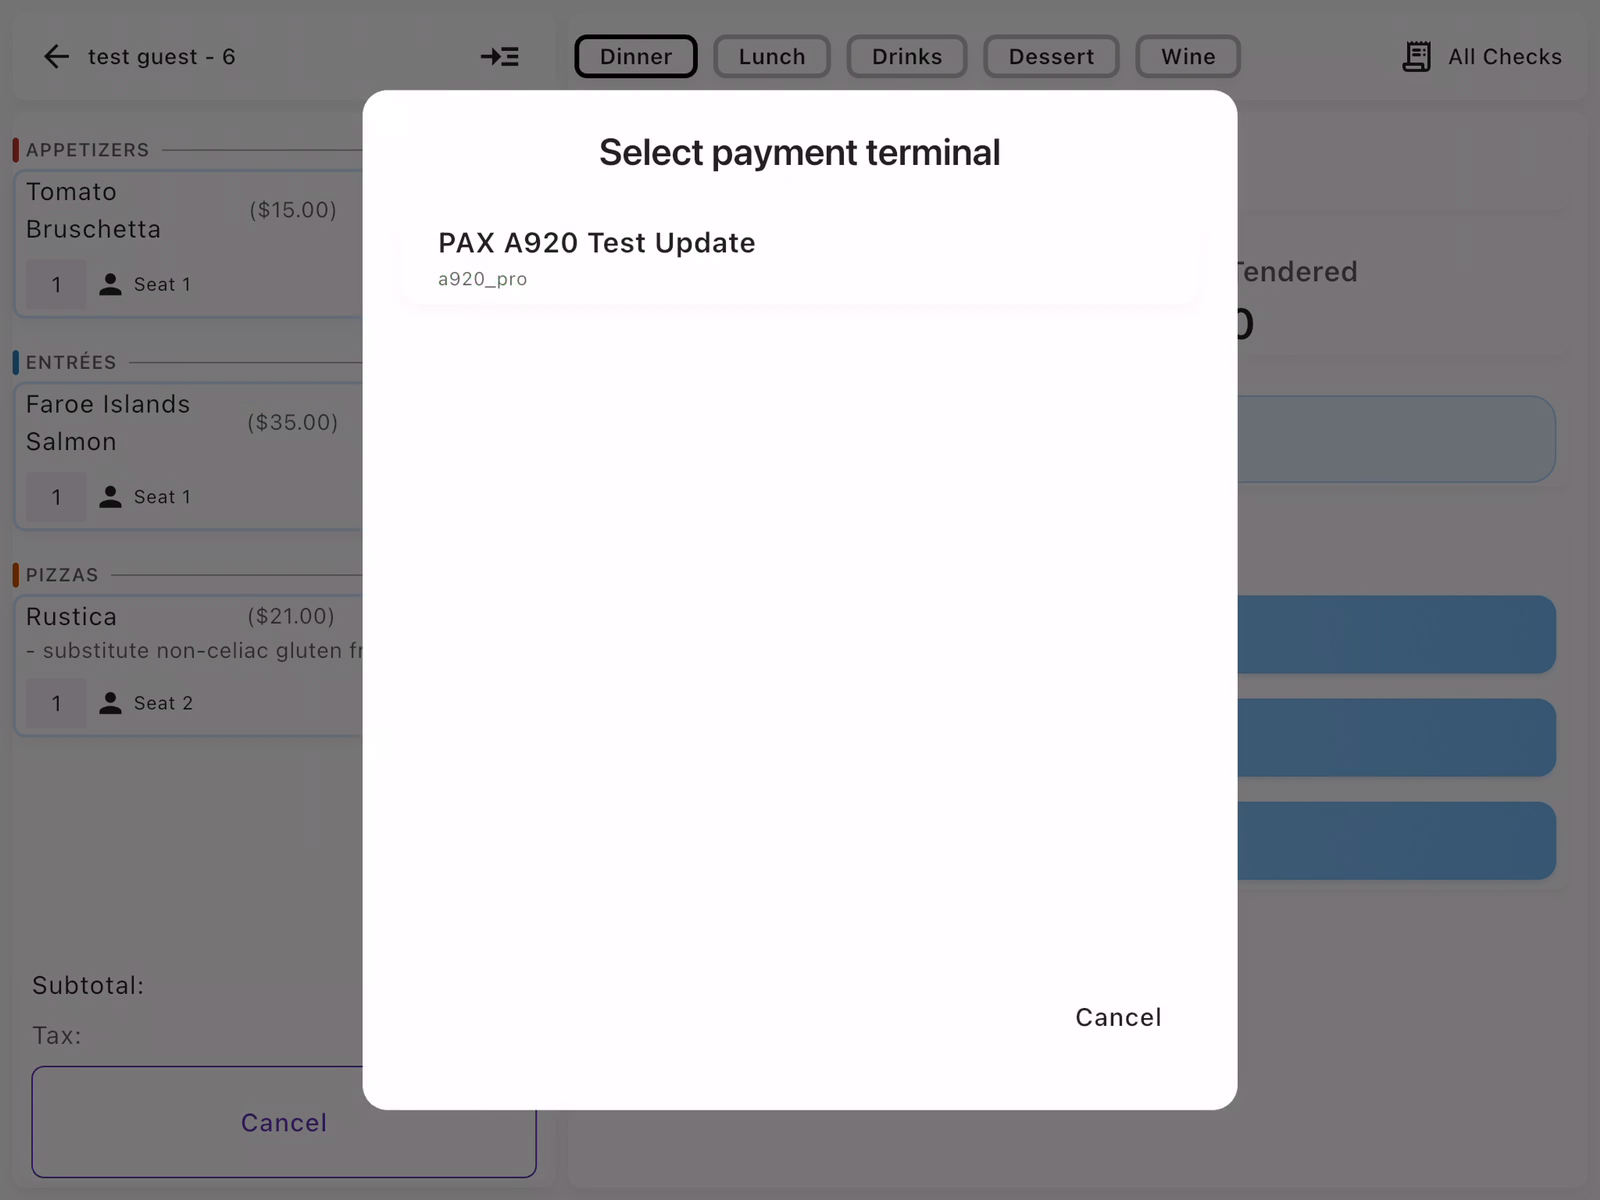
Select Payment Terminal
A dialog appears listing available payment terminals. Tap the terminal you want to use (e.g., "PAX A920 Test Update").
If only one terminal is available, it may be selected automatically.
Confirm and Send to Terminal
A confirmation dialog appears showing the charge amount and selected terminal. Review the details:
- Charge amount: $76.00
- Terminal: PAX A920 Test Update
Tap Send to terminal to initiate the card payment.

Await Card Payment
The screen shows "Awaiting card payment" with a progress indicator. The Payment Summary displays:
- Subtotal, Tax, Tip breakdown
- Total amount: $76.00
- Captured: $0.00 (until payment completes)
- Balance Due: $76.00
The guest should follow prompts on the terminal to insert/tap/swipe their card and enter a tip.

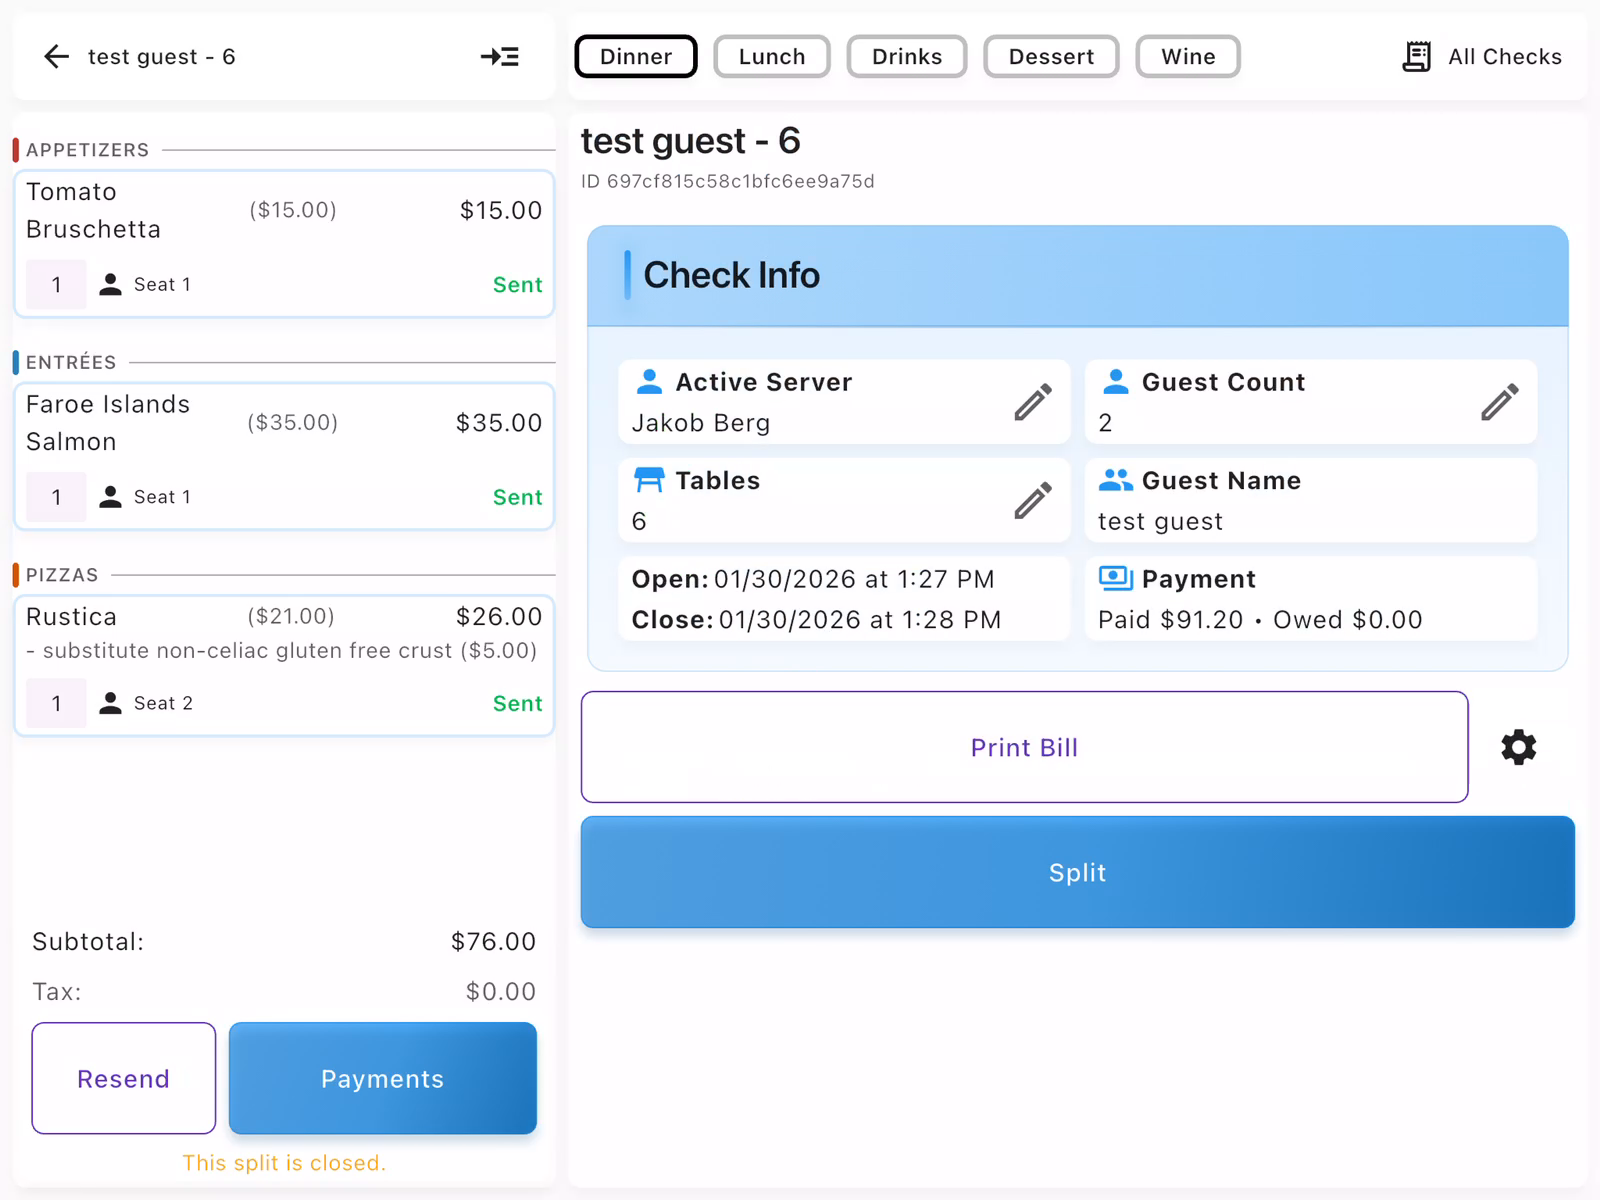
Payment Complete
Once the card payment is processed successfully, the Check Info panel updates to show:
- Payment: Paid amount and balance (e.g., "Paid $91.20 - Owed $0.00")
- Close time: When the check was closed
The payment includes any tip entered on the terminal. Options available: Print Bill, Split.
The message "This split is closed" confirms the check is complete.
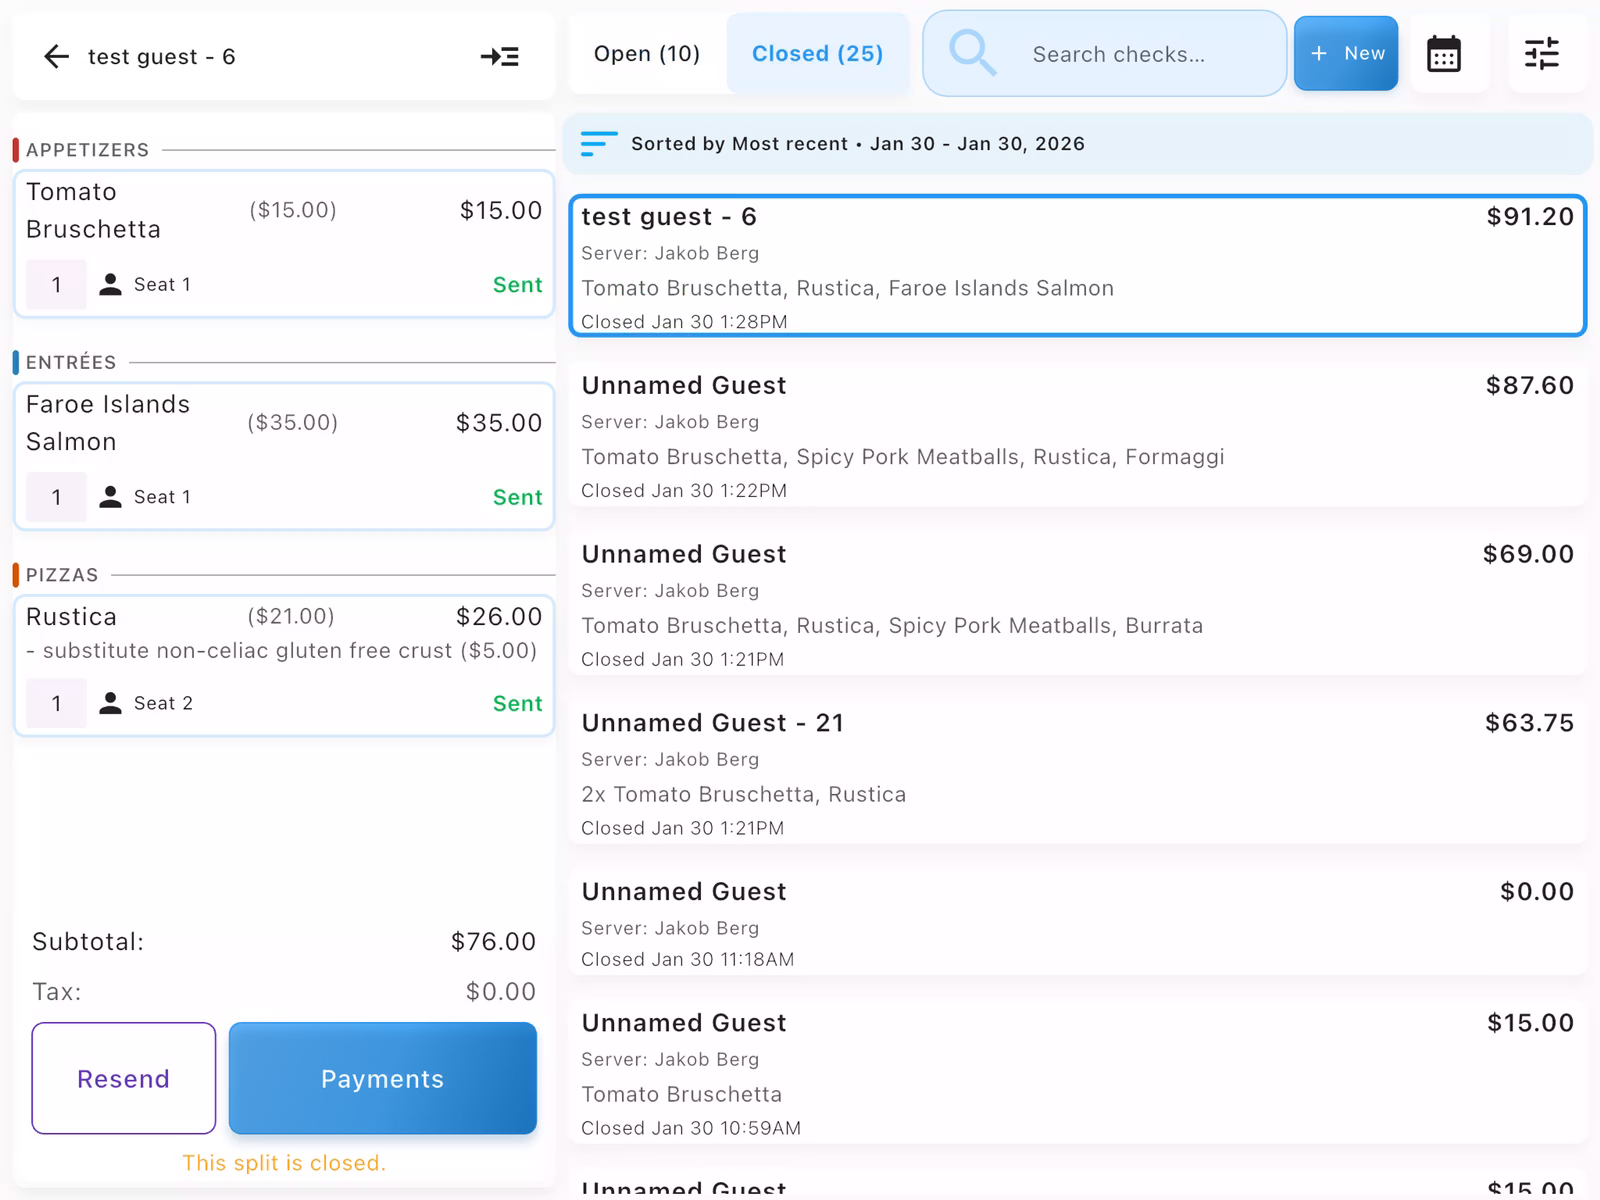
View Closed Check
Tap All Checks and select the Closed tab to see completed checks. The closed check appears in the list showing:
- Guest name and table number
- Server name
- Items ordered
- Final amount paid (including tip)
- Close time
You can tap any closed check to view details or reprint receipts.
- Items must be sent to kitchen before payment can be collected
- Tips are entered on the payment terminal by the guest
- If the terminal times out, you can retry the payment
- For split payments, use the Split feature before collecting payment
- Closed checks can be found in the Closed tab of All Checks
Sending Orders to Kitchen
Before guests can receive their food, items must be sent to the kitchen.
Send to Kitchen
Tap Send at the bottom of the check panel. A confirmation dialog appears asking to confirm sending items to the kitchen. Tap Send to confirm. The order is transmitted to kitchen display systems and printers.
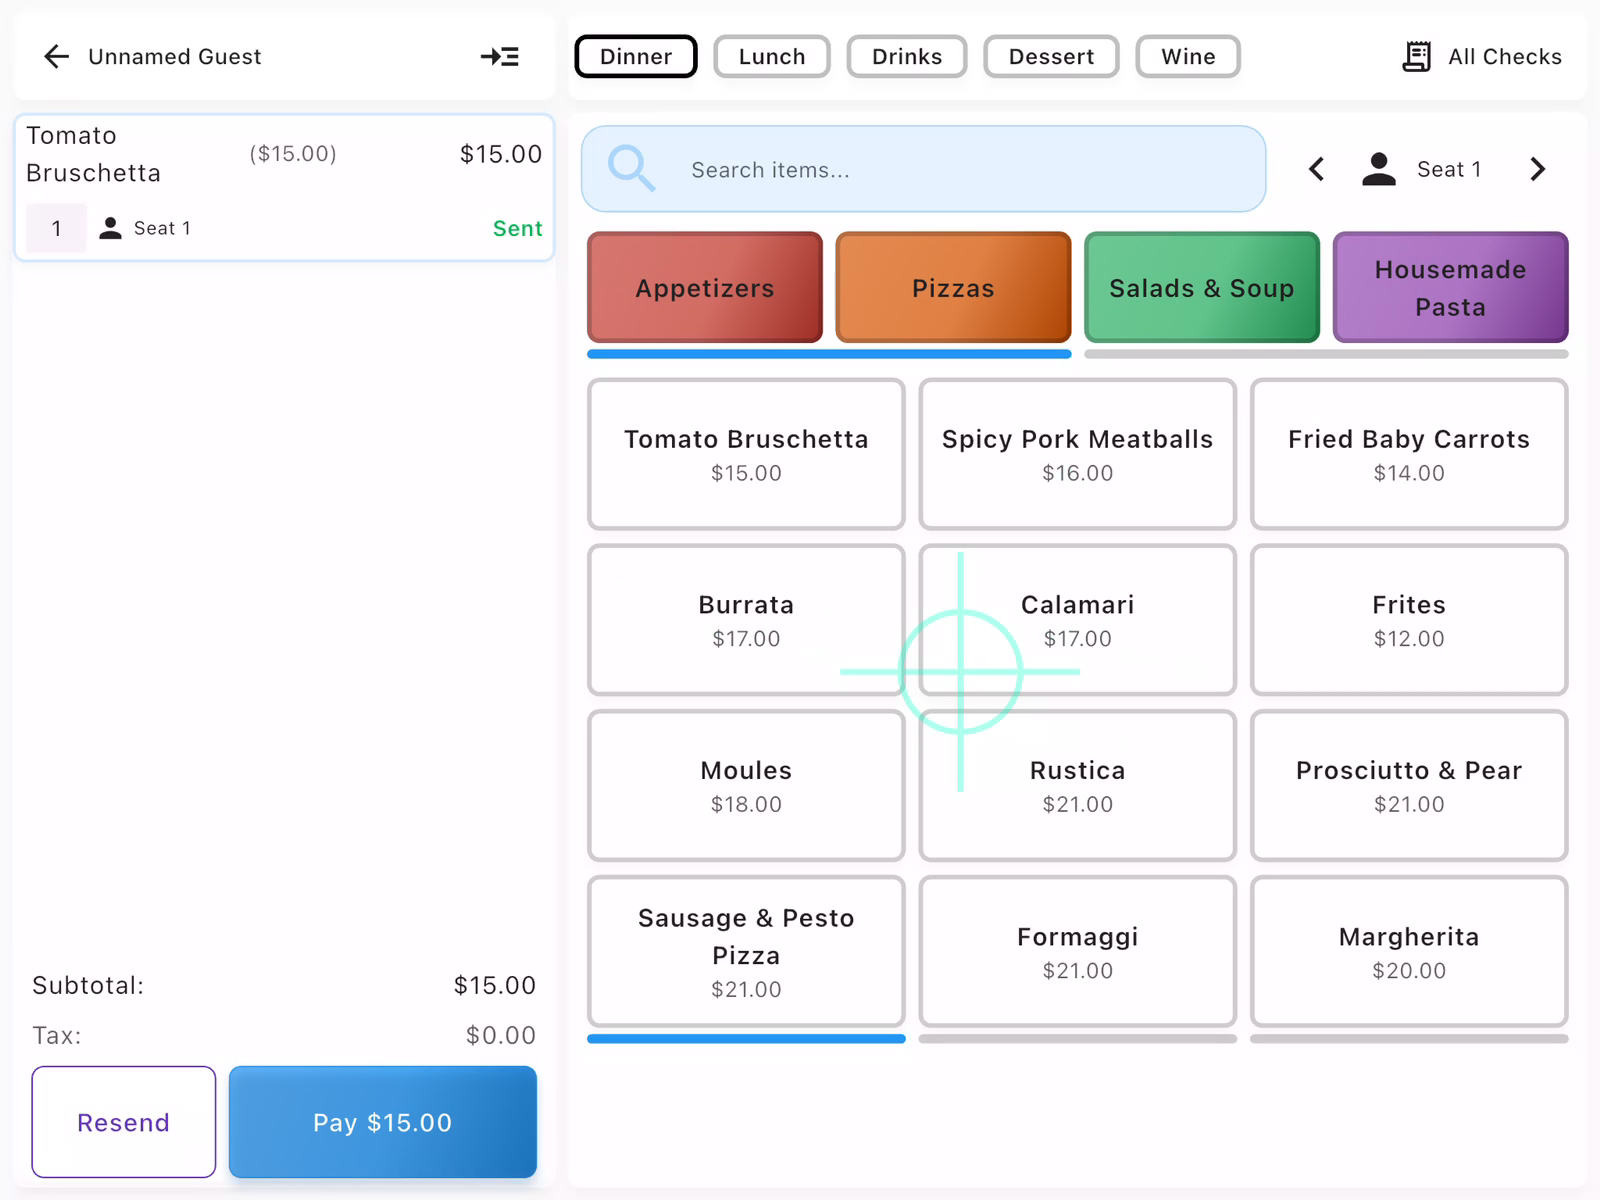
Verify Items Are Sent
After sending, items show a green Sent status instead of "Held". This confirms the kitchen has received the order. You can continue adding more items and send them in batches as needed.
Splitting Checks
When guests want to pay separately, split the check so each person can pay for their own items.
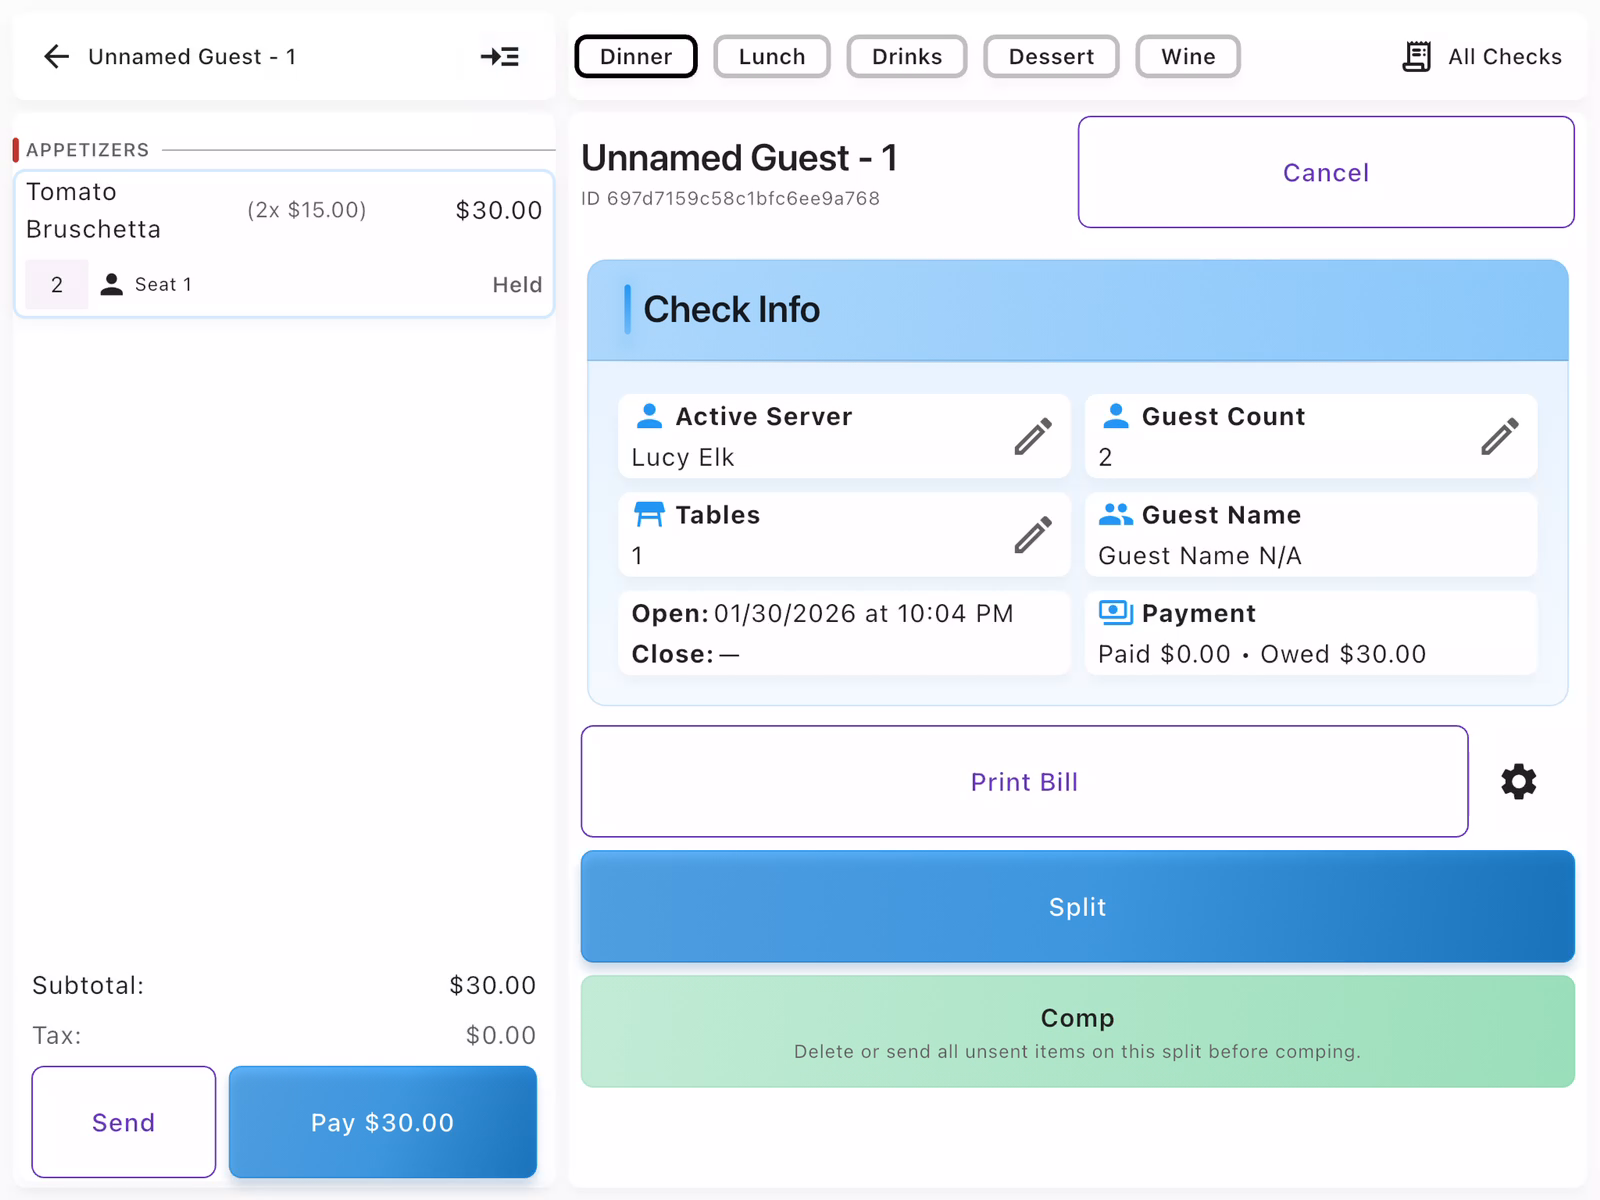
Tap Split
From the check detail view, tap the Split button in the right panel.
View Split Options
The split options screen opens where you can choose how to divide the check.
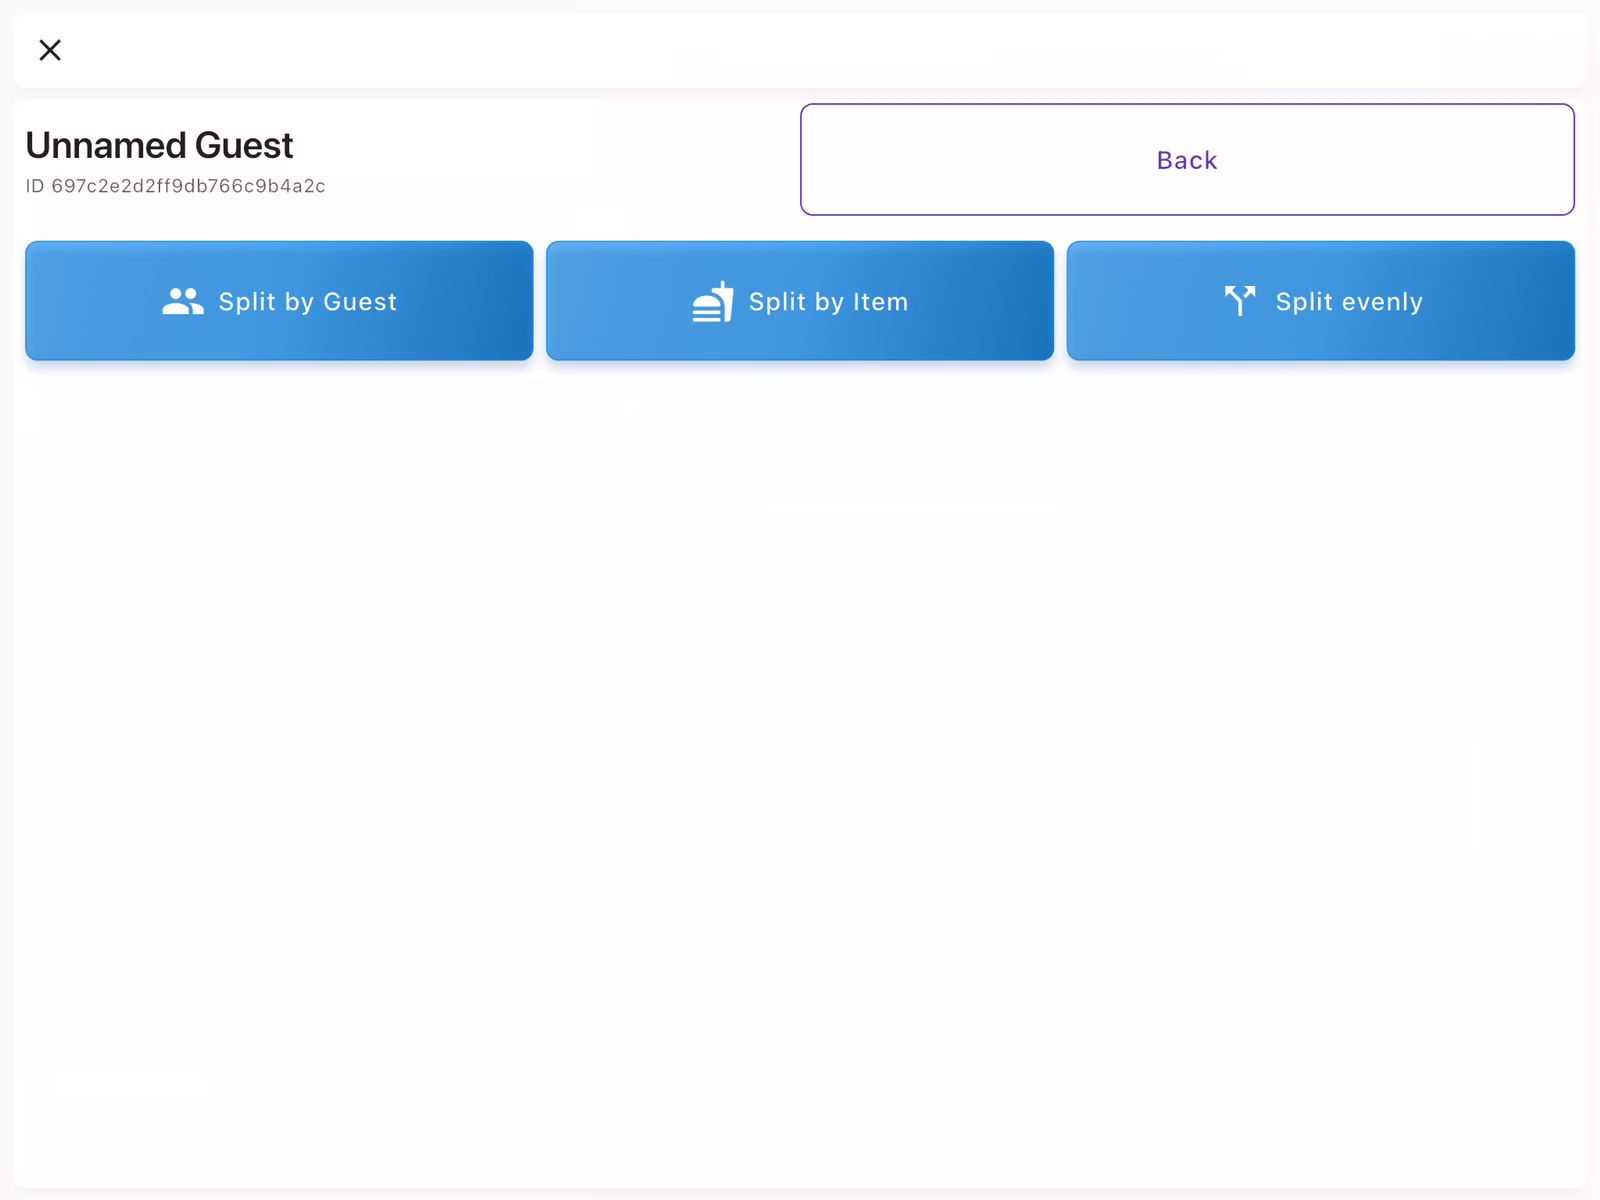
Choose Split Method
Select how you want to split the check:
- Split by Guest: Automatically divides items based on seat assignments
- Split by Item: Manually select which items go on each split
- Split evenly: Divide the total equally among guests
For parties where each guest ordered separately, Split by Guest is the fastest option.
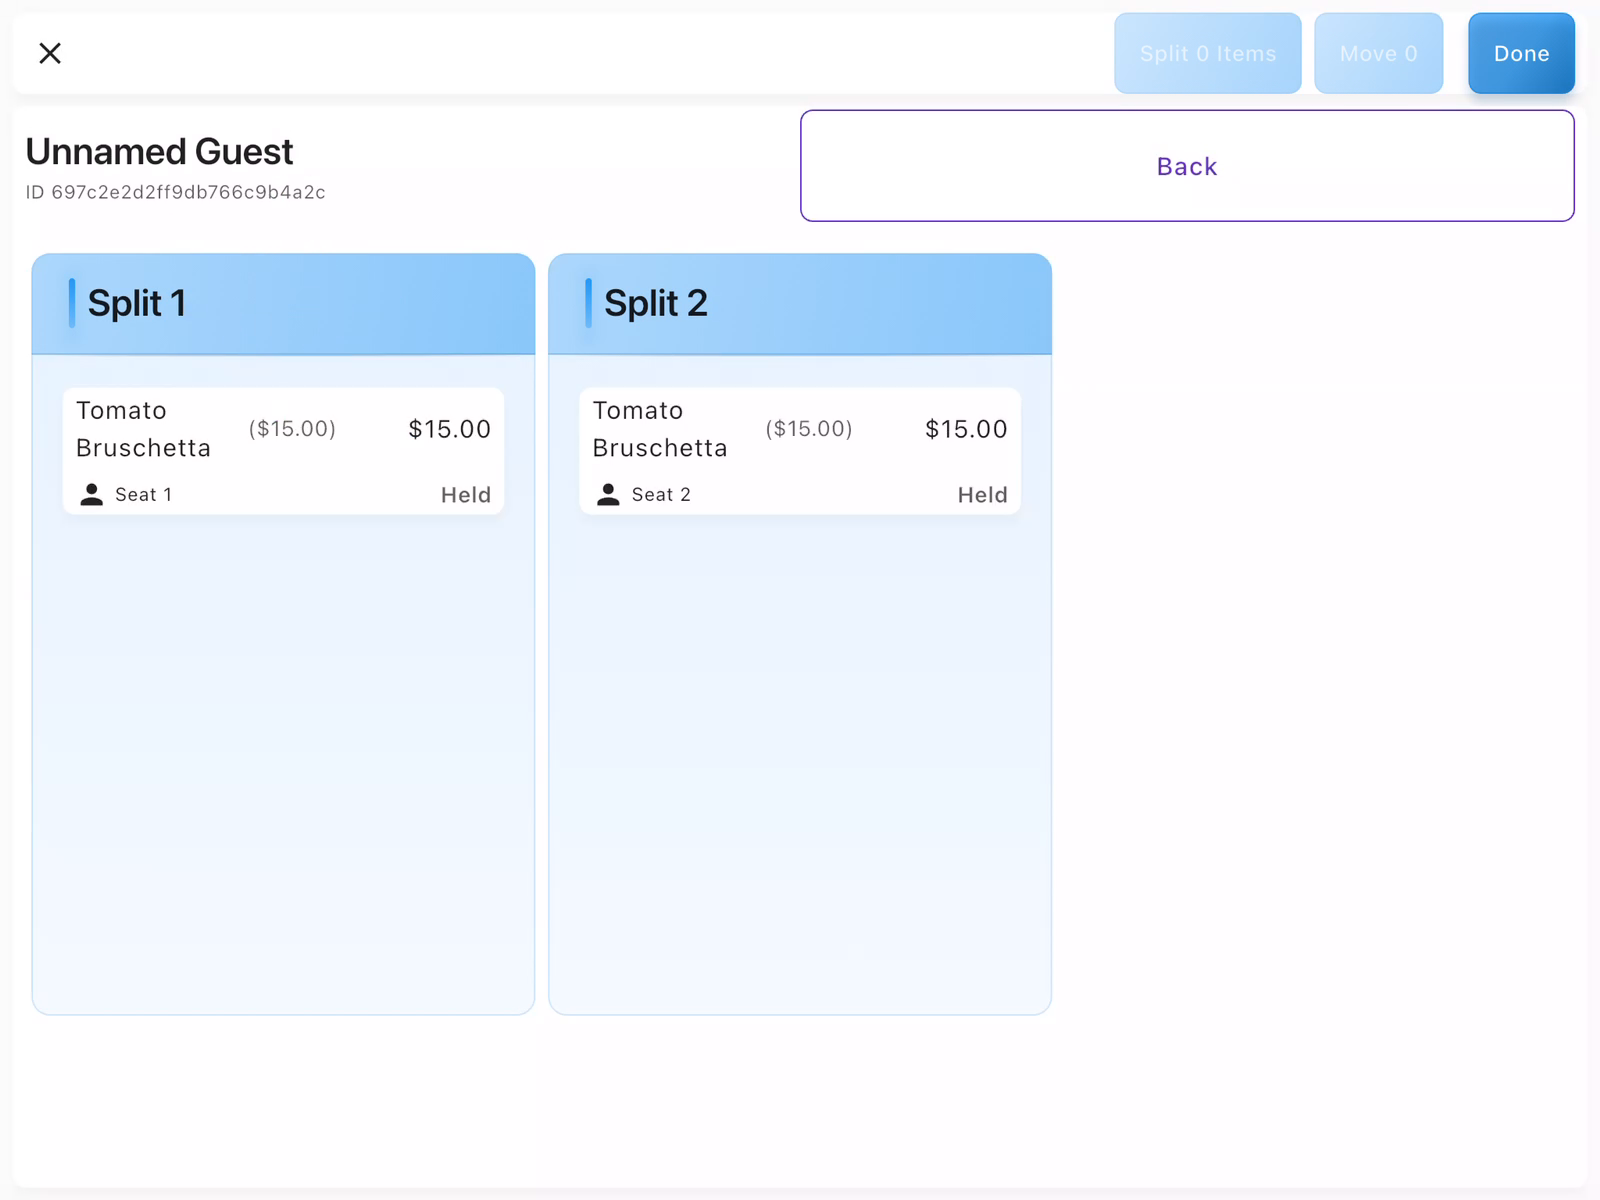
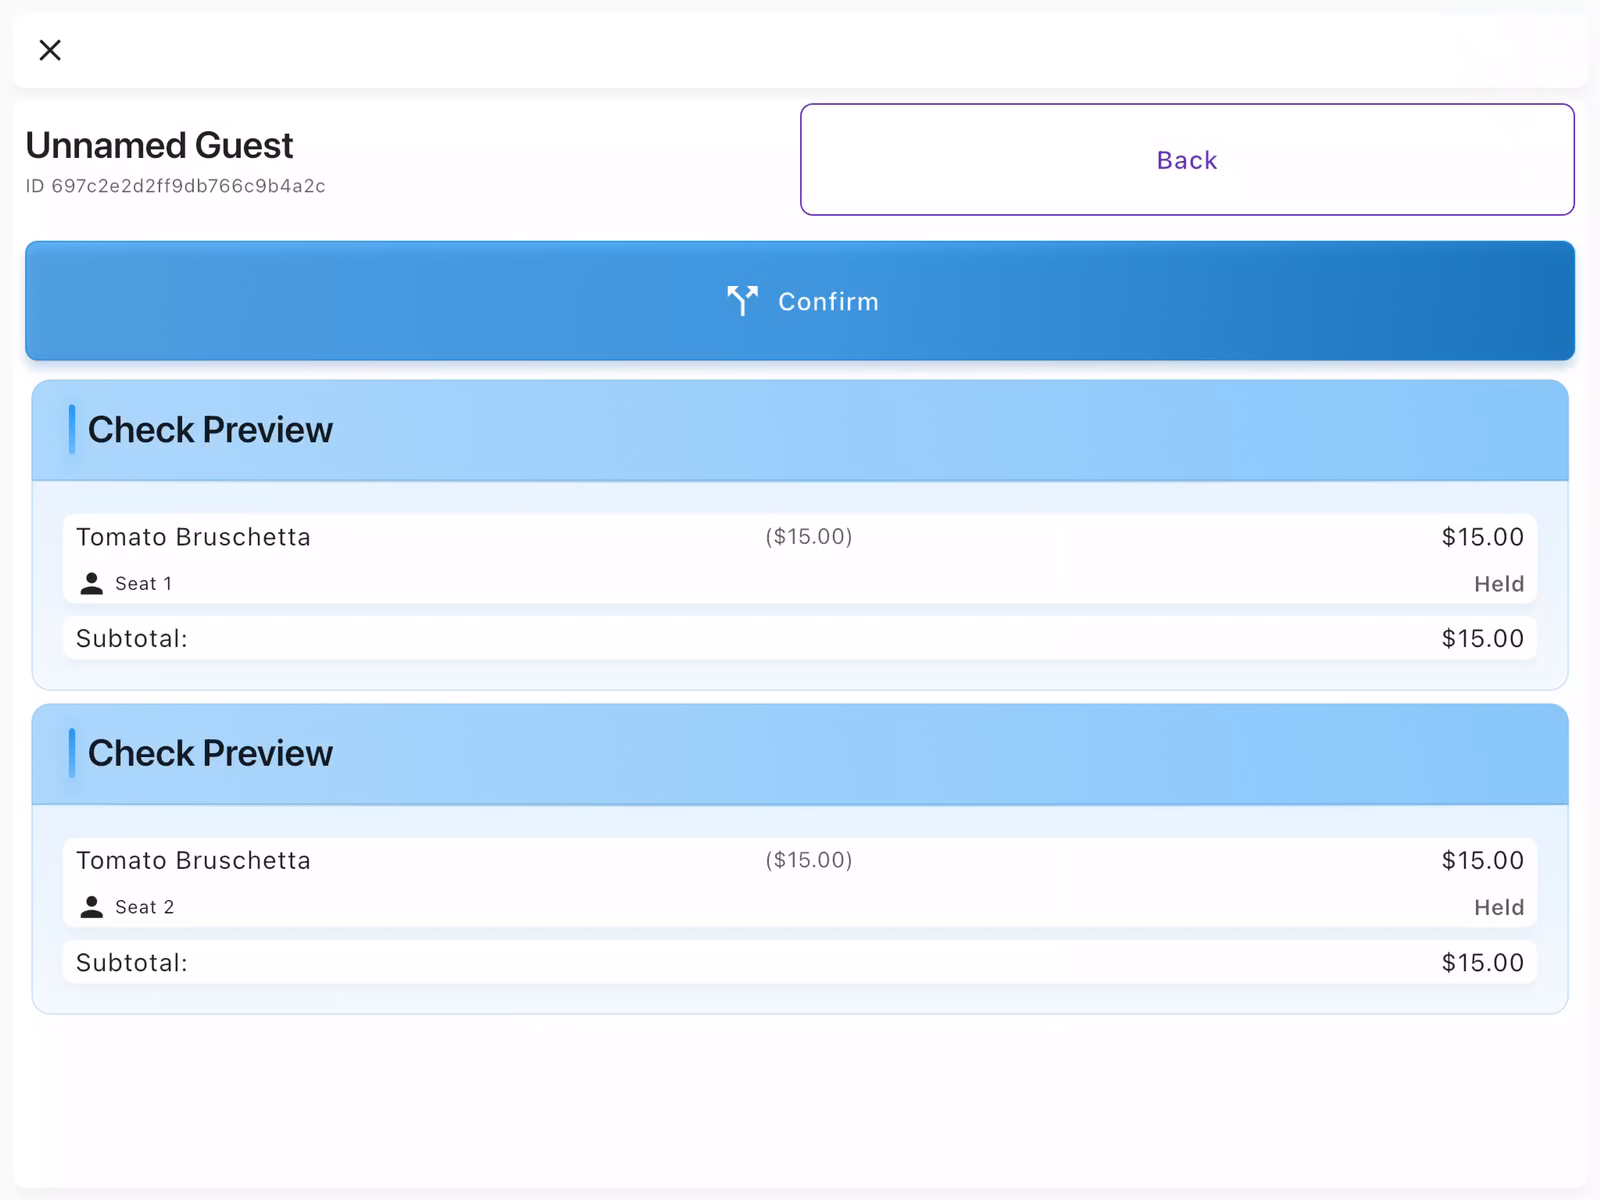
Review the Splits
Before confirming, review the split preview showing each guest's items and subtotal. You can see:
- Items assigned to each split
- Subtotal for each split
- Seat assignments
Tap Confirm to create the splits.
Pay Each Split
After splitting, the check shows tabs for All, Split 1, Split 2, etc. Select each split tab to view and process payment for that guest. Each split can be paid separately with different payment methods.

- Assign items to seats when ordering to make splitting faster later
- Each split closes independently when paid
Comping Items
Use comps when you need to discount or remove the charge for an item due to service issues, mistakes, or VIP treatment.
Select Item to Comp
Tap on the item in the check that needs to be comped. This opens the item detail view showing:
- Item history (when added, when sent)
- Resend: Re-send to kitchen
- Void: Remove item entirely
- Comp: Apply a discount
Tap Comp to proceed with the comp.

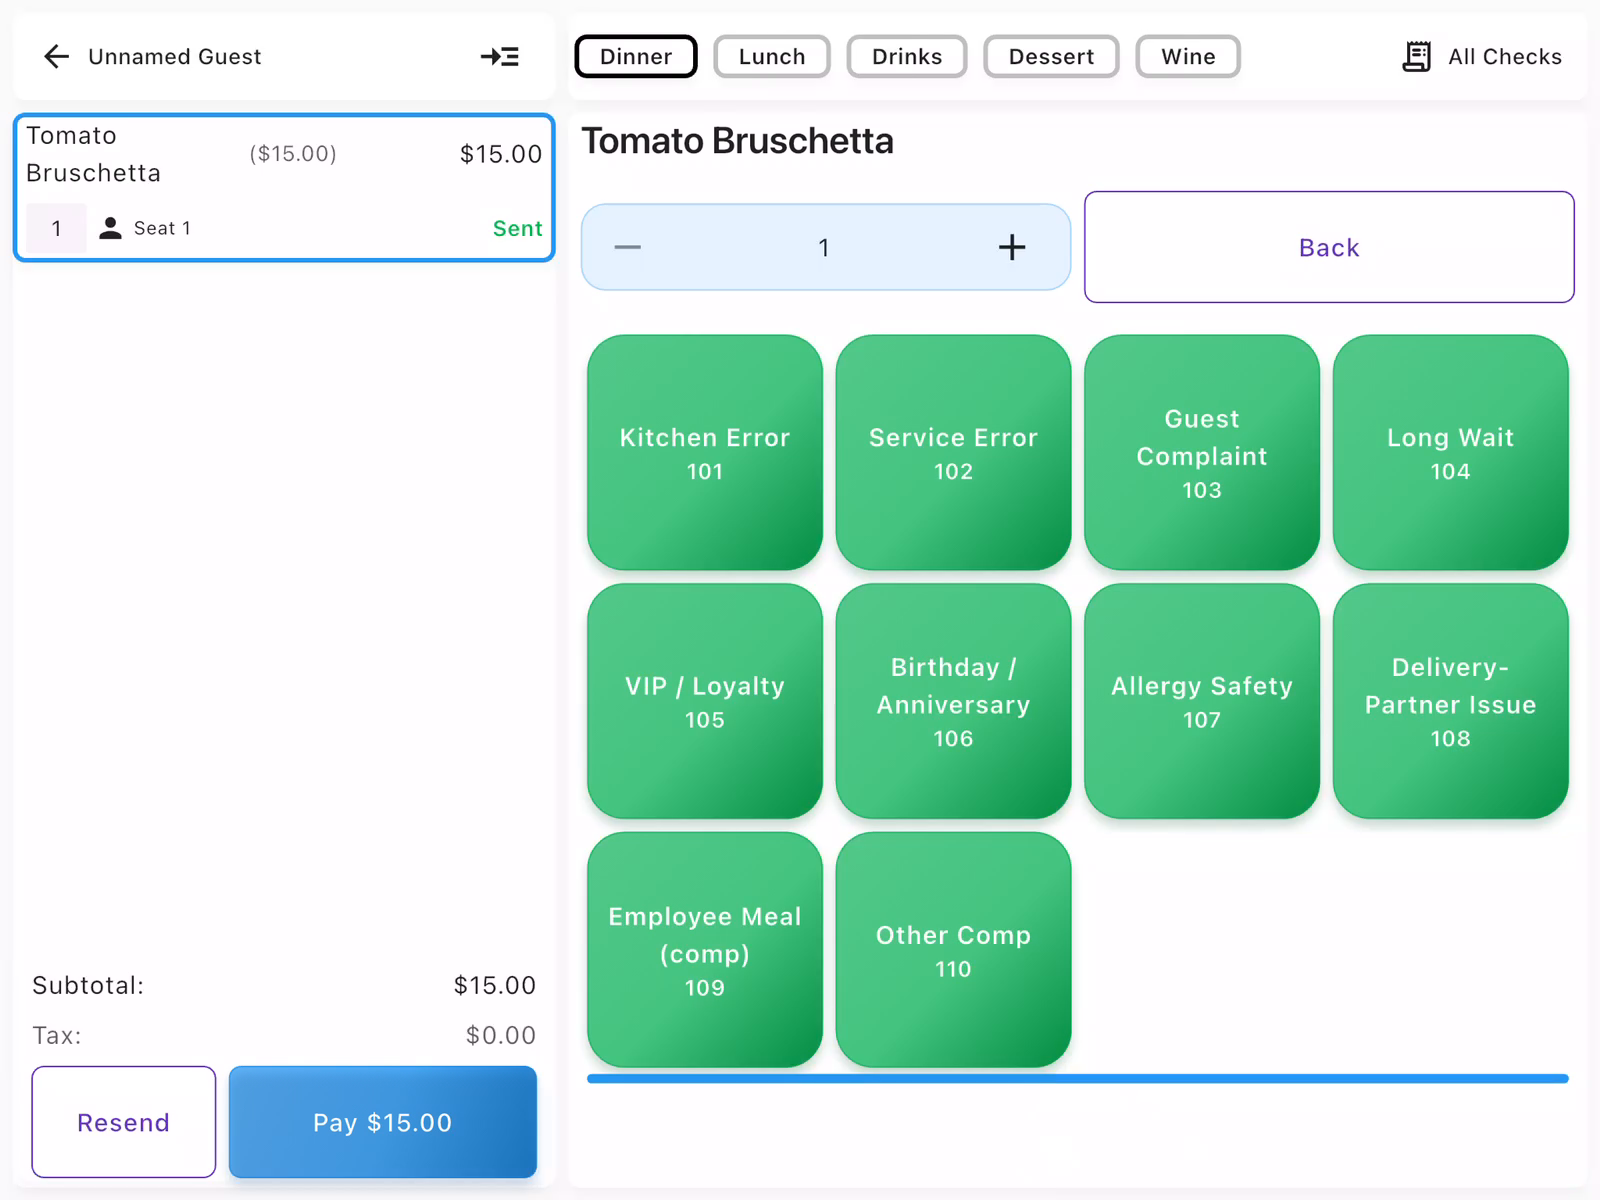
Choose Comp Reason
Select the reason for the comp from the available options:
- Kitchen Error: Issue with food preparation
- Service Error: Service-related problems
- Guest Complaint: Customer satisfaction issue
- VIP / Loyalty: Courtesy for special guests
- Employee Meal: Staff discount
Each reason has a code for tracking and reporting purposes.
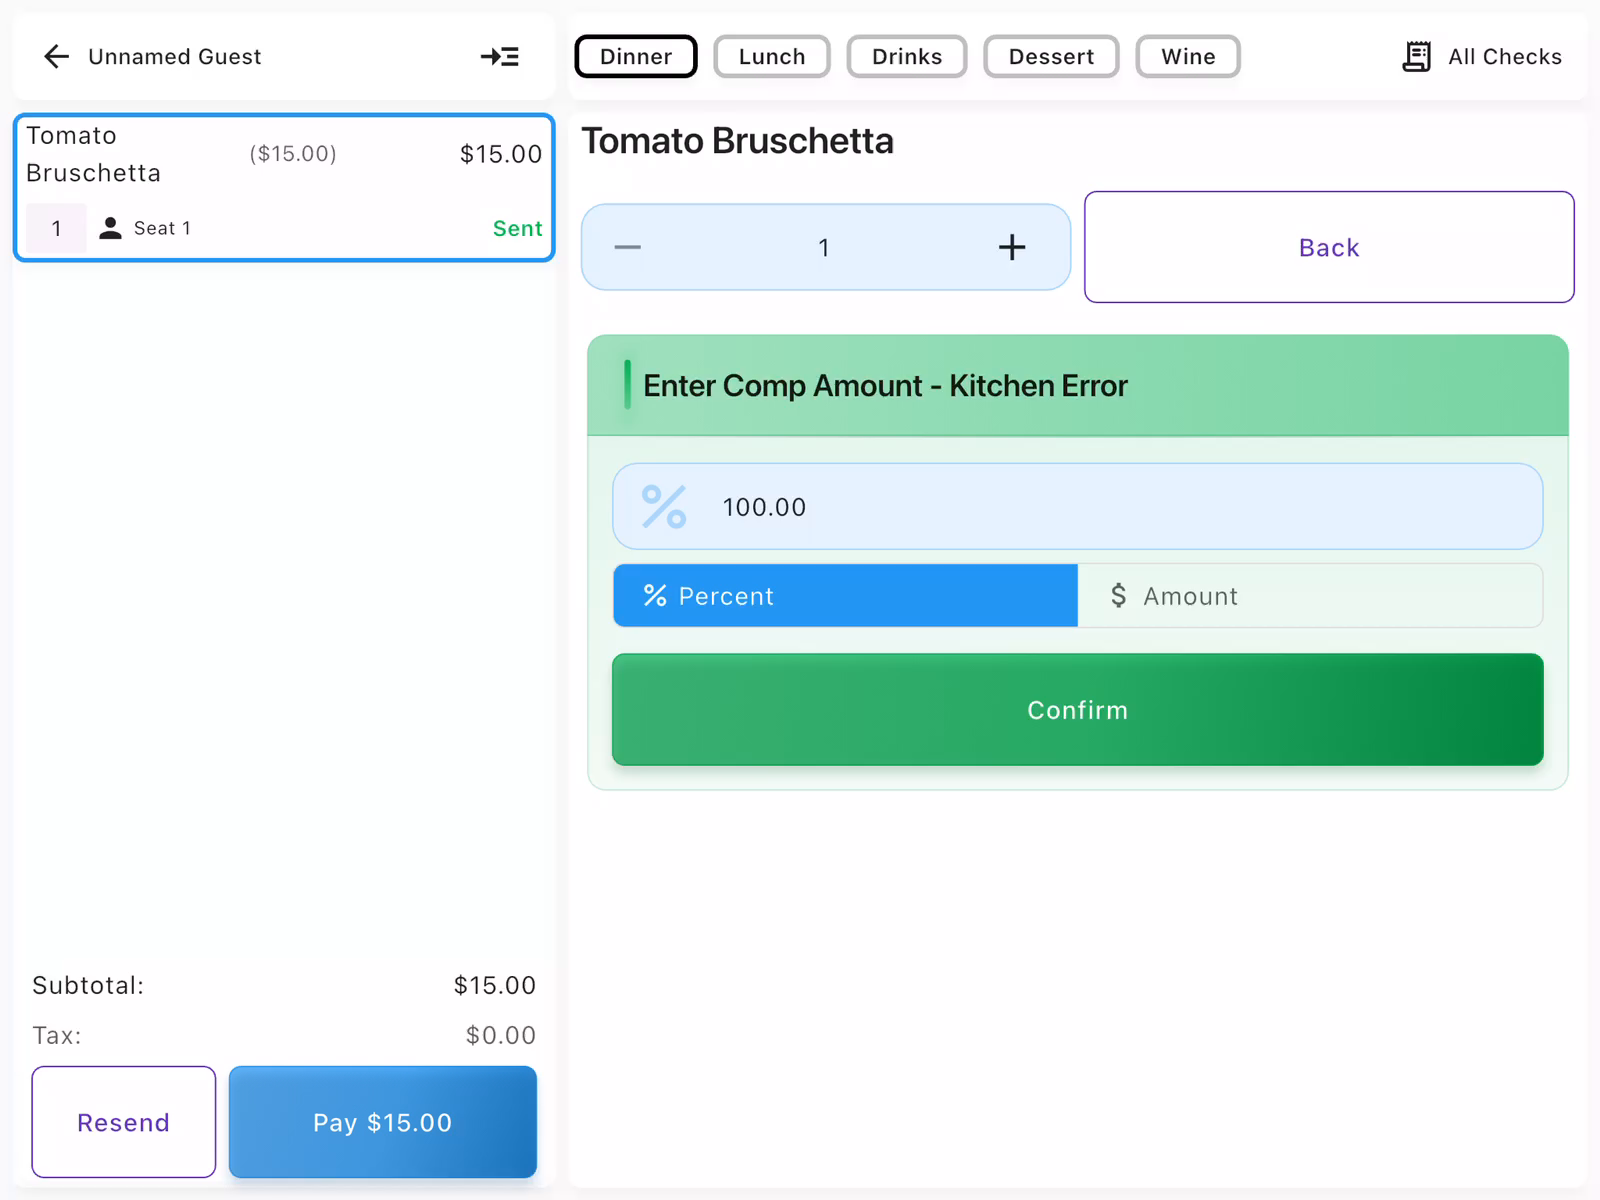
Enter Comp Amount
Specify the comp amount using either:
- % Percent: Enter a percentage (e.g., 50% or 100%)
- $ Amount: Enter a specific dollar amount
For a full comp, enter 100%. Tap Confirm to apply the comp.
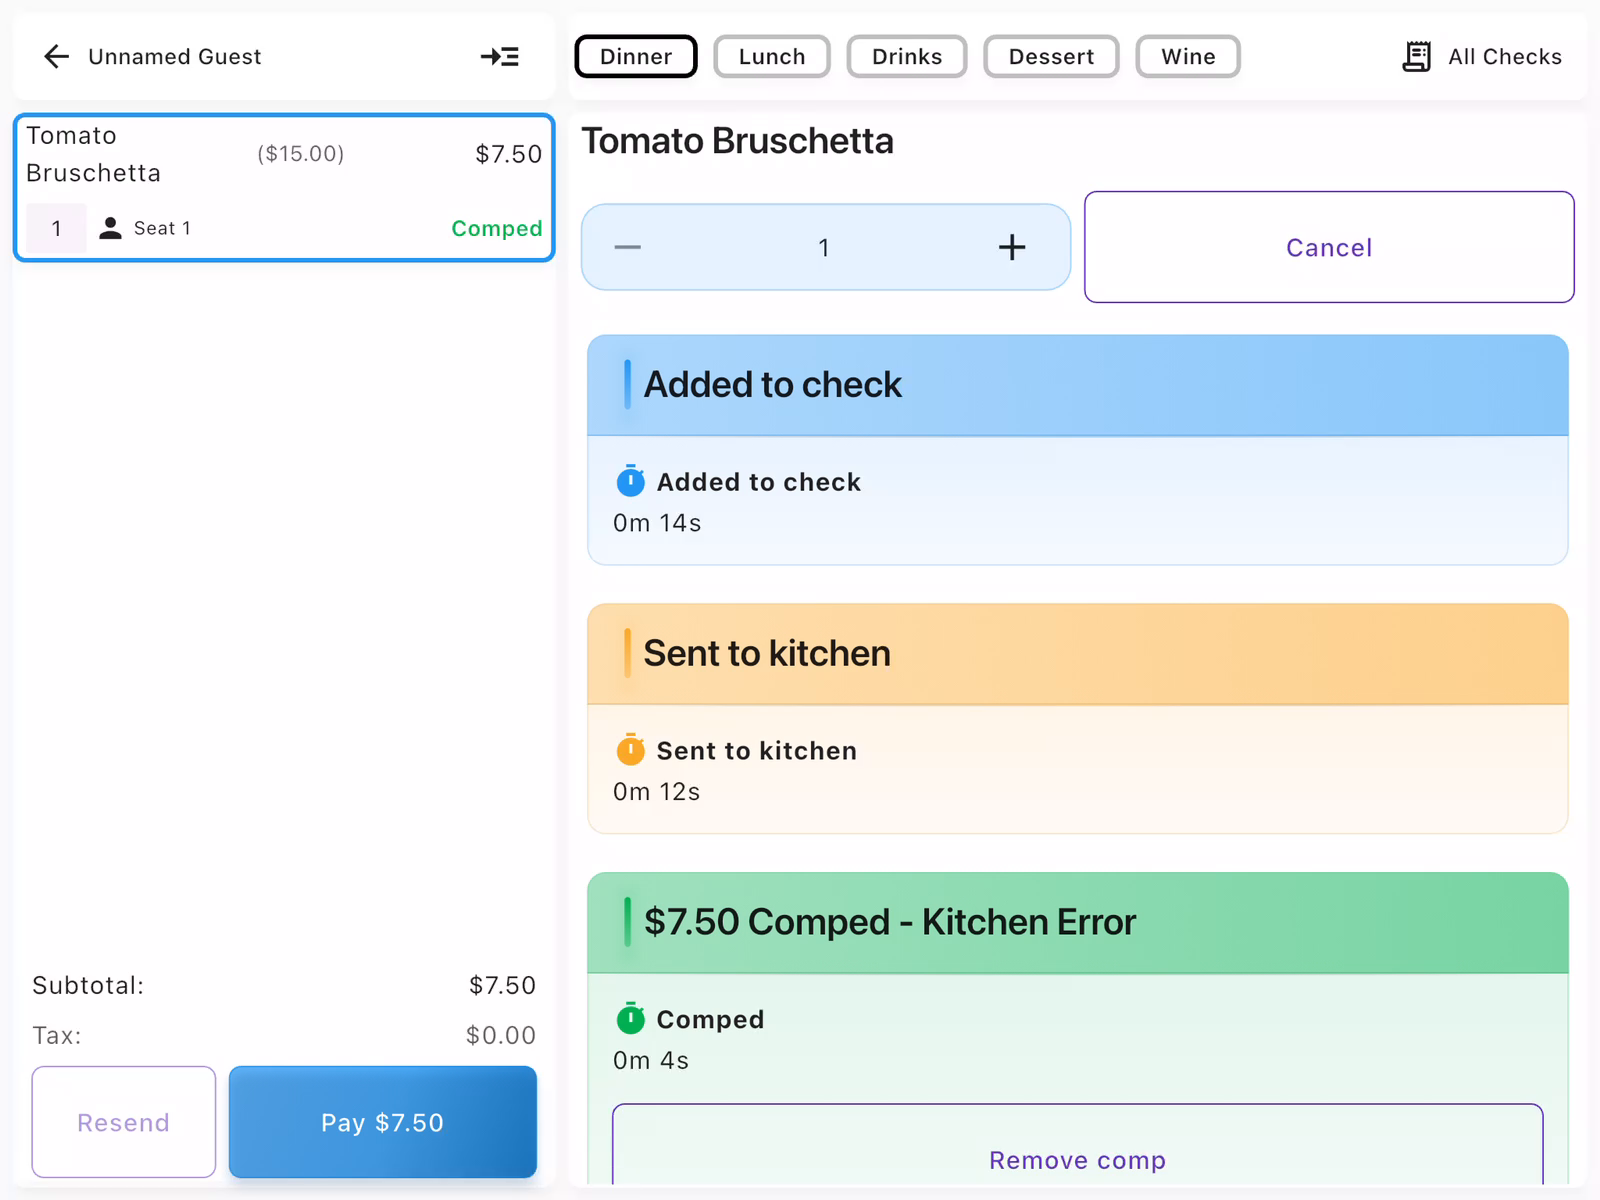
Verify the Comp
After applying the comp, the item shows:
- Comped status in purple
- Original price with discount applied
- Comp reason and amount in the item history
The check subtotal updates automatically to reflect the discount.
- Comps may require manager approval depending on your restaurant's settings
- You can remove a comp by tapping the item and selecting Remove comp
- All comps are tracked for reporting and accountability
Voiding Items
Use voids when an item needs to be completely removed from a check, such as when an order was entered incorrectly or a guest changes their mind before the food is prepared.
Select Item to Void
Tap on the item in the check that needs to be voided. This opens the item detail view showing:
- Item history (when added, when sent)
- Resend: Re-send to kitchen
- Void: Remove item entirely
- Comp: Apply a discount
Tap Void to proceed with removing the item.

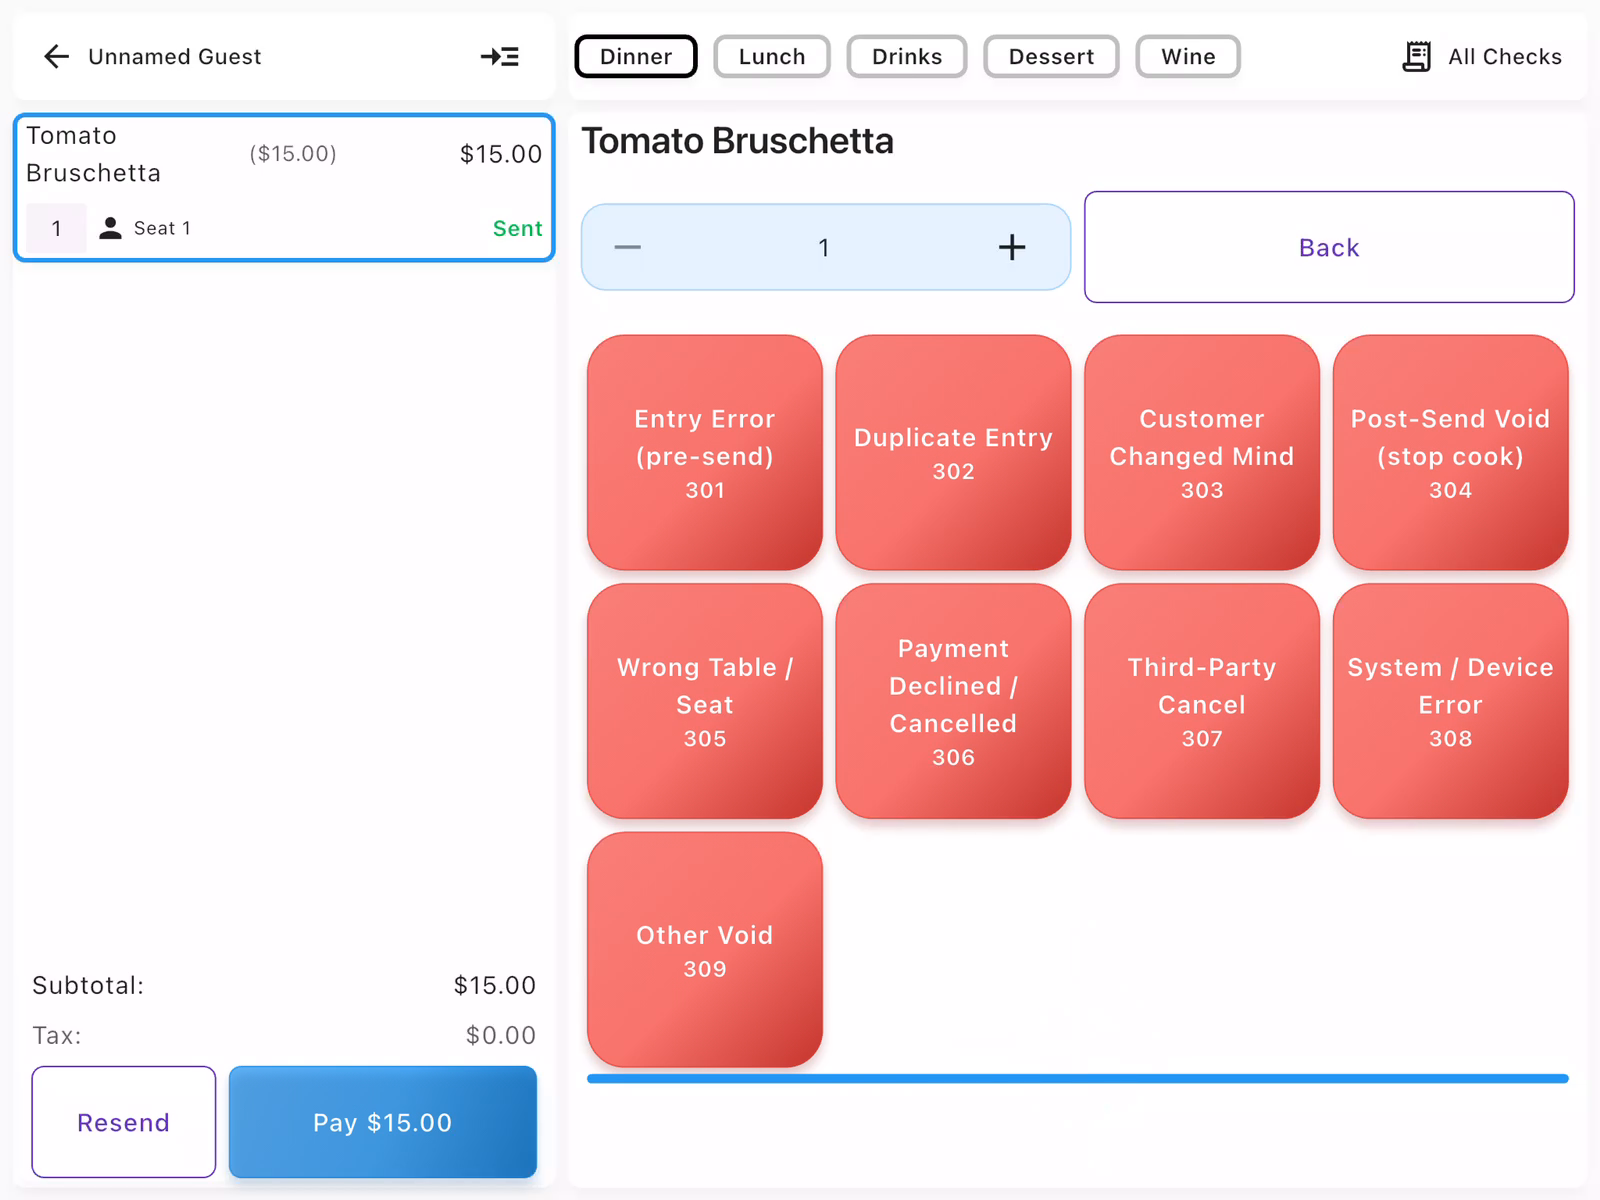
Choose Void Reason
Select the reason for voiding the item from the available options:
- Entry Error (pre-send): Item was entered incorrectly before sending
- Duplicate Entry: Item was added twice by mistake
- Customer Changed Mind: Guest decided against the item
- Post-Send Void (stop cook): Cancel item already sent to kitchen
- Wrong Table / Seat: Item assigned to wrong location
- Payment Declined / Cancelled: Payment issue
- Third-Party Cancel: External order cancellation
- System / Device Error: Technical issue
- Other Void: Other reasons
Each reason has a code for tracking and reporting purposes.
Confirm the Void
A confirmation screen appears showing:
- The selected void reason and code
- A Void button to confirm
Tap Void to complete the action. This may require manager approval depending on your restaurant's settings.

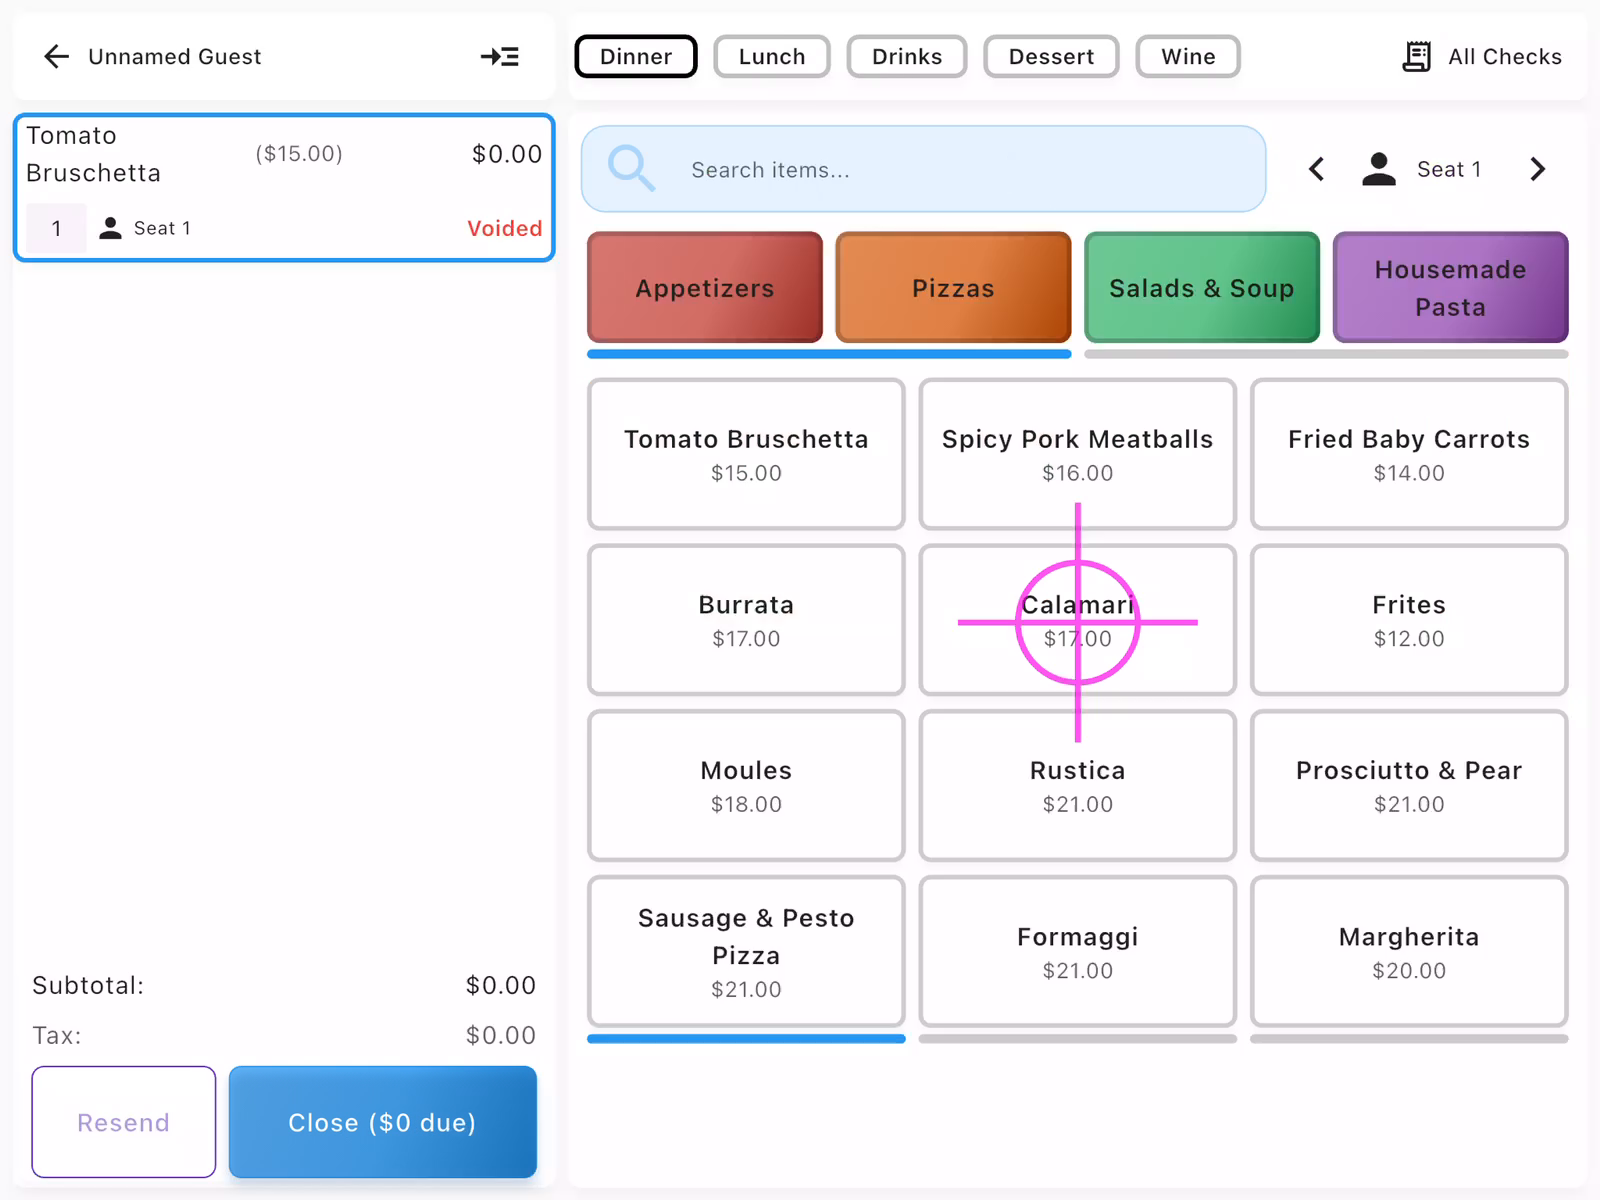
Verify Item Voided
After voiding, the item shows:
- Voided status in red
- Price reduced to $0.00
- Original price shown with strikethrough
The check subtotal updates automatically to reflect the removal. If all items are voided, you can close the check with $0 due.
- Voids may require manager approval depending on your restaurant's settings
- Use Entry Error (pre-send) for items not yet sent to kitchen
- Use Post-Send Void (stop cook) to alert the kitchen to stop preparing the item
- All voids are tracked for reporting and accountability
Transferring Tables
Move a check to a different table when guests relocate or when you need to reassign seating. The server assignment stays the same during a table transfer.
Open Tables Field
From the check detail view, look at the Check Info panel on the right. Find the Tables field and tap the pencil icon next to it. This opens the table selection screen where you can assign or change the table.
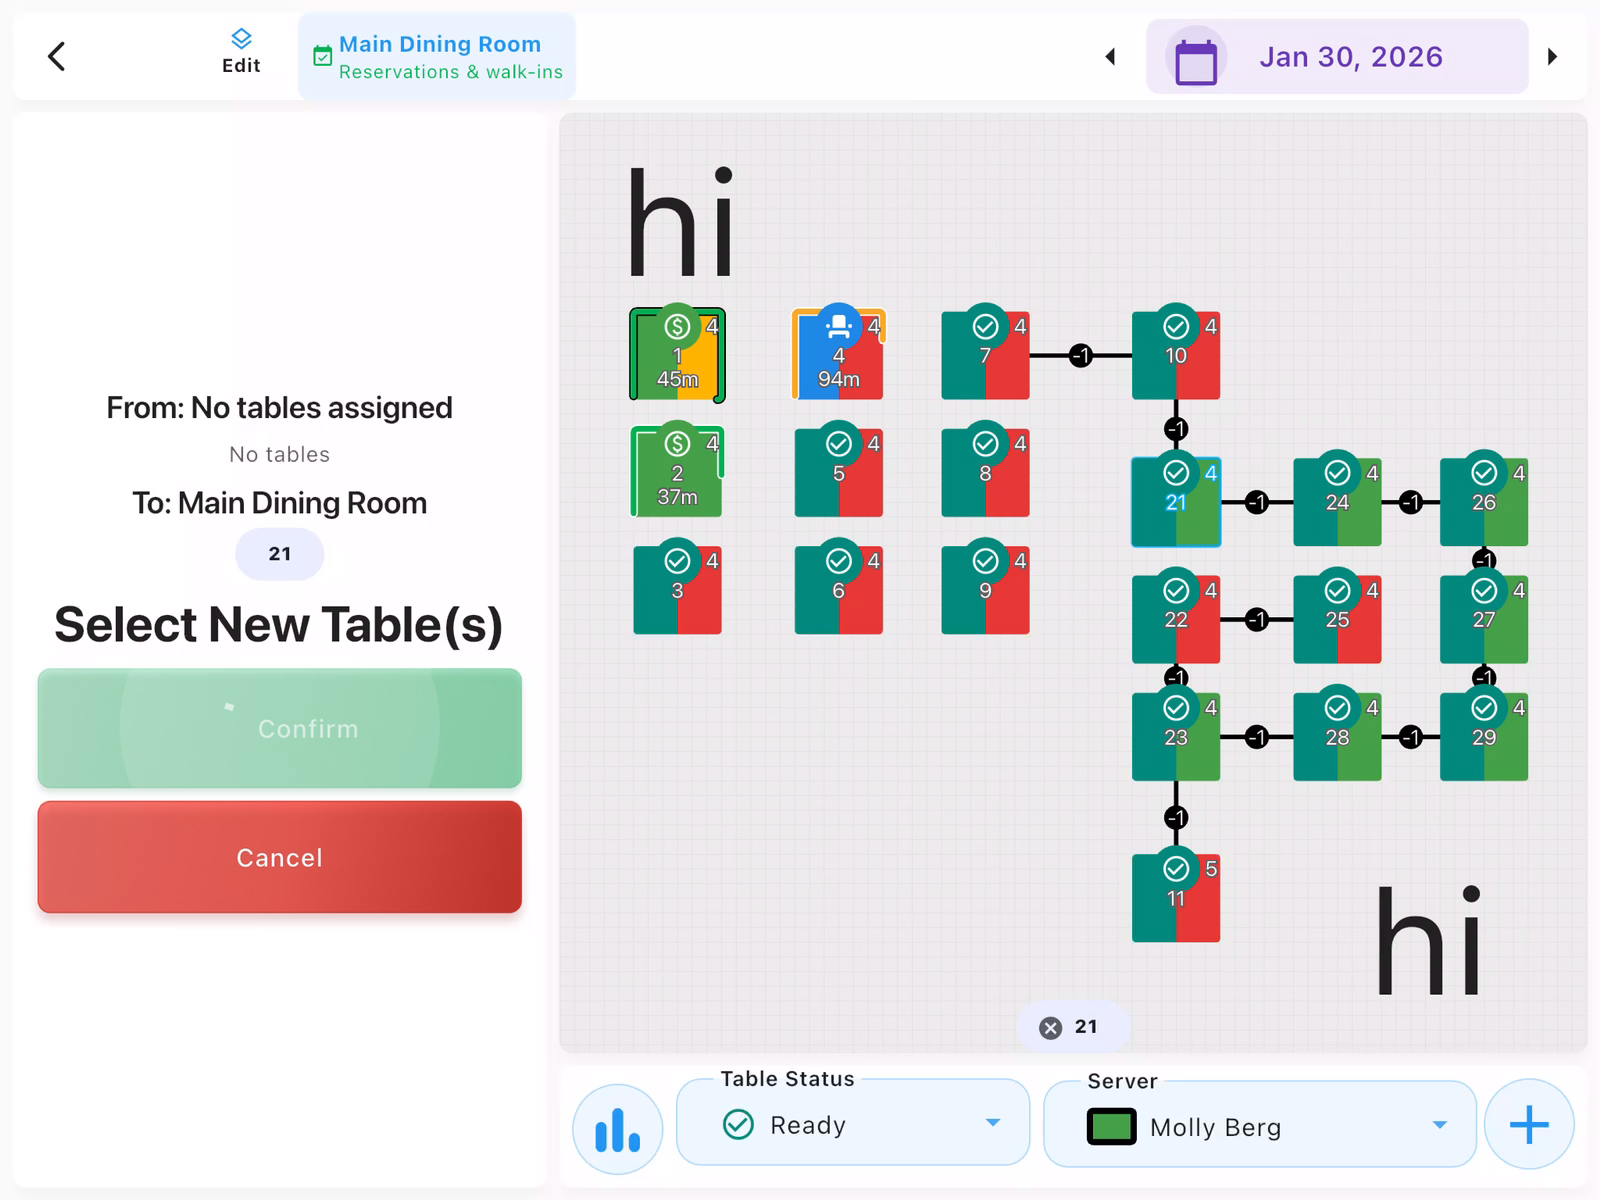
Select New Table
The table selection screen shows the floor plan with available tables. You can:
- Tap a table on the floor plan to select it
- Filter by Table Status (Ready, Occupied, etc.)
- Filter by Server to find tables in a specific section
Select the new table and tap Confirm to complete the transfer.
Verify Table Transfer
After the transfer, the check header updates to show the new table number (e.g., "Unnamed Guest - 21"). The check info panel also reflects the new table assignment. The server remains unchanged, ensuring continuity of service.

- Table transfers preserve the current server assignment
- Use table transfer when guests move to a different seat in the restaurant
- To change the server, use the Active Server field in Check Info instead
Changing Server
Transfer a check to a different server when sections change or shifts end.
Open Check Info
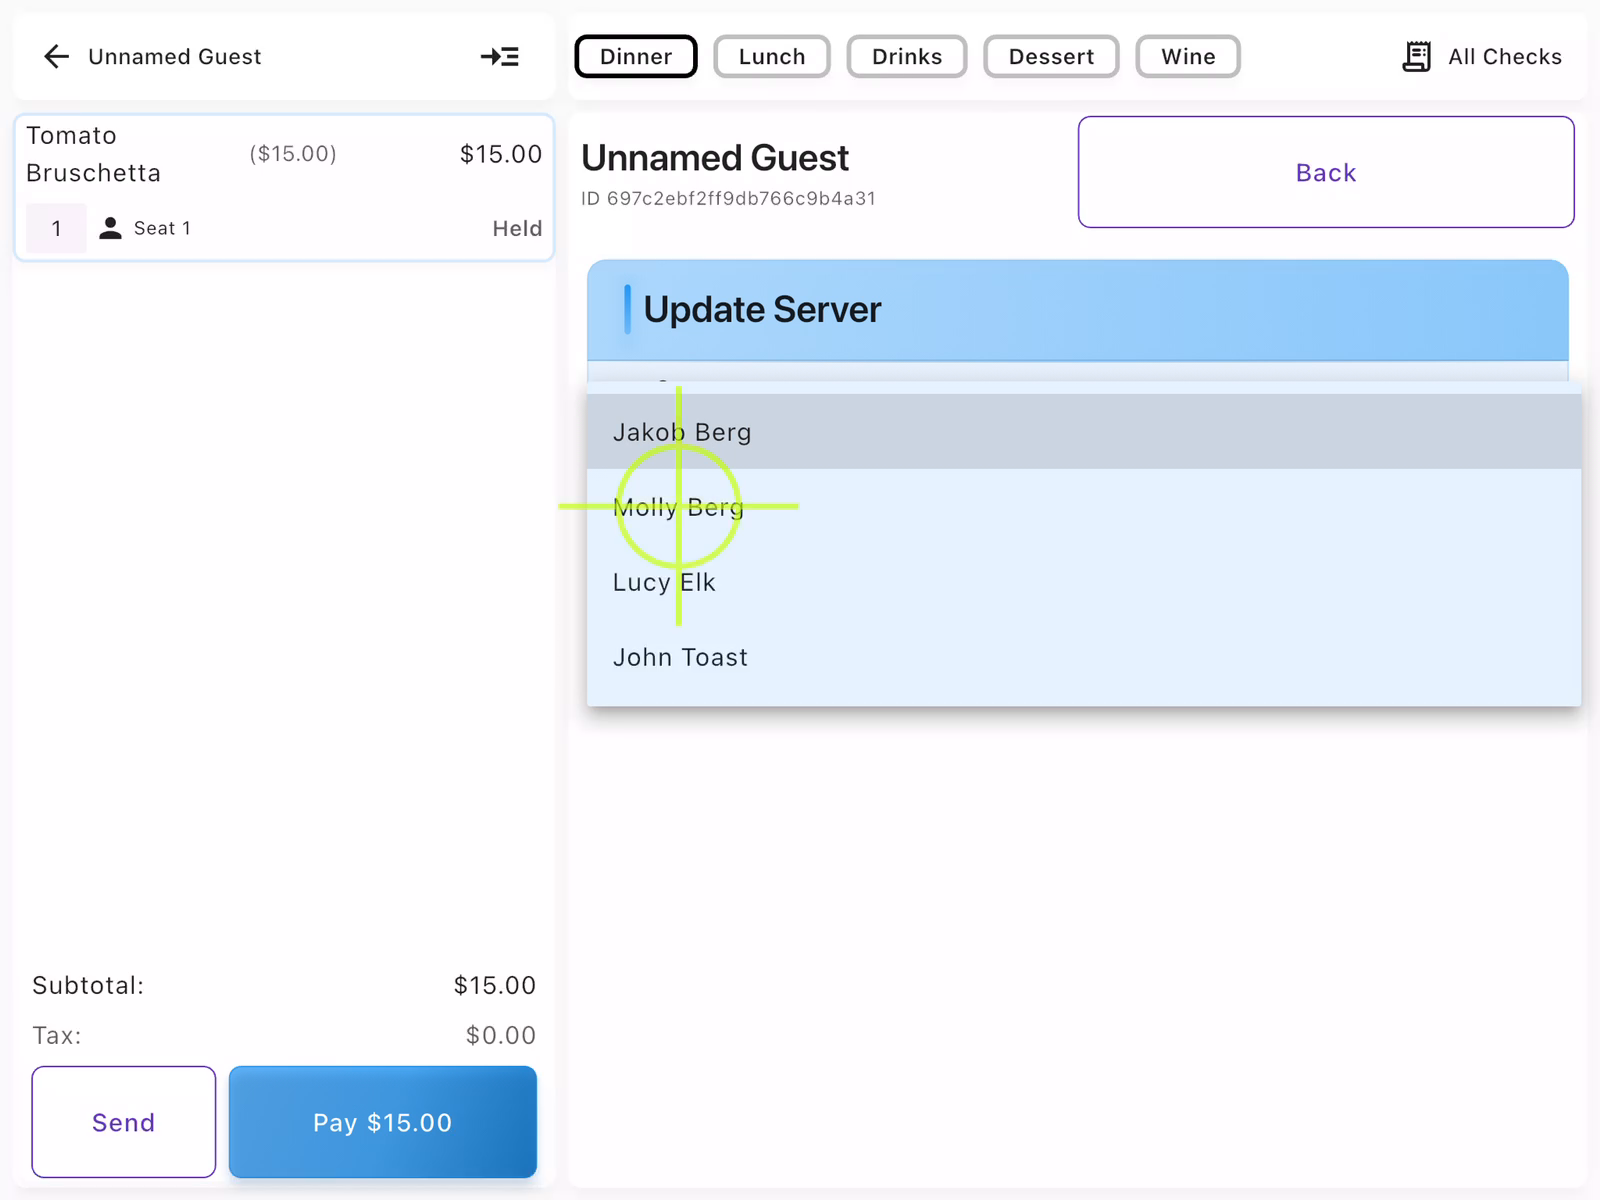
From the check detail view, tap the pencil icon next to Active Server in the Check Info panel. This opens the server selection screen.
Select New Server
A list of available servers appears. Tap the name of the server who should take over the check. The check is immediately transferred and will appear in the new server's list.
- Only servers currently clocked in appear in the list
- The original server can still view the check in their history
- Tips follow the check to the new server
Paying with Cash
When the guest is ready to pay with cash, process their payment to close the check.
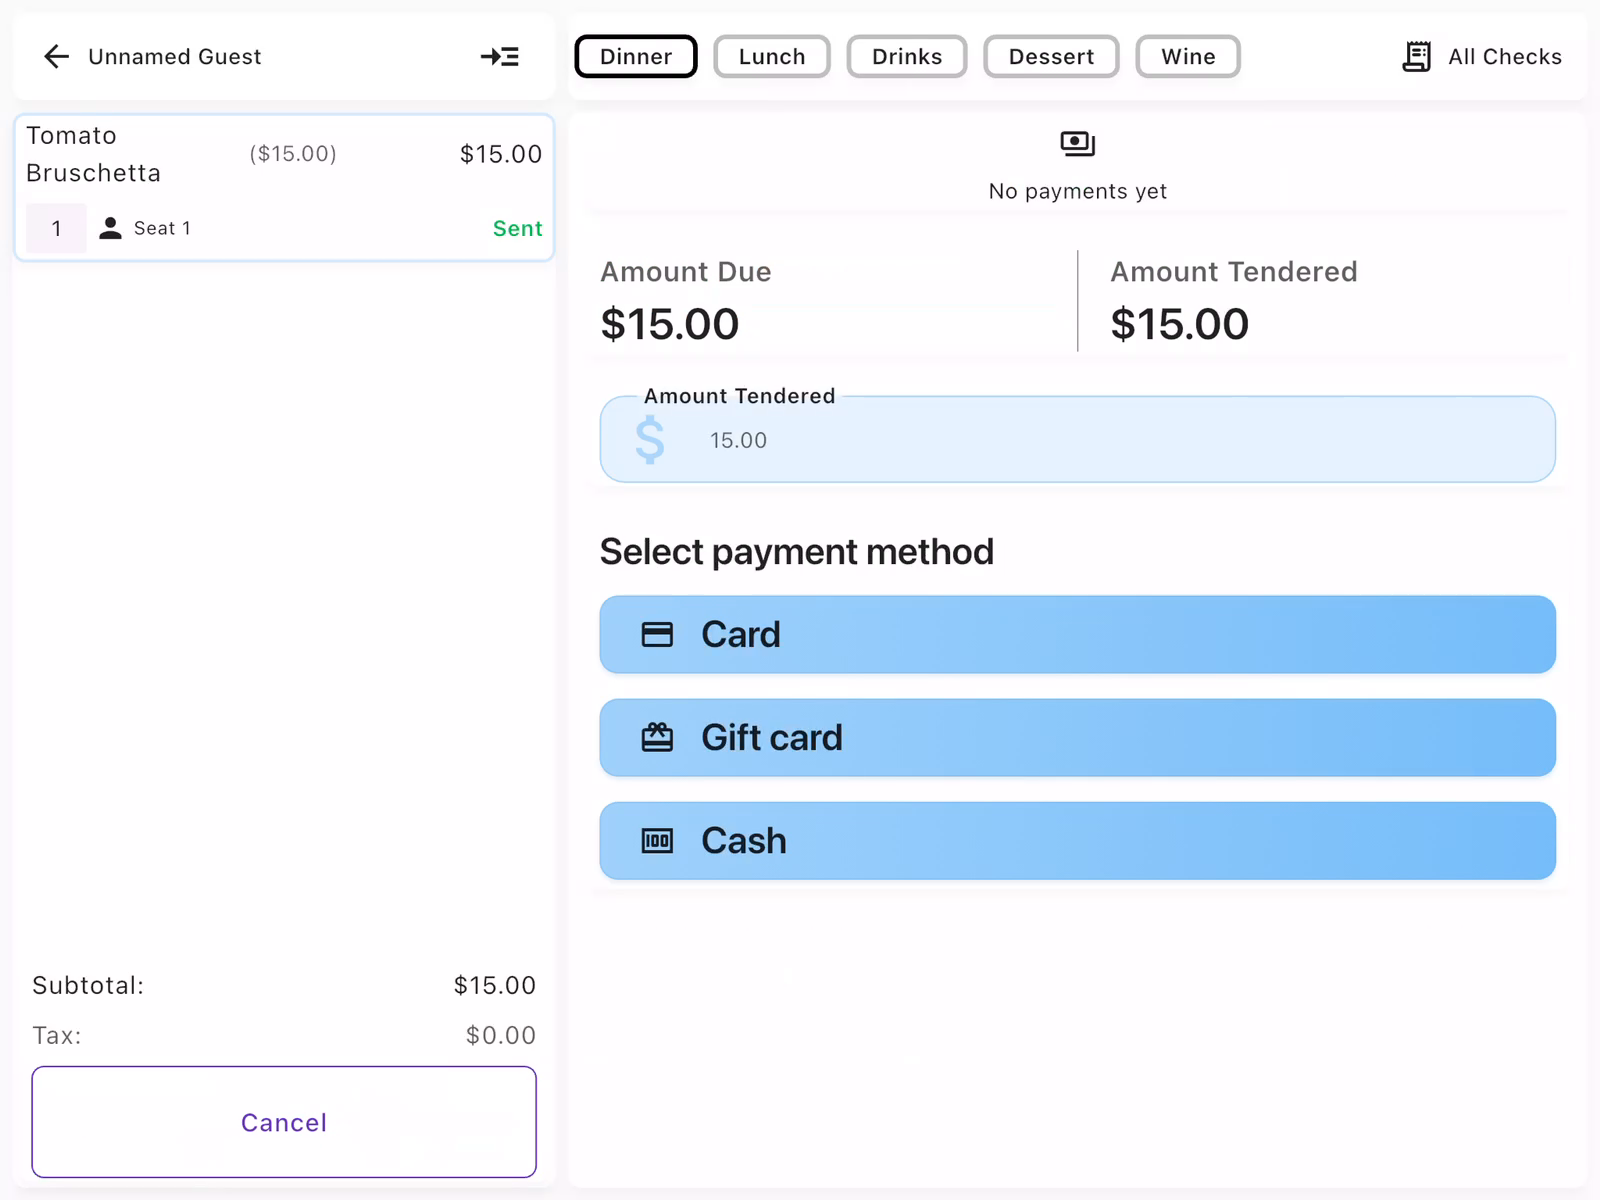
Open Payment Options
Tap Pay $XX.XX to open payment options. Available payment methods:
- Card: Credit/debit card via terminal
- Gift card: Redeem gift card balance
- Cash: Accept cash payment
The Amount Due and Amount Tendered are shown at the top. Adjust the tendered amount if the guest provides a different amount.
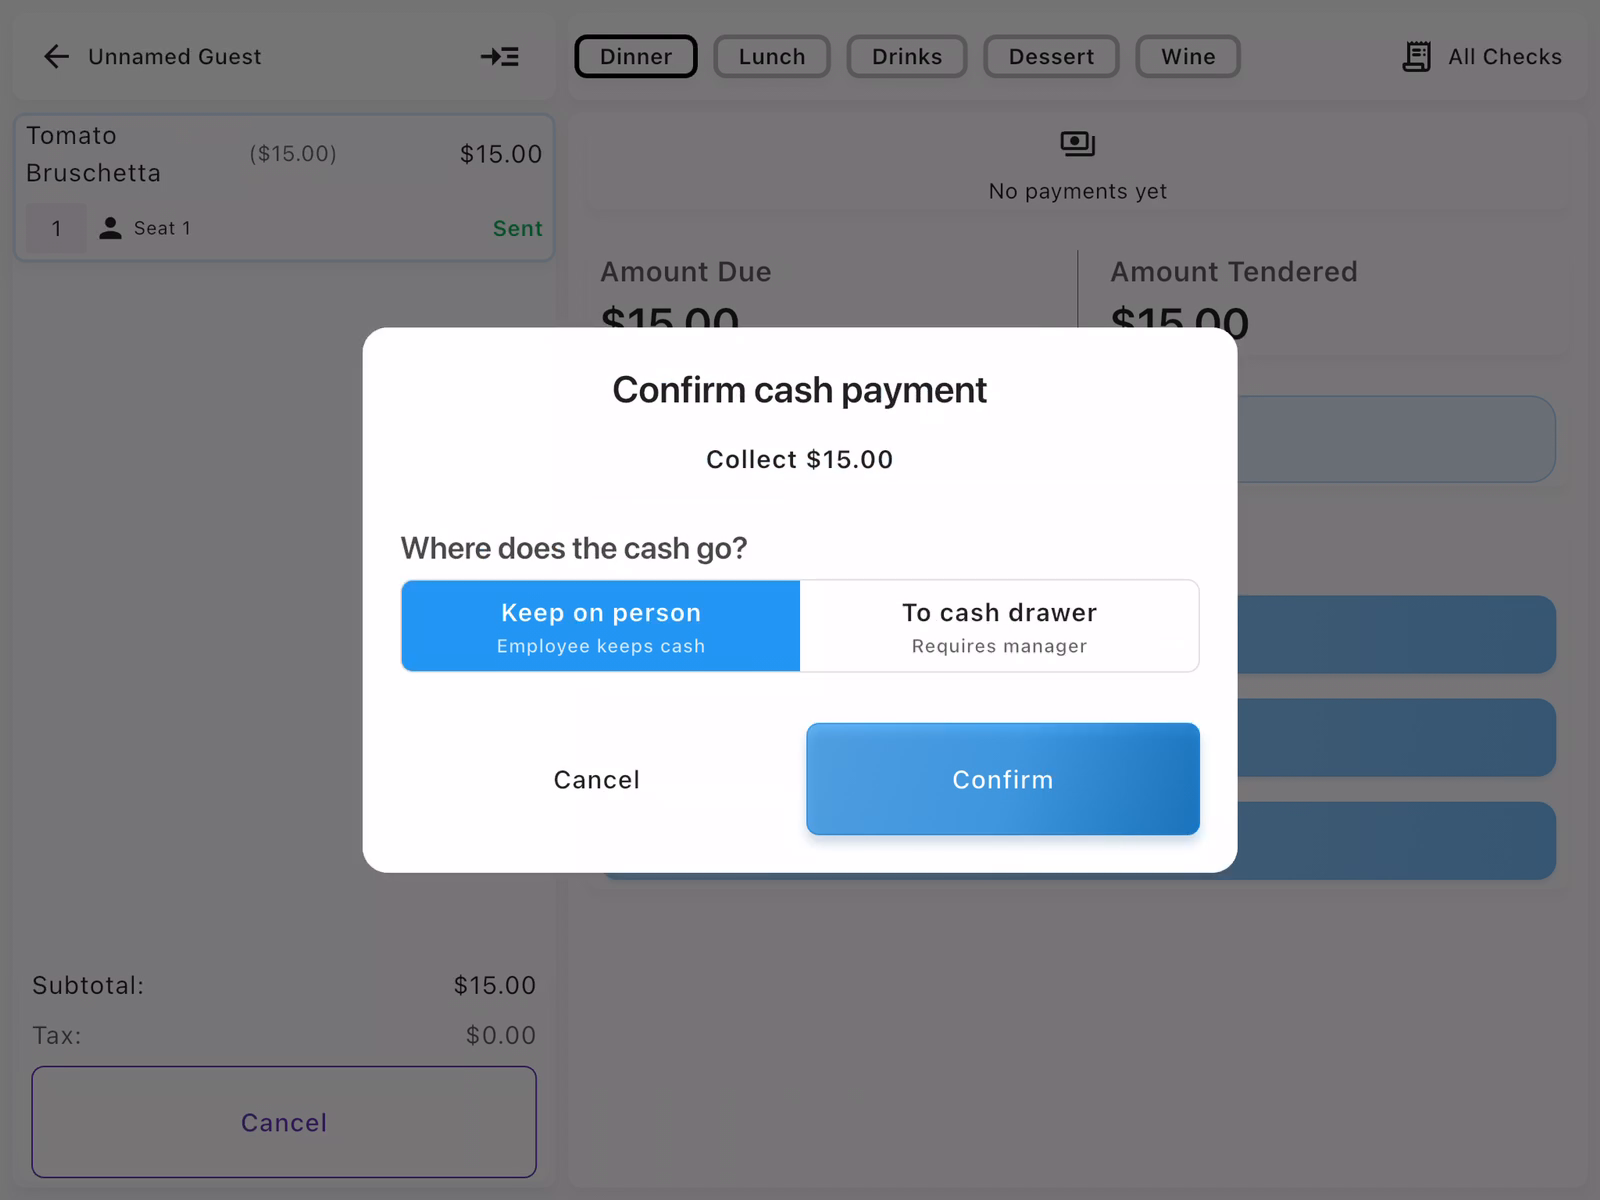
Handle Cash Payment
When accepting cash, you'll be prompted to specify where the cash goes:
- Keep on person: Employee holds the cash (no drawer access needed)
- To cash drawer: Deposit into assigned cash drawer (may require manager approval)
Select the appropriate option and tap Confirm to complete the transaction.
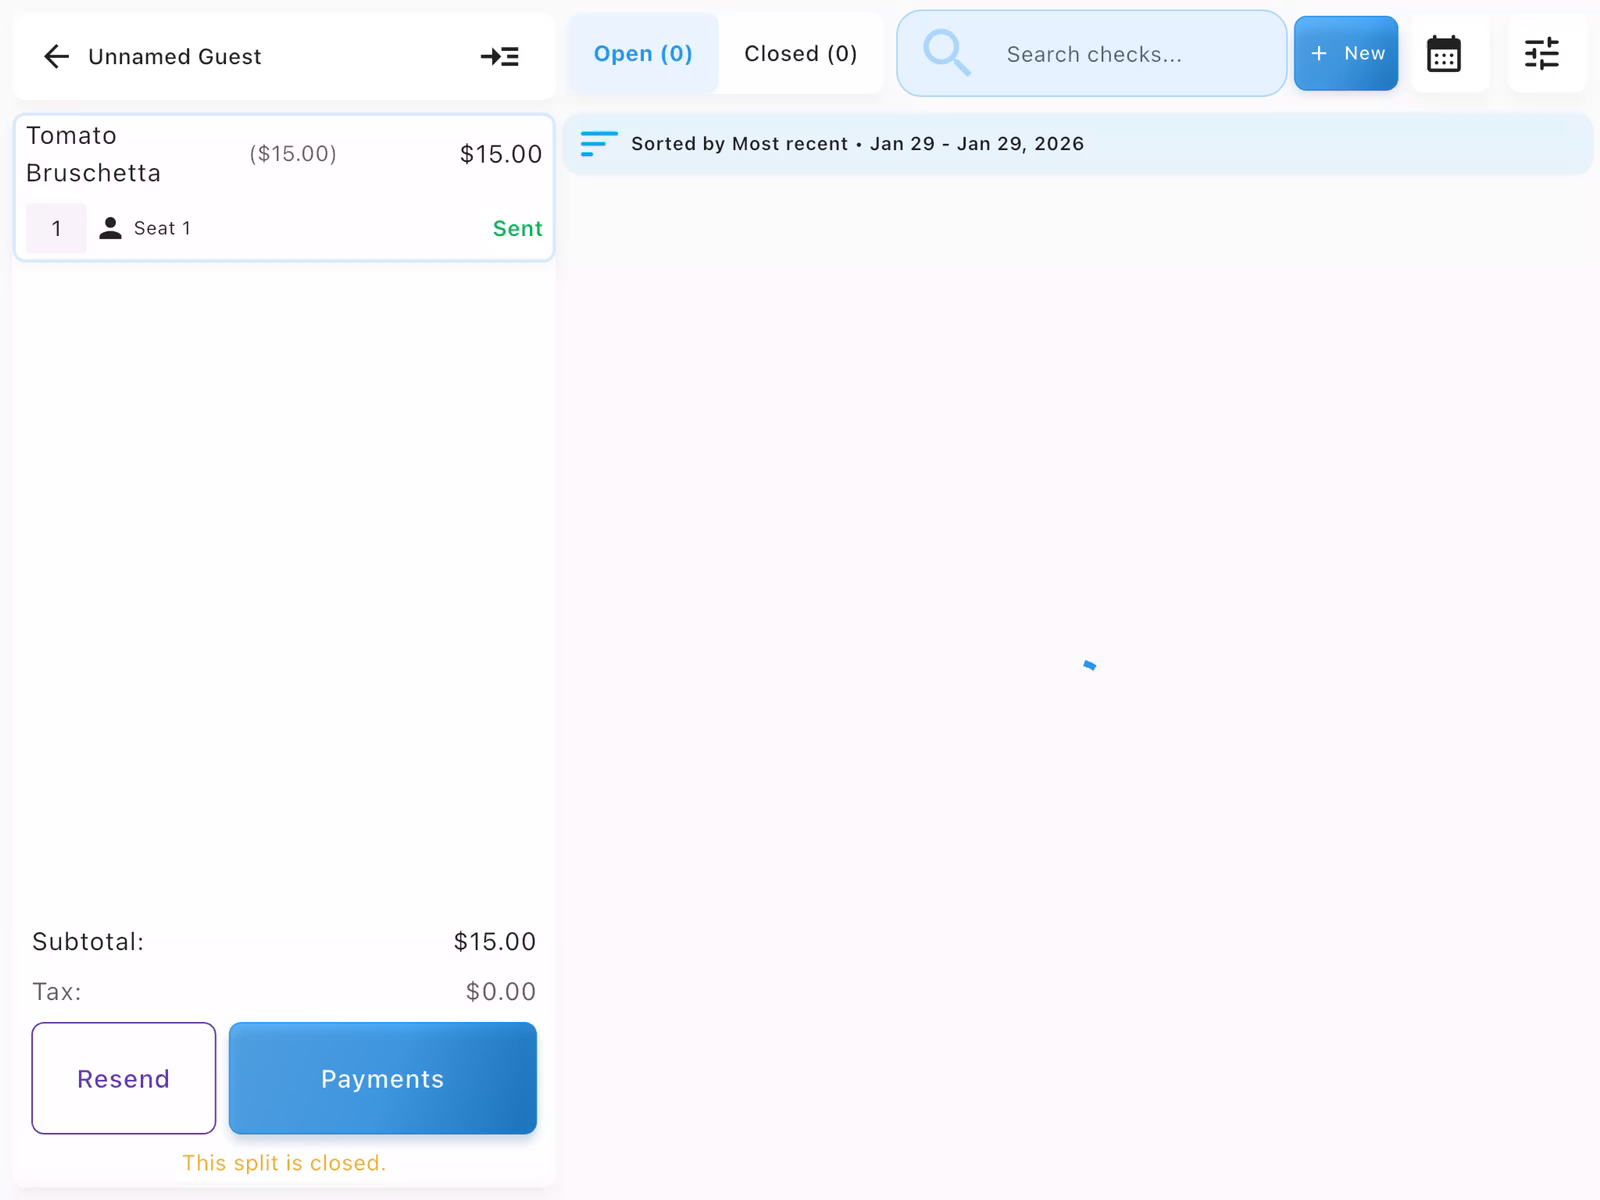
Confirm Check Closed
After payment is collected, the check shows "This split is closed" indicating completion. The check moves from "Open" to "Closed" in the checks list. You can still view closed checks for reference or reprint receipts.
- Navigate to Server from Home Dashboard
- Open or create a check from All Checks
- Tap Add items to browse the menu
- Tap Send to transmit orders to kitchen
- Tap Pay to collect payment and close the check
Contact us at support@chompypos.com.